

Prepare a humane harvest routine before fishing: confirm legal retention, learn the species-specific method, check the result and protect the cold chain.
- Confirm the species and legal retention before dispatch.
- Prepare a learned method, immediate follow-up and backup tools.
- Check the result, chill promptly and retain required identification.
Bottom line Use a method you have learned for the species, complete the killing follow-up and monitor the result before chilled storage.
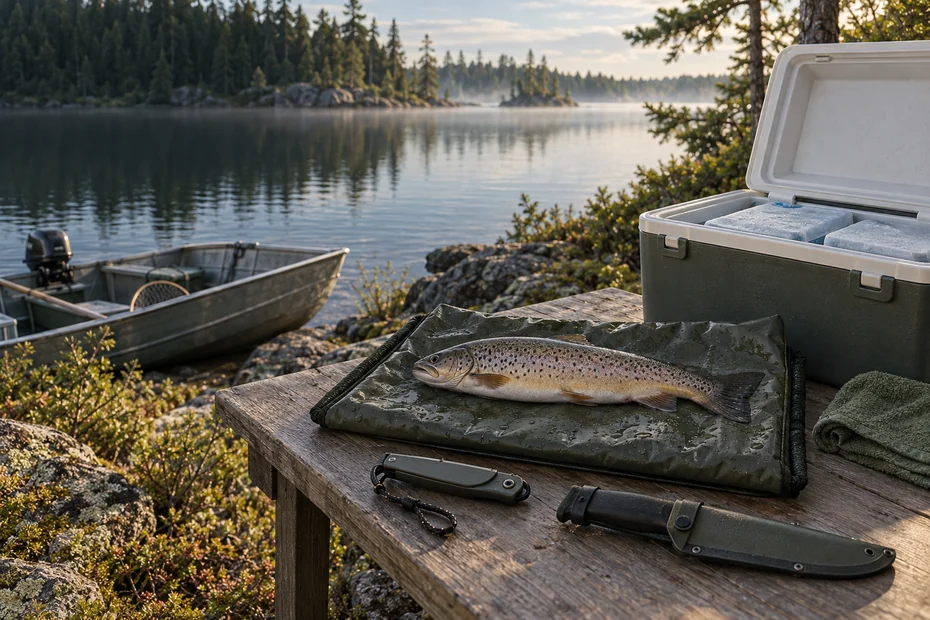
Before you keep a fish
Knowing how to humanely kill a fish starts with a decision you make before the catch: keep only a fish you may legally retain, use a method you have learned for that species, and have the follow-up equipment ready. For fish kept for food, effective stunning must be followed promptly by a killing method. Check the result, then chill the catch.
The RSPCA’s guidance for fish intended for eating describes percussion and brain spiking. Neither means leaving a fish to suffocate while you finish fishing. A sharp knife, a fish club or an ikejime spike is useful only when the person using it understands the method.
If you have never dispatched a fish, arrange a demonstration with a competent angler or instructor before your next harvest trip. Practise the layout, restraint position and hand placement without a live animal. Trying to work out the anatomy on a struggling catch gives you very little room to correct a mistake.
This guide is for legally retained finfish intended for food. It is not an aquarium euthanasia protocol, a method for protected fish, or a substitute for hands-on training. Follow species-specific instruction and the tool manufacturer’s directions.
Choose a method you can carry out correctly
Percussive stunning uses an accurate, sufficiently forceful blow to the appropriate head area with a suitable blunt tool. It aims to make the fish unconscious. A stun can be temporary, so arrange the killing follow-up before landing the fish. Do not pause to take photographs or open a tackle box between the two stages.
Brain spiking, often called ikejime, requires locating and reaching the brain, then destroying it. Species differ in head shape and brain position. A mark on a generic trout drawing cannot safely stand in for instruction on a northern pike, yellow perch, walleye or salmon. Learn the actual species you intend to keep.
The SPCA’s recreational-angling advice recommends experienced help for newcomers and an immediate killing follow-up after percussion, such as severing the gill arches or brain spiking. These are welfare recommendations from New Zealand, not a statement of Canadian law.
For a beginner, the choice should depend on competence and the fish’s size. Ask an instructor to show how they restrain that fish, judge the stun and complete the follow-up. A compact spike still requires accurate placement and control. Manual spiking can fail if the point slips, the fish moves or the operator is unsure of the target.
The term shinkei-jime is also used for passing a wire through the spinal canal after brain destruction. Do not treat this extra processing step as a shortcut to unconsciousness. A spinal wire kit adds equipment and species-specific skill; an angler does not need to buy one merely to establish a responsible basic harvest routine.
Choose one learned method and a backup that you can use promptly if the first attempt is ineffective. Keep both within reach. If a fish is too large for your equipment or secure handling position, that is a preparation problem to solve before fishing for a harvest, not a reason to improvise with a lightweight tool.
| Approach | What it requires | Critical limitation |
|---|---|---|
| Percussive stunning | Accurate target, suitable blunt tool, secure restraint | Follow immediately with a killing method; assess the stun |
| Brain spiking / ikejime | Species-specific target knowledge, suitable spike, secure restraint | A misplaced spike does not establish unconsciousness |
| Cold storage | Prepared ice or cold packs, suitable cooler, temperature monitoring | Use after dispatch; it is not the killing method |
Set up a stable handling station
A preparation station can be simple: a supported wet mat or other suitable surface, a dispatch tool, a sheathed sharp knife, long-nose pliers, a measuring board and a cooler with enough cold capacity for the planned catch. Keep sharp tools away from the landing net so a hook or mesh cannot catch them as you bring the fish aboard.
Think about the order in which your hands will move. The measuring board should be accessible before the harvest decision. The blunt tool should be close to the restraint position. The knife should remain sheathed until needed, with a clear cutting direction that keeps your supporting hand out of the blade’s path.
A rocking boat complicates this job. Prepare a low, stable work position and avoid balancing a fish on a narrow gunwale. Loose tackle, wet decks and an unprotected knife point create hazards for the angler and anyone nearby. Clear the working area before casting.
Secure tools where they will stay put during a sudden wake. For fish you will release, our fish-unhooking guide covers the separate handling task.
For a shore trip, inspect the bank before choosing the handling spot. A sloped rock that looks convenient may become slippery when wet. Pick a place where you can support the fish without carrying it unnecessarily far from the water. Keep the cooler shaded and within practical reach of the station.
Cold Canadian weather does not remove the need for planning. Gloves can reduce dexterity, melting snow can soak equipment, and a metal tool may be hard to grip. Check that you can take hold of the tool securely before the catch. Do not add unfamiliar coatings or lubricants to equipment that will contact food.
For children joining a family fishing day, decide who will manage each stage. An adult with the required skill should handle the dispatch and knife. Another person can move the rod, keep bystanders clear and open the cooler. Keep helpers outside the cutting area.
Confirm that the fish can be kept
Identify the species and measure it before making an irreversible harvest decision. A general species page cannot establish the current limit for a particular lake or river. Check the named water, management zone or region, date, size restrictions, catch and possession limits, and any local exception in the applicable official regulations.
Keep these details available offline when a trip takes you beyond mobile reception. Save the current regulation page and keep a clearly marked measuring board at the landing net. Our Canadian fishing regulations and licences guide explains where to begin the jurisdiction check.
Do not assume an injured fish is exempt from a release requirement. Ontario’s catch-and-release guidance explains that fish which cannot legally be kept must be released immediately. Contact the relevant fisheries authority if you need a specific rule clarified before a trip.
Also check whether the fish is suitable for your intended meal. A legal harvest limit and a fish-consumption advisory answer different questions. Size, species and the waterbody can matter for contamination advice. Ontario anglers can use the provincial Guide to Eating Ontario Fish; elsewhere, find the equivalent local health or fisheries guidance.
If you are unsure of the species, do not rush to dispatch it because it resembles a fish you normally keep. Arrange identification help before targeting an unfamiliar catch. For a planned release, keep handling brief and use the appropriate release procedure rather than moving the fish through a harvest station.
Handle, stun, complete the follow-up and check
Keep the fish supported and minimise time out of water as you move directly into the prepared procedure. Avoid holding it suspended by the tail or pressing it against a dry rough surface. Wet the handling surface before the catch arrives. Carry out the restraint technique you have been taught, with your hands clear of the intended tool path.
For percussion, apply the learned blow to the species-appropriate target with a tool suited to the fish. For brain spiking, use the learned entry position and direction for that species. Use the species-specific placement you were shown. A universal angle or distance behind the eye can put the tool in the wrong place.
Immediately assess whether the first stage was effective. A fish that continues purposeful movement, regular gill-cover movement or an eye-roll response needs prompt corrective action using the method you have learned. Do not proceed with cutting simply because the fish has stopped struggling or its fins have flared.
After an effective percussive stun, complete the learned killing follow-up without delay. Have the gill-cutting or spiking equipment ready beforehand. Bleeding an unstunned conscious fish is not an acceptable substitute for the stunning stage. Keep monitoring through the procedure instead of treating one brief change in appearance as a guarantee.
Give the person dispatching the fish enough space to concentrate. Ask companions to hold questions and photographs until the catch has been dispatched and chilled. A video demonstration can explain the stages before a trip, but looking for a video while the fish is on the mat is too late.
If a tool slips or the fish is not securely restrained, respond immediately with competent help and the prepared backup method. Afterwards, examine why the setup failed before keeping another fish. A slippery grip, an inaccessible knife or an unsuitable work surface needs correction; buying a more elaborate kit will not fix a poor sequence.
Assess the result without relying on one sign
SPCA guidance uses several observations when assessing consciousness, including the eye-roll response, gill-cover movement and behaviour. In the eye-roll check, a conscious fish may move its eyes to maintain orientation as the body is gently rolled. Ask your instructor to demonstrate this assessment on the species you will handle.
Loss of movement alone is an unreliable shortcut. A fish can appear still under circumstances that do not establish a humane death. Likewise, an isolated twitch should not be interpreted through an invented rule that every twitch proves a missed brain. Look for the relevant combination of signs, and seek instruction on how to distinguish purposeful responses from other movement.
Continue observing after the procedure. If you see signs consistent with consciousness, take immediate corrective action with the competent method and backup you prepared. Do not set a doubtful fish aside in the cooler while you discuss what happened. The person responsible for dispatch should remain responsible until the result is assessed.
For a first harvest lesson, ask the instructor to explain their checks out loud. What do they observe immediately after the stun? What follow-up do they perform? What would make them repeat the stun? This makes the lesson useful beyond watching someone perform a fast movement with a tool.
Be cautious about online clips edited into a few dramatic seconds. They may omit restraint, checks or a follow-up. Choose a demonstration that names the species and shows restraint, dispatch and the checks afterwards. An impressive close-up of a spike entering a fish does not establish that the whole process was carried out well.
Chill the catch and protect the cold chain
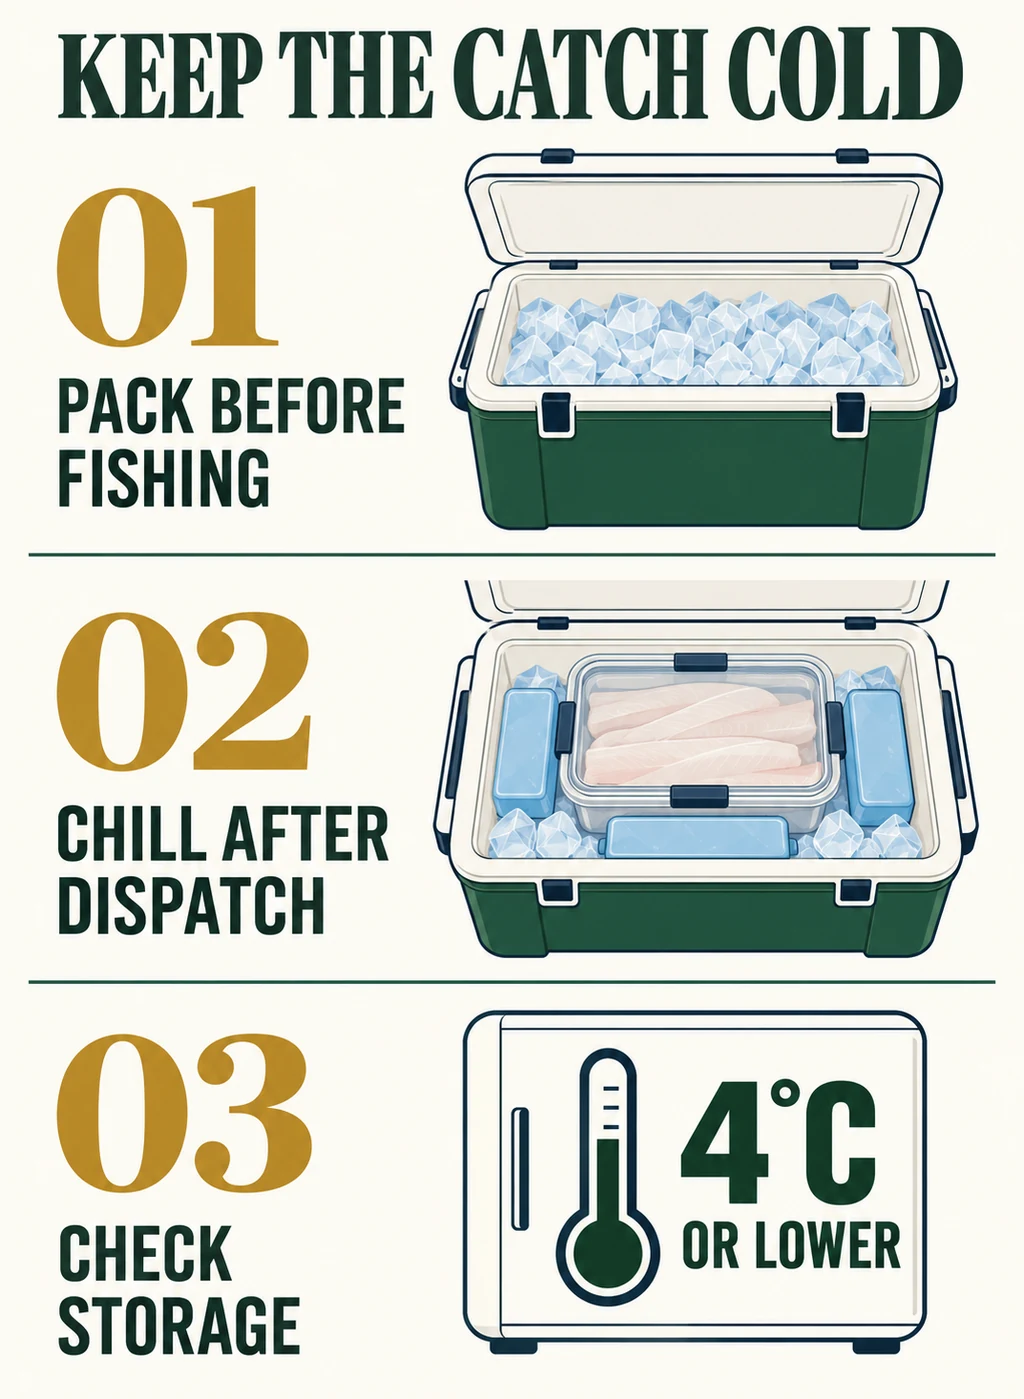
Once the fish has been dispatched, move it into the prepared chilled storage promptly. Ice is for caring for the dead catch; placing a live fish in an ice bath is not a humane substitute for the dispatch method. Do not leave the fish in sunshine while you keep casting or use a warm livewell as a storage container.
Health Canada’s food-safety advice sets refrigerated storage at 4°C or lower and frozen storage at −18°C or lower. Keep raw fish separate from ready-to-eat food. Clean the surfaces and utensils that touch it, and wash your hands before handling other food.
Pack the cooler to suit the actual return journey. A short shore session near home and an all-day boat trip with a long drive have different demands. Include the journey from ramp to vehicle, stops for fuel, and the time before the catch reaches a refrigerator. Our fishing-cooler guide explains storage choices and boat fit. Check that the closed cooler is actually maintaining cold conditions.
Use an appropriate thermometer to check storage conditions. A refrigerator thermometer measures the environment; it does not instantly measure the centre of a thick fish. Read the tool’s instructions and allow it to stabilise. Keep the probe or dial where it is intended to operate, rather than immersing an appliance thermometer in water.
Consider keeping lunch and the catch in separate containers. Repeatedly opening the fish cooler to retrieve drinks makes temperature management harder, and raw fish juices should not contact sandwiches or other ready-to-eat items. Food-safe sealed packaging can help with separation, but packaging cannot compensate for inadequate chilling.
At home, make refrigerator space before unloading the cooler. Set the catch down in its designated container and clean the work area afterwards. If you will not cook it soon, arrange suitable freezing and label the package. Do not assume that vacuum sealing makes fish shelf-stable or removes the need for cold storage.
Some anglers choose ikejime for eating quality, but flavour and texture also depend on the species, handling, chilling and preparation. Avoid promising restaurant-quality fish from a single tool. A careful cold chain is part of the job regardless of the dispatch method you learned.
Keep the catch identifiable during transport
Check the rules before cleaning or packaging the fish. Once dispatch and the transport checks are complete, use our fish-cleaning and gutting guide for the preparation stage. Ontario’s sport-fish transport guidance says transported sport fish must be dead for overland travel, and catch must remain identifiable and countable. It recommends keeping a substantial skin patch on fillets, with additional identifying features required for some species.
Length restrictions and exceptions can affect when a fish must remain measurable. Read the applicable rule for your situation rather than assuming that every fish may be filleted at the ramp. Rules in another province may differ, and a lodge’s preferred packaging method does not replace the regulation.
Keep each fish’s portions together and recognisable when packaging allows it. Avoid an unlabelled frozen block of mixed fillets that makes inspection difficult. Your fishing licence and catch records should be accessible, and a conservation officer should be able to inspect the fish without you emptying the whole vehicle onto the road.
For a multi-day trip, include fish already stored at camp when you check your possession allowance. Discuss the harvest plan with companions before fishing again. The count on a boat for one afternoon is not necessarily the same as the catch in your possession across a longer trip.
On a guided outing, ask before booking how the operator handles dispatch, chilling, fish identification and the trip home. A useful answer describes the actual process and your responsibilities. If you will travel by air, also check the carrier’s packaging requirements and any destination restrictions before deciding how much fish to retain.
Two tools with different jobs
As an Amazon Associate, CanadaFever earns from qualifying purchases. Product links use Amazon.com; country routing and local availability may vary.
Use equipment you already own when it suits the learned method. A club belongs in the dispatch station; a food probe belongs in meal preparation. Health Canada recommends a minimum internal temperature of 70°C (158°F) for fish, measured in the thickest part. Clean the probe between uses.

Eagle Claw Fish Billy Club
- A blunt-tool option for the percussive method you have learned.
- Match the tool and restraint to the fish; no tool guarantees an effective stun.
- Prepare a separate immediate killing follow-up before use.

TempPro TempSwift / TP19H food thermometer
- An instant-read food probe for checking a cooked fish meal.
- Use a separate suitable instrument to monitor cooler or refrigerator conditions.
- Check the current listing branding and included items before ordering.
Avoid the shortcuts that create problems
Leaving a fish on a stringer or in a bucket until the end of the day does not solve the dispatch decision. Plan the method before keeping the first fish. If your intention is to retain a catch for food, prepare the handling station and cold storage as carefully as the rod and tackle.
Do not use a tiny pocket tool simply because it is convenient to carry. Match the equipment to the fish and the trained technique. For a larger fish, restraint and sufficient tool control become especially important. The same kit should not be assumed suitable for every fish from a small perch to a large salmon.
Keep blades maintained and protected. A dull blade can require extra pressure, while an exposed sharp blade can injure someone reaching into a bag. Clean and dry the tools after the trip, inspect handles and grips, and replace damaged equipment before the next harvest outing.
Do not let a product claim decide whether the procedure worked. Words such as humane, instant or professional on a sales page describe the seller’s positioning. Your assessment still depends on a correctly applied method and the fish’s observed response. A purpose-made tool does not guarantee correct placement.
If you are not ready to keep fish, arrange a lesson first. Learn with someone competent, assemble the station and practise the equipment layout first. On that day’s trip, choose an appropriate lawful release plan. Harvesting a fish should be a prepared choice, not an obligation created by catching it.
Before the next harvest trip
Lay out the equipment at home in the same order you expect to use it outside. Confirm that the measuring board, dispatch tool, follow-up tool and cooler can each be reached without shifting the others. Replace missing covers or loose grips now. Put pliers where you can find them without reaching past a blade.
Explain the plan to whoever will fish with you. Agree who handles the fish, who moves loose rods, and who keeps children or other companions outside the work area. Review the species and the expected size class, then check that the instructor’s method matches the fish you intend to retain.
Save the current rules and consumption advice for the actual waterbody. Prepare enough chilled storage for a modest catch, and decide when the fishing session will end if the cooler cannot maintain suitable conditions. Set a modest harvest plan that fits the chilled storage you can carry.
| Check | What to arrange | When |
|---|---|---|
| Rules and identification | Named-water rules, species ID, measuring board | Before the trip; confirm before retaining |
| Method and follow-up | Species-specific lesson, suited tools, backup | Before keeping a fish |
| Cold chain | Chilled capacity for fishing and the return journey | Before departure; monitor during storage |
| Packaging | Current identification and transport requirements | Before cutting or filleting |
Questions about humane fish dispatch
Is bleeding a fish enough to kill it humanely?
Bleeding should follow an effective stun or appropriate brain-spiking procedure. Cutting the gills of a conscious fish skips the unconsciousness stage. Learn the full method, prepare the follow-up equipment beforehand and check the result throughout.
Can I use ice to kill the fish?
Do not put a live fish into ice or freezing water as your dispatch method. Chill the catch after effective dispatch. A cold, motionless fish is not proof that a humane death has occurred.
Where exactly should an ikejime spike go?
The target and entry direction depend on the species. Get species-specific instruction from a competent demonstrator. This guide provides no generic distance behind the eye, because a position suitable for one fish can be wrong for another.
Does ikejime make fish safe to eat raw?
No. A dispatch technique does not establish that fish is suitable for raw consumption. Handling, contamination, parasites and preparation requirements are separate food-safety questions. Follow the appropriate public-health guidance for the fish and intended meal.
Do I have to keep a badly injured fish?
Injury does not automatically override a release requirement. Identify the species, check the current rules for the waterbody and follow the official guidance. Ask the fisheries authority about any uncertainty before your trip rather than assuming an exemption.