

Plan a short guided ice-fishing lesson with suitable clothing, accessible emergency equipment and one simple presentation.
- Book instruction, not only a hut.
- Ask about current access and warm breaks.
- Learn one rod before buying a full kit.
Bottom line Choose a guided daytime lesson and agree on access, equipment and a return plan before leaving shore.
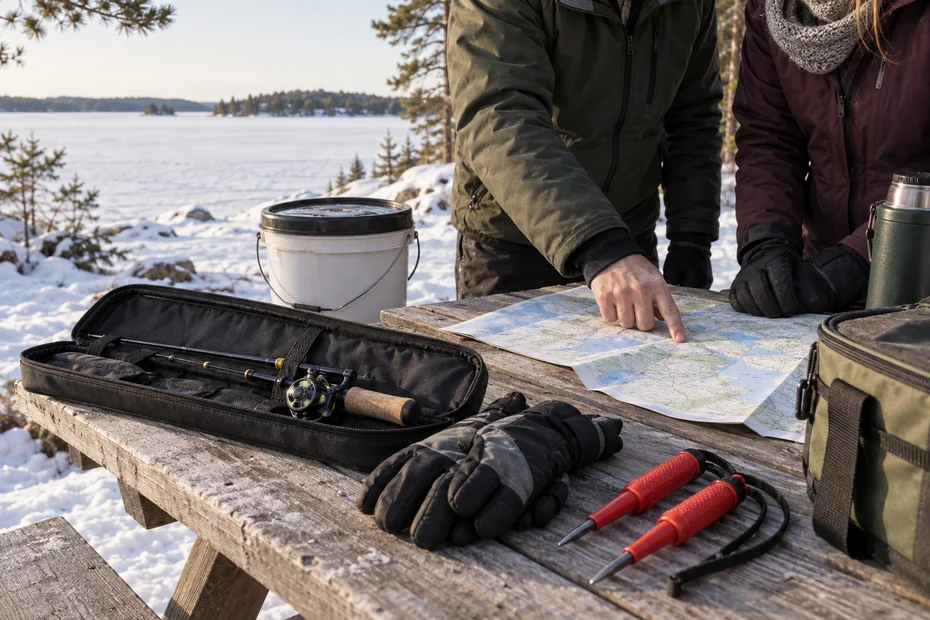
Beginner ice fishing is easier to learn when a local guide handles the route, current ice assessment and equipment while you concentrate on one rod. For a first Canadian outing, book a short daytime session close to shore, ask what is included and keep a warm place within reach.
You do not need to buy an auger, shelter and fish finder before trying it. A borrowed outfit and a lesson can tell you whether you enjoy sitting over a hole, watching a small bite and working in winter clothing.
Plan the first outing
- Choose a local operator who explains access, changing conditions and cancellation decisions.
- Ask for one simple rod setup, a species identification lesson and help releasing fish.
- Bring suitable layers, accessible emergency equipment and a firm return time.
This guide covers the first lesson and the decisions around it. Our ice fishing in Canada guide covers the broader destination choice. A frozen-looking lake does not establish a usable route, and a busy hut area does not establish that your route to it has been assessed.
Book instruction before buying equipment
Look for a guided beginner session, not simply a hut rental with keys collected at a gas station. Ask who meets you, who accompanies the trip to the fishing area and who explains the tackle. A heated hut can be comfortable without providing any instruction.
Give the operator your group’s ages, winter experience and mobility requirements. Explain if anyone struggles to walk on slippery surfaces, needs frequent warm breaks or has never handled a fish. Those details influence the distance, seating and length of the session.
Ask before booking
- Ask what happens if the conditions change on the morning of the booking.
- Get the cancellation policy in writing, including weather cancellations, unsafe access, refunds and rescheduling.
- Do not let a non-refundable hotel booking pressure you into an outing the operator has cancelled.
- Request a clear equipment list.
- Rods, tackle and drilled holes may be included while flotation clothing, ice picks, footwear, licences and food are not.
- Ask whether the guide will fit borrowed equipment to each person and demonstrate its use before departure.
Leave time during the lesson to ask questions. You should be able to ask why that spot was chosen, where the lure is fishing and what a bite looks like. If the promised experience focuses only on a trophy photograph, find a lesson with a clearer teaching plan.
Beginner ice fishing questions to ask the operator
Ask how the current access route is checked and what hazards the route avoids. Ask who decides to end the outing, how you contact that person and where you go if someone becomes cold or unwell. Ask whether communications work at the fishing site.
Also ask which species you are likely to fish for legally during the booked period. Perch, crappie, walleye and trout require different presentations and rules. The answer should identify the water and the current season, not promise that every Canadian winter species is available.
Check parking, meeting location and any walking distance before paying. A listing can call itself accessible because a vehicle reaches the hut, yet still involve slippery steps or a difficult shoreline. Describe the help you need instead of relying on a broad accessibility label.
Ice assessment is a local decision
Ask an experienced local operator to explain the route assessment for your outing. Changing water levels, moving water, cracks and snow cover deserve attention. A photograph or last week’s social post cannot confirm today’s access conditions.
The Canadian Red Cross also warns that ice thickness varies. Published minimums apply within their stated activity and ice-quality assumptions. Treat them as background guidance for a trained assessment, rather than permission to cross a lake after measuring one convenient spot.
For your first outing, leave vehicle access decisions to a competent local operator. A walking plan and a driving plan have different loads and consequences. Tracks in the snow do not identify the vehicle weight, timing or assessment behind somebody else’s crossing.
Stay on the agreed route and keep the guide informed if you want to move. Do not cut a shortcut around huts or follow another group toward a distant bay. If the route changes, stop and let the person responsible for it explain the change.
You can decline an outing even if other people continue. If the operator cannot answer your route questions or your group feels pressured to proceed, return to a warm place on land. Ask the operator about the next available lesson date.
| Ask about | Useful answer | Reconsider when |
|---|---|---|
| Instruction | Named instructor explains the route, tackle and fish handling. | Booking provides a hut but no beginner lesson. |
| Access | Current route assessment, meeting point and cancellation plan. | Old photos or somebody else’s tracks are the only evidence. |
| Equipment | Clear list of supplied gear and required clothing. | Essential fit and emergency equipment are left vague. |
| Leaving | Warm breaks, return time and communication plan. | The group cannot explain how someone leaves early. |
Dress for sitting still
Walking from the car warms you up. Sitting beside a hole is different. Build your clothing around the stationary part of the session, with enough room to move your arms and handle the rod without opening every layer.
Build your layers
- Wear a moisture-managing base layer, an insulating middle layer and an outer layer that blocks wind.
- Adjust layers before you become sweaty during the walk.
- Damp clothing makes the quiet fishing period harder to manage once you stop moving.
Try your socks and insulated boots together at home. Extra socks that make a boot tight can reduce comfort instead of adding useful insulation. Leave enough room to move your toes, and ask the guide about traction appropriate to the walking surface.
Keep hands warm
- Bring spare gloves in a dry bag.
- A thin pair can help with tackle, but keep warm mittens available between adjustments.
- Ask the guide to handle fiddly knots if removing your gloves would leave your hands cold for too long.
Use a seat or insulating pad supplied for the outing. Sitting directly on snow or ice makes staying comfortable harder. Keep food, a warm drink and spare clothing where you can reach them without unpacking the whole sled.
The CCOHS cold-environment guidance explains why wind, wet clothing and exposure duration need attention. Agree on warm-up breaks before you leave. Numb hands, persistent shivering or difficulty using simple equipment are reasons to tell the guide and stop fishing.
If someone seems confused, unusually drowsy or unable to coordinate ordinary movements, treat the change seriously and activate the emergency plan. Call local emergency services when needed. This page is general preparation guidance; practise cold-water and ice emergency procedures with qualified instruction.
Keep emergency equipment accessible
Ask how the flotation equipment fits over your winter layers and follow the manufacturer’s instructions. Some winter fishing suits provide warmth without being certified personal flotation devices. Check the actual equipment classification rather than assuming that a thick suit floats you.
Ice picks need to be available when needed, not buried under tackle in a sled. Have the guide show you how the chosen model is worn and how its guards work. Practise handling them in a controlled lesson, without entering water or testing questionable ice.
Carry a whistle and a protected phone, and know whether the phone has coverage. Keep batteries warm where practical. For a remote site, ask about the operator’s backup communication and evacuation arrangements before you book.
Leave the meeting location, planned fishing area and return time with somebody on land. Tell that person what to do if you miss the agreed check-in. Give them the operator’s contact details and a location they can describe to responders.
If another person breaks through, call for help and follow the emergency plan. Running onto the damaged area can put additional people in the water. Reach-and-throw rescue methods need instruction and equipment; this article does not replace a rescue course.
Emergency tools reduce some practical difficulties, but their performance depends on fit, condition, training and the situation. Carrying picks or a rope does not make an unassessed route acceptable. Follow current official advice and the operator’s instructions.
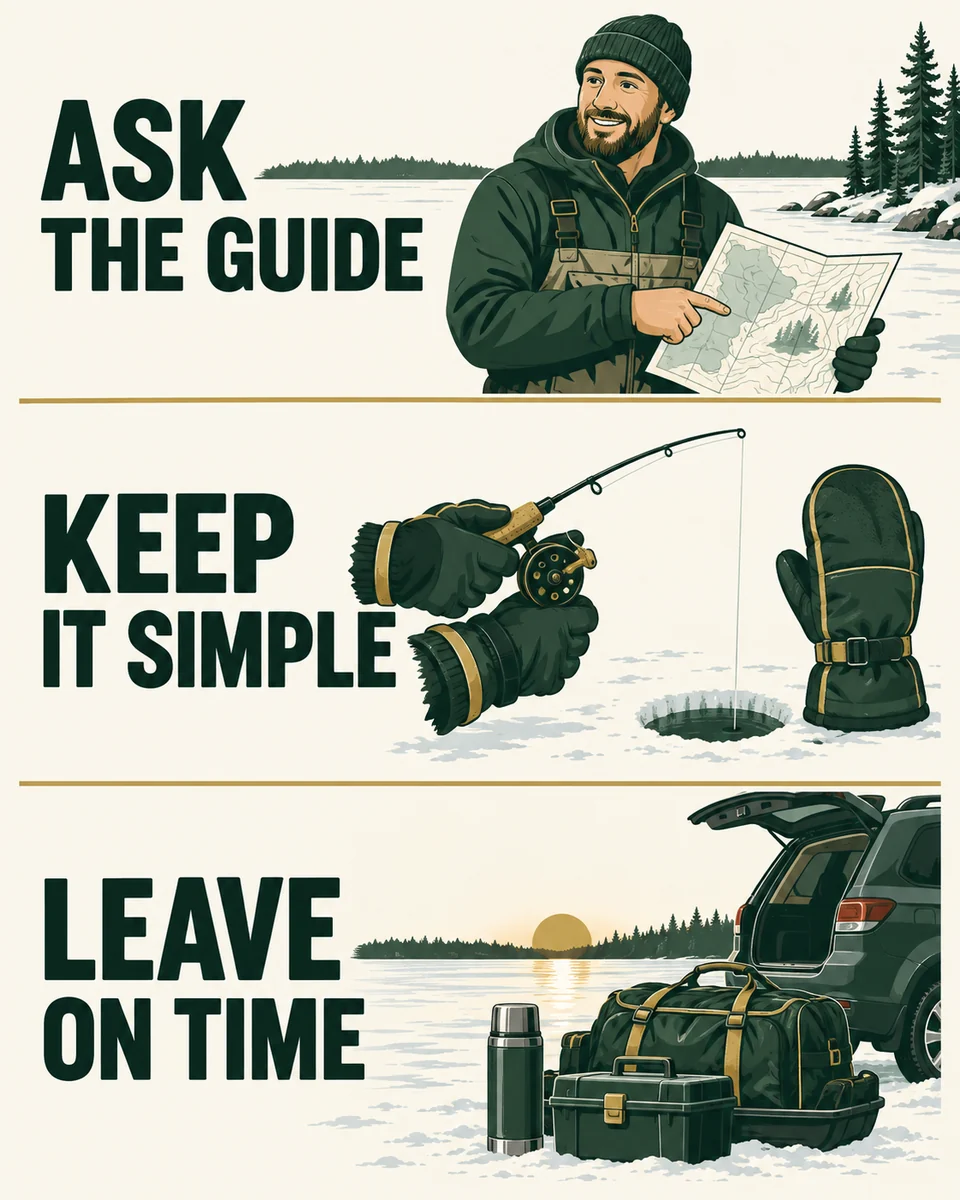
Use one rod and one presentation
Start with a short ice rod suited to the target and the lure. For modest perch or crappie presentations, a light outfit can make a small bite easier to see. Walleye lures or heavier fish may call for a different rod, line and hook arrangement.
Ask the guide to explain the rod’s tip movement before you lower the lure. You need to distinguish the lure’s weight from a fish pulling, lifting or briefly holding it. Watching one working rod is easier than dividing your attention among several unfamiliar systems.
Keep the reel’s drag working and ask for a demonstration. It should release line under a firm pull before you overload the outfit. Test it with the hook controlled safely, away from faces and exposed skin.
A small jig is a weighted hook. A jigging spoon is a metal lure that moves as you lift and lower it. A float shows changes at the surface, while a spring bobber shows changes at the rod tip. Learn the signal on the setup you actually have.
Use the guide’s choice of bait only where it is permitted. Live bait, preserved bait and scented soft plastics can fall under different local restrictions. Keep bait in its proper container and ask how unused bait must be handled at the end of the trip.
Leave a fish finder optional for the first session. It can show depth and returns within its beam, but learning the rod and presentation still takes practice. If the guide uses one, ask them to identify your lure signal and explain what the screen cannot confirm.
Do not buy several rod lengths on the assumption that longer always means better. Shelter space, lure weight, presentation and how you hold the rod affect the choice. Borrow the first outfit, then write down the actual model and job if you enjoyed using it.
Let the guide prepare the fishing area
An auger cuts the hole; a scoop removes loose ice. Ask the guide to explain where you should stand while the hole is being drilled. Keep your hands, loose clothing, line and bags away from the cutting equipment.
Do not buy a powered auger for a first lesson. Apart from cost and transport, you need to learn the controls, blade protection and operating procedure. Sharing an experienced operator’s equipment lets you focus on fishing while observing the setup process.
Keep holes, anchors and line paths visible. Place tackle on a stable surface instead of spreading hooks across the floor. A closed tackle box is easier to manage when someone enters the shelter with a bulky jacket or moves a chair.
Ask how the site will be left after fishing. Pack out line, bait containers, food packaging and damaged tackle. Do not use a hole as a rubbish bin, and do not scatter unwanted bait around the fishing area.
Have the guide explain any local expectations for marking a hole or removing temporary shelter anchors. Follow the applicable rules for the water and equipment. Another hut nearby may have a different owner, registration or removal responsibility.
Learn the lure depth before the jigging rhythm
Choose the depth
Ask where the target fish are expected in the water column. A lesson for perch near bottom can start differently from one for suspended crappie. Set the initial depth under instruction, then learn how to return to it after a bite or bait change.
Lower under control
Lower the lure under control. If the guide wants bottom contact, let the lure touch gently and recover enough line to put it at the agreed height. Avoid repeatedly dropping the lure hard into sediment, where the hook can collect debris.
Lift, pause and watch
Try a small lift, controlled drop and pause. Watch the tip during the pause as well as during movement. A bite can change the load without producing a dramatic downward pull. Ask the guide to demonstrate a normal lure movement alongside a suspected bite.
When a fish approaches but does not bite, change one thing at a time. Lengthen the pause, reduce the lift or move the lure a little within the agreed depth. Changing colour, depth and action together makes it difficult to learn which adjustment helped.
On a sonar-equipped lesson, watch how the lure reacts to your hand movement. A return near your lure is a reason to pay attention, not proof of a fish species or an imminent bite. Our fish finder guide explains those display limits.
If you keep snagging bottom, ask about the lure height and whether the location has weeds or structure. Raising the lure can solve a presentation problem without changing the whole rig. If the lure spins or tangles, let the guide inspect it before dropping it again.
Give yourself time to observe. Even without a catch, practise setting the lure depth and recognising changes at the rod tip. Use the session to work on tackle handling too. Keep notes on what you changed, especially if you plan to rent the same outfit for another session.
| What you notice | Ask the guide to check | Try after instruction |
|---|---|---|
| Lure keeps touching bottom | Depth setting and debris on the hook. | Raise it slightly to the agreed fishing height. |
| Tip moves without a clear bite | Normal lure movement, slack and wind. | Pause and watch the change in load. |
| Fish return approaches on sonar | Whether the mark and lure are within the beam. | Change one presentation variable at a time. |
| Hands become cold | Glove condition, clothing and warm-break plan. | Stop fishing and warm up; do not wait for a catch. |
Bring the fish through the hole calmly
When the guide identifies a bite, use the hook-setting movement appropriate to that rig. A light jig can need much less movement than a beginner expects. Avoid swinging the rod overhead or pulling as hard as possible.
Keep steady pressure while the fish is below the hole. Let the drag release line when necessary, and keep the rod within its working bend. Do not lift a fish by winding it into the rod tip or raising it on a tightly bent rod.
The hole edge can rub the line. Keep the line controlled, and ask the guide to help bring the fish into position. If a larger fish will not enter easily, allow the guide to manage the landing instead of trying to force it through.
Prepare release tools before fishing. Wet hands, suitable pliers and quick identification make the landing easier to handle. Avoid placing a fish on ice or snow for a photograph, and minimise exposure to cold air.
Ask the guide how to identify the species and assess a fish that must be released. Photograph only when it can be done briefly and without delaying the release. The rules for a closed species or protected size still apply when the fish bites accidentally.
If you intend to retain fish, discuss that before the outing. Legal retention, suitable dispatch, cold storage and transport identification require preparation. Our responsible fish-harvest guide explains why the sequence needs to be learned before keeping a catch.
Check the water’s rules before the booking
Use the province’s or territory’s current fishing regulations, then check the exact water and species. Ontario’s ice-fishing guidance explains that the normal species seasons apply; ice cover does not create an additional open season.
Ask what licence you need for your age and residency, and purchase it through the official service when required. Do not rely on the rental fee to include a licence unless the operator clearly says so and the arrangement complies with local rules.
Check permitted lines, hooks and bait for that water. Although multiple lines are allowed in some ice fisheries, a beginner can learn with one. A tip-up is still fishing equipment subject to the local rules and observation requirements.
For a rental hut, ask who handles any registration and removal obligations. Confirm the current requirements with the applicable zone rules. Provincial overview pages and annual summaries can use different date wording, so have the operator resolve that detail for the actual booking.
National parks can have their own permits and tackle restrictions. For example, a provincial licence and tackle sold locally do not automatically meet a park’s rules. Use our Canadian fishing regulation guide to find the right authority before narrowing the purchase list.
Take a saved copy of the relevant rule page and your licence details. Keep the documents accessible with your catch, if any. A weak phone signal should not prevent you from checking a rule you already knew you would need.
Ask about shelter heating and warm breaks
A shelter reduces wind exposure, but any fuel-burning heater needs its own operating precautions. Ask what heater is used, which instructions apply and who monitors it. Check that the heater is suitable for the shelter even when the interior feels comfortable.
Ontario’s carbon monoxide guidance identifies portable fuel-burning heaters among possible carbon monoxide sources. Follow the heater’s specified ventilation and clearance instructions. Never use a barbecue as an improvised indoor heater.
For a first outing, choose a session short enough that you do not need overnight heating arrangements. A nearby warm building or vehicle on land makes breaks easier to plan. Tell the guide if you are getting cold rather than waiting for everybody else to finish.
Keep children within the adult supervision plan. A child absorbed in a float may not notice cold hands or wet clothing. Arrange predictable check-ins and make leaving early an ordinary option, especially when the group includes first-time winter visitors.
Two small tools to discuss with your guide
As an Amazon Associate, CanadaFever earns from qualifying purchases. Links use Amazon.com; country routing and local availability may vary.
Borrow suitable equipment when your operator supplies it. Ice picks are an emergency tool that requires instruction; a line cutter helps with tackle changes. Neither replaces the route assessment, flotation equipment or emergency plan.

Frabill retractable ice picks, model 6579
- Designed to be worn with the handles accessible at your sleeves.
- Retractable guards cover the pick tips; practise the model with your guide.
- Picks only: this selected listing is not the broader ice-safety kit.
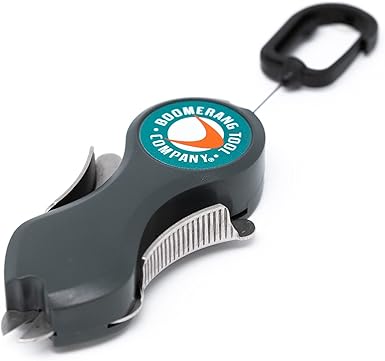
Boomerang Original SNIP, grey
- A compact cutter for line changes and trimmed knot tags.
- Original grey model with retractable tether.
- A tackle tool, not a rescue rope or ice-safety device.
Decide what to buy after the lesson
Write down the rod power, line and lure that you used successfully. Note the seating arrangement and how much equipment the operator supplied. You may discover that renting the bulky items is more practical than storing them for one or two annual trips.
Prioritise clothing fit and a repeat lesson before electronics. If you could not feel your fingers or manage the line comfortably, a better screen will not solve that problem. Ask the instructor which single equipment change would address the difficulty you actually had.
If you want to fish independently later, arrange instruction in route assessment, emergency planning and equipment operation first. The progression includes responsibilities that were handled for you during the guided outing. You will need local judgement as well as tackle. Plan who will assess the route and make access decisions on your next outing.
For a summer alternative while you practise knots and tackle handling, our beginner fishing gear guide builds a coherent shore-fishing kit. The longer shore rod and ice outfit have different jobs, so borrow where possible before buying both.
Frequently asked questions
Do I need an auger for my first ice-fishing trip?
A guided rental lesson can supply drilled holes and an operator who handles the auger. Confirm the equipment list before booking. Buy an auger only after learning its operation and deciding that independent outings fit your plans.
What ice thickness makes a lake safe?
No single measurement certifies a lake or route. Ice quality, current, weather and loading affect the assessment. Follow current official guidance and a competent local assessment; published minimums do not turn an unassessed crossing into a safe trip.
Can I use my summer fishing rod through the ice?
A longer rod may work in open space for some methods, but can be awkward inside a shelter. Borrow a short outfit matched to the target during the first lesson, then decide whether a separate purchase is useful.
Is a fishing licence included with a hut rental?
Do not assume so. Ask the operator and check the official age, residency and water rules. A rental payment does not itself authorise fishing, and ice cover does not open a closed species season.
What should I do if I am too cold to continue?
Tell the guide immediately and use the agreed warm-break or return plan. Persistent shivering, numb hands or difficulty with simple movements deserve attention. If a person becomes confused or unusually drowsy, activate the emergency plan and obtain help.
Sources and preparation notes
Official safety and rule pages checked on 3 October 2026. Ice access remains a current local assessment. Equipment examples are choices for stated jobs, not tested safety guarantees or a list of everything a first outing requires.