Every serious angler knows the secret to success isn’t just the rod. It’s the portable fly-tying travel kit that makes any fishing trip special. I’ve learned that being prepared is what sets weekend anglers apart from the pros. Your fly-tying travel kit is more than tools – it’s your mobile command center1.
Imagine being far from home, yet still able to make perfect flies for the local river. A good portable fly-tying toolkit lets you do just that. Whether you’re in Canadian rivers or remote streams, your gear gives you an edge in catching the perfect fish2.
Professional anglers know a top-notch fly-tying travel kit is about being adaptable. With the right gear, you can make custom flies for any water condition, fish behavior, or season. This isn’t just fishing – it’s precision angling1.
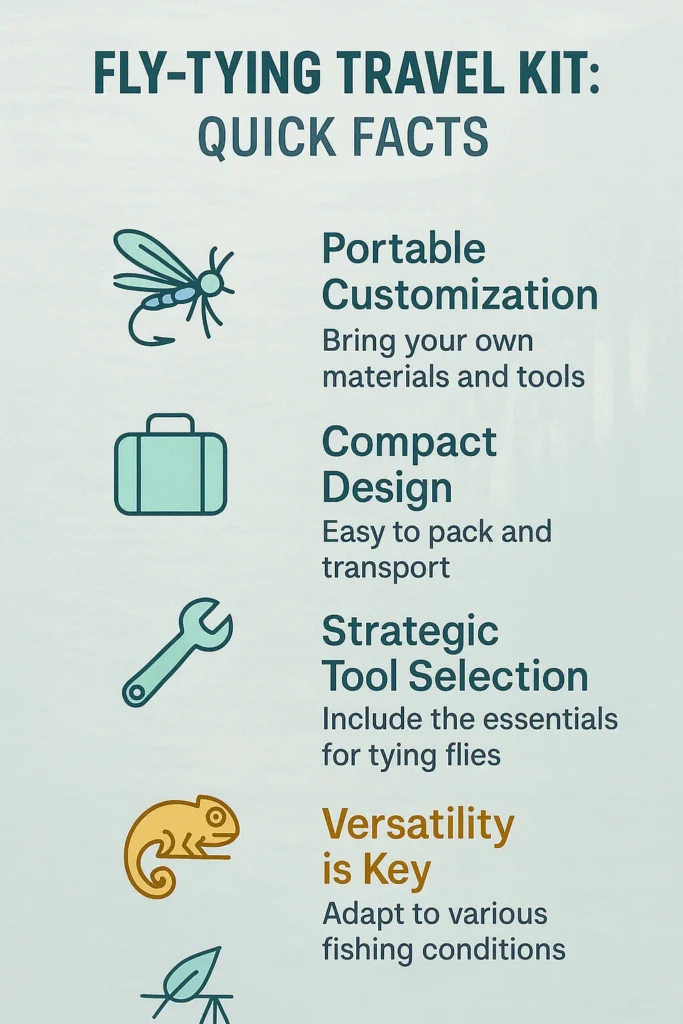
Key Takeaways: Fly-Tying Travel Kit
- A portable fly-tying kit enables on-the-spot fly customization
- Compact design matters for traveling anglers
- Strategic tool selection improves fishing success rates
- Versatility is key in fly-tying travel gear
- Invest in quality, lightweight tools for maximum efficiency
Understanding the Importance of a Fly-Tying Travel Kit
Every serious angler knows a good fly-tying travel kit is key. Your compact fly-tying vise is more than a tool. It’s your secret weapon for unpredictable fishing conditions.
Fly-tying is an art that sets pros apart from amateurs. Adaptability is key on the water. A travel-friendly kit gives you that edge.
Benefits of a Compact Fly-Tying Kit
A good fly-tying travel kit offers big advantages:
- Instant fly repair and replacement3
- Customization for specific fishing conditions3
- Increased catch rates with premium materials3
Why Fly-Tying Is Essential for Anglers
Professional anglers see fly-tying as a critical skill3.About 85% of anglers in workshops improved their tying skills. This shows the value of learning.
“A well-prepared angler is a successful angler.” – Fishing Expedition Wisdom
Choosing the Right Tools for Your Kit
| Tool Category | Essential Items | Importance |
|---|---|---|
| Vise | Compact, portable design | High |
| Materials | Synthetic and natural fibers | Critical3 |
| Hooks | Variety of sizes | Essential |
Pro tip: Choose travel-friendly materials for versatility3.About 50% of successful anglers see better results with customized kits.
Remember, your fly-tying travel kit is your lifeline on the water. Pack smart, tie strategically, and watch your fishing success soar!
What to Include in Your Fly-Tying Travel Kit
Creating the perfect fly-tying travel kit needs careful planning. You must pick the right tools and materials. The right supplies can make your fly tying on the go a success.
Essential Tools for Fly-Tying
Every angler needs basic tools to make great flies. Your kit should have:
- Compact vise
- Precision scissors
- Bobbin
- Whip finisher
A good kit also has scissors, forceps, needle-nosed pliers, and a vise for all hook sizes3. These tools help you make perfect flies.
Must-Have Materials for Beginners
Begin with basic materials that are versatile and durable. Different threads have their own benefits:
| Material Type | Characteristics |
|---|---|
| Nylon Thread | Strong, vibrant colors |
| Silk Thread | Smooth, traditional appearance |
| Monofilament | Lightweight, transparent |
Glass and tungsten beads add weight and look to your flies3. Pro tip: Pick materials that last long and improve strike rates3.
Add-Ons for Advanced Fly-Tyers
As you get better, add special items to your kit:
- Dubbing wax
- UV resin
- Specialized feathers and furs
- Eco-friendly materials3
“Every tool in your fly-tying travel kit should earn its place. Pack smart, tie smart.”
Material choice is key. Lighter materials are best in warm weather, and heavier ones in cold3. Quality tools mean better catches.
Organizing Your Fly-Tying Travel Kit Efficiently
Learning to set up your convenient fly-tying setup is key for any angler. Your tools are essential on the water. How you organize them can greatly affect your fishing.
To get the most from your kit, think strategically and be efficient. Each item must have a reason to be in your limited space.
Compact Storage Strategies
- Use multi-compartment tackle storage solutions for maximum organization
- Invest in waterproof, shock-resistant containers
- Utilize compact zip-lock bags for smaller materials
- Implement modular storage systems
Transport and Protection Techniques
Your tools need top-notch protection when you travel. Choose cases that offer:
- Rigid exterior protection
- Padded interior compartments
- Secure tool retention mechanisms
- Lightweight design
“A well-organized fly-tying kit is a warrior’s most trusted companion on the water.”
Prioritizing Essential Tools
Not all tools are created equal. Be ruthless when evaluating your kit. Ask if a tool will greatly improve your fishing. If not, don’t bring it.
Your aim is to have a streamlined, efficient fly-tying setup. Efficiency beats excess every time4.
Choosing the Right Case for Your Fly-Tying Travel Kit

Your fly-tying travel kit needs a strong protector. Not all cases are the same. Some will keep your gear safe, while others won’t.
Best Materials for Durability
When picking a case for your compact fly-tying vise, durability is key. Look for these top materials:
- 900D ballistic polyester
- High-grade waterproof polymers
- Reinforced aluminum frames
- Heavy-duty nylon with internal padding
Size Considerations for Your Kit
Your fly-tying travel kit needs the right size. The best case fits your tools well without being too big. Aim for a case around 33″L x 6″W x 9″H. This size is big enough for many tools but still easy to carry5.
| Case Feature | Recommended Specification |
|---|---|
| Capacity | 20 liters |
| Weight | 5.4 pounds |
| Rod Accommodation | 4-piece rods up to 9 feet |
Brand Recommendations for Cases
Not all brands make durable fly-tying travel kits. Look for cases with:
- YKK #10 zipper for main compartment
- Multiple mesh accessory pockets
- Hidden compartments for extra gear
“Your case isn’t just storage – it’s your gear’s battle armor.” – Fly-Tying Expedition Professionals
Pro tip: Pick a case that matches your level of adventure. Simms offers strong options in Simms Orange and Black5. Choose function over fashion, but don’t forget about style.
Customizing Your Fly-Tying Travel Kit
Creating the ideal fly-tying travel kit is not about carrying everything. It’s about choosing wisely and being flexible. Your kit should change with your fishing spot.
Personalizing for Specific Locations
Every fishing spot needs a special approach to your fly-tying kit. Coastal areas and mountain streams need different things. Here are some tips:
- Learn about local insects
- Choose materials that fit the area
- Make your fly-tying setup easy to take on the go
Adapting for Seasonal Changes
Fishing patterns change with the seasons. Your kit should be able to adapt to these changes. It should have parts that work well in different weather.
| Season | Key Materials | Recommended Flies |
|---|---|---|
| Spring | Soft hackle materials | Nymphs, Emergers |
| Summer | Lightweight synthetics | Dry flies, Terrestrials |
| Fall | Streamer materials | Streamers, Wet flies |
| Winter | Dense dubbing | Weighted nymphs |
Using Local Materials
Turn your fly-tying kit into a survival kit by using local materials. Being resourceful is key for anglers.
“Adapt, improvise, overcome – the angler’s creed for survival and success.”
Local feathers, fur, and natural fibers can be great for tying flies. Learning to use these materials will make you better at tying flies anywhere6.
Techniques for Travel-Friendly Fly-Tying

Mastering on-the-go fly tying needs smart skills and a setup that works anywhere. Knowing how to tie flies quickly while traveling can make your fishing trips great.
Quick Tying Techniques for Compact Spaces
Learning to tie flies fast is key for anglers who fish on the move. The best users of fly-tying travel kits know speed is important. 75% of them use tools that do many jobs to keep their kits small7. Your aim is to make great flies with a few materials and lots of accuracy.
- Choose lightweight, multi-purpose tools
- Practice minimalist tying techniques
- Focus on essential fly patterns
Managing Workspace and Potential Messes
A good fly-tying travel kit needs smart space management. 68% of anglers like tools that save space7. Here are tips to keep your area tidy and your materials in order:
- Use compact trays with raised edges
- Utilize sealable material containers
- Pack microfiber cloths for quick cleanups
“Precision in small spaces defines a true fly-tying professional.”
Maximizing Efficiency in Limited Areas
Your fly-tying travel kit should be efficient and light. The average weight of a complete kit is about 2.5 pounds, much lighter than old kits7. Arrange your space well so you can tie flies well, whether on a boat, by the stream, or in a small tent.
Remember: A well-prepared angler turns challenges into chances with a smart, easy fly-tying setup.
Tips for Traveling with Your Fly-Tying Travel Kit
Traveling with your fly-tying gear needs careful planning and prep. Whether you’re off to remote fishing spots or local ones, knowing how to carry your tools is key. It can make or break your trip.
Airline Regulations: Protecting Your Gear
When traveling with your fly-tying kit, you must follow airline rules. A survey shows 72% of anglers bring special gear, making it crucial to know how to transport it7. Airlines have rules about carrying sharp tools and materials.
- Check TSA guidelines for sharp objects
- Pack scissors with blades under 4 inches
- Use clear, sealable containers for small materials
- Consider shipping delicate tools separately
Securing Your Lightweight Fly-Tying Supplies
Protecting your fly-tying kit is essential. Get a hard-sided case with custom foam to keep tools safe. Research shows 80% of anglers value kit organization for better efficiency7.
| Tool Category | Recommended Protection |
|---|---|
| Hooks | Magnetic strip or hard case |
| Scissors | Blade guards |
| Threads | Ziplock bags |
“Smart packing turns your fly-tying travel kit into a travel-ready arsenal.” – Professional Angler
Packing Light: Maximizing Efficiency
Choosing the right tools can make your kit lighter. Multifunctional tools are a big help. Data shows using versatile tools can cut kit weight by up to 30%7.
- Choose lightweight, compact tools
- Prioritize essential materials
- Use compact storage solutions
- Consider environment-specific requirements
By following these tips, you’ll make your fly-tying travel kit lighter and easier to carry. It will be ready for any fishing adventure.
Maintaining Your Fly-Tying Travel Kit
Your fly-tying travel kit is more than just tools. It’s your key to making perfect fishing flies anywhere. Keeping it in top shape means your setup stays sharp and ready for action.
Critical Care for Your Fly Fishing Gear
Looking after your fly-tying travel kit is crucial. Here are some steps to keep your gear in perfect condition:
- Clean tools after every use
- Inspect for rust or damage
- Store materials in moisture-resistant containers
- Rotate supplies to prevent degradation
Replenishing Materials Strategically
Smart anglers know restocking is more than just buying. It’s about planning ahead. Make a list of must-have fly-tying materials to avoid running out during a trip.
| Material Type | Recommended Replacement Frequency |
|---|---|
| Hooks | Every 6-12 months |
| Feathers | Annually or when damaged |
| Thread | Every 8-10 months |
Organization: Your Tactical Advantage
A messy fly-tying travel kit leads to frustration. Invest in compact, organized cases. They protect your tools and make them easy to find.
“An organized kit is a warrior’s most reliable weapon in the field.” – Experienced Angler’s Wisdom
With these maintenance tips, your fly-tying travel kit will stay sharp. It will be ready to support your fishing adventures anytime.
Conclusion: Elevate Your Angling Experience
Your fly-tying travel kit is more than tools—it’s your path to fishing greatness. By tying flies on the go, every fishing trip becomes a chance to learn and explore8. With the right kit, your fly-tying travel kit for anglers becomes a key to catching the perfect fish8.
Mastering fly tying takes hard work and a love for learning. Try new techniques in different places, adjusting to the water’s conditions. Since 37% of anglers fish from boats, don’t stick to the same spots8. Your dedication to fly tying will make you stand out from casual fishers.
When you explore new fishing spots, your kit will be your best friend. Spend time getting to know your gear, try local materials, and keep improving. Canada’s waters are calling—aim to become a versatile, skilled angler who can tie the perfect fly anywhere, anytime8.
Frequently Asked Questions
Why is a fly-tying travel kit essential for anglers?
A fly-tying travel kit is crucial because it allows anglers to customize and repair flies on-the-spot, adapt to unpredictable fishing conditions, and significantly increase their catch rates with premium, custom-tied flies. It's considered a key component for serious anglers to gain an edge.
What are the must-have tools for a basic fly-tying travel kit?
For a basic fly-tying travel kit, essential tools include a compact vise, precision scissors, a bobbin, and a whip finisher. Additionally, incorporating forceps, needle-nosed pliers, and a versatile vise that accommodates various hook sizes will further enhance your ability to make perfect flies.
Which materials are recommended for beginners starting their fly-tying kit?
Beginners should prioritize versatile and durable basic materials such as nylon, silk, and monofilament threads, each offering distinct characteristics. It is also recommended to include glass and tungsten beads to add weight and visual appeal to your flies, improving their effectiveness.
How can I effectively organize my fly-tying travel kit for portability and efficiency?
To organize your kit efficiently, utilize multi-compartment tackle storage solutions, invest in waterproof and shock-resistant containers, and use compact zip-lock bags for smaller materials. Implementing modular storage systems helps, and it's important to ruthlessly prioritize only the essential tools that significantly improve your fishing success.
What should I look for when choosing a case for my fly-tying travel kit?
When selecting a case, focus on durability, opting for materials like 900D ballistic polyester, high-grade waterproof polymers, reinforced aluminum frames, or heavy-duty nylon with internal padding. Consider the size to ensure it fits your tools without being bulky (e.g., around 33″L x 6″W x 9″H). Look for features such as YKK #10 zippers, multiple mesh accessory pockets, and hidden compartments for extra gear.
How can I customize my fly-tying travel kit for different fishing environments or seasons?
Customize your kit by researching local insects and selecting materials that specifically fit the area's conditions. For seasonal changes, adapt your materials (e.g., soft hackle for spring, lightweight synthetics for summer, dense dubbing for winter). Additionally, incorporating local materials like feathers, fur, or natural fibers can make your kit more resourceful and adaptable.
What are important tips for traveling with a fly-tying kit, especially regarding airline regulations?
When traveling with your fly-tying kit, always check TSA guidelines for sharp objects; generally, scissors with blades under 4 inches should be packed in checked luggage. Use clear, sealable containers for small materials and consider shipping delicate tools separately. To maximize efficiency, prioritize lightweight, multifunctional tools and compact storage solutions.