Learn to customize soft plastic baits for better fishing. Discover simple steps, materials, and expert tips to create unique lures.
- Use Customizing Soft Plastic Baits to match species behaviour, habitat, season, and presentation to Canadian water conditions
- Check local regulations before fishing; limits, closures, bait rules, and licences can vary by province and waterbody
- Focus on practical setup: where to fish, what to cast or troll, how deep to work, and when to move
Bottom line Customizing Soft Plastic Baits gets simpler when you pair current rules with the right habitat, timing, and presentation
Customizing soft plastic baits means changing their look, feel, and smell to catch more fish. It helps you make lures that work best for your local waters and target fish.
Key Takeaways
- Save Money & Scraps: Melting down and recycling torn plastic worms and trailers is an eco-friendly way to create high-performing custom baits.
- Vibrant Custom Colors: Liquid plastisol colorants and heat-resistant glitters let you craft unique patterns fish haven’t seen.
- Scent Infusion: Mixing oil-based garlic, craw, or salt scent into hot plastisol ensures the flavor lasts long after casting.
- Safety First: Always melt plastisol in a well-ventilated area (or outdoors) using safety glasses and heat-resistant gloves.

Estimated reading time: 7 minutes
Do you want to catch more fish? Many anglers are now customizing soft plastic baits. This lets you make lures that are perfect for your fishing spot. It can truly boost your catch rates and make fishing even more enjoyable.
What Are Custom Soft Plastic Baits?
Soft plastic baits are popular fishing lures. They feel like real food to fish. You can change these baits to make them special. This means picking their shape, color, feel, smell, and how they move in the water.
You can make your own baits from a liquid material called plastisol. You can add colors, scents, and special effects. This helps you create lures that look and act just right.
Making your own baits lets you:
- Choose molds: Pick shapes like worms, craws, or swimbaits.
- Change colors: Use dyes and pigments. You can even add glow or color-changing effects.
- Adjust feel: Make baits softer or harder for different fish and water.
- Add scents: Use smells that attract fish.
- Control float: Make baits float or sink as you need.
Many stores in Canada sell everything you need. This includes the base plastisol, colors, and powders. You can find materials for texture, floating, and glow effects.
Why Customize Your Baits?
More and more anglers are making their own baits. This helps them stand out and catch more fish. Online videos show how easy it is to start this hobby. Many molds and materials are easy to find.
Affiliate Disclaimer: We may earn a commission from purchases made through the links on this page without any addiitonal costs for you. Thank you for supporting our website ! Appreciated 👍
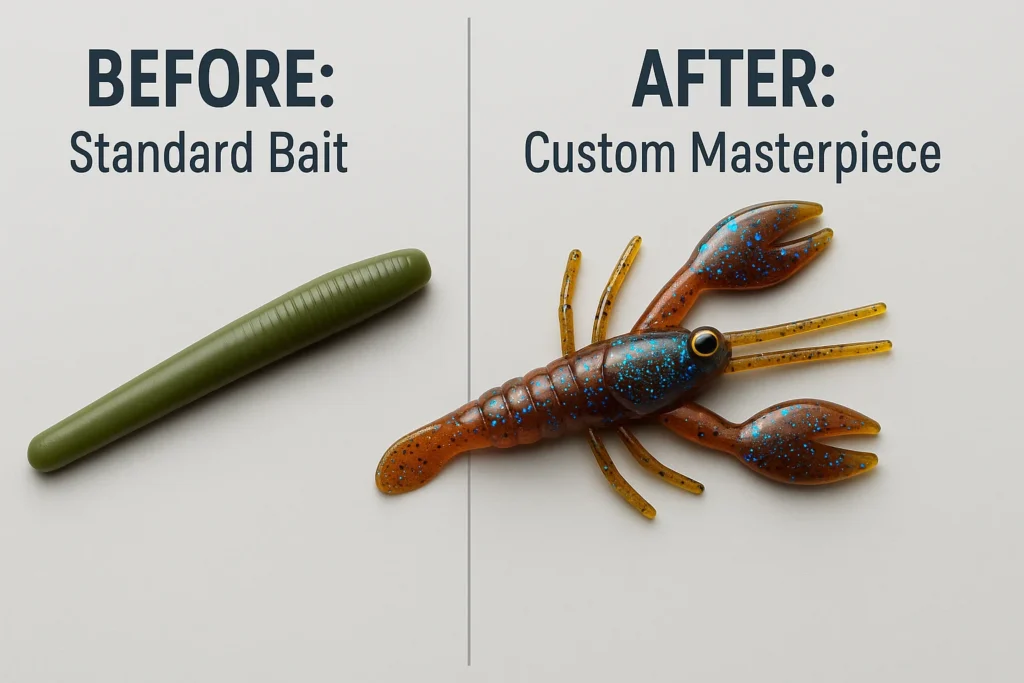
New store-bought soft plastics also show this trend. They have very real colors and strong materials. This shows that anglers want lures that work better and can be changed.
Canadian stores see more people buying bait-making supplies. These buyers range from casual anglers to pro guides. They all want special baits for their fishing spots.
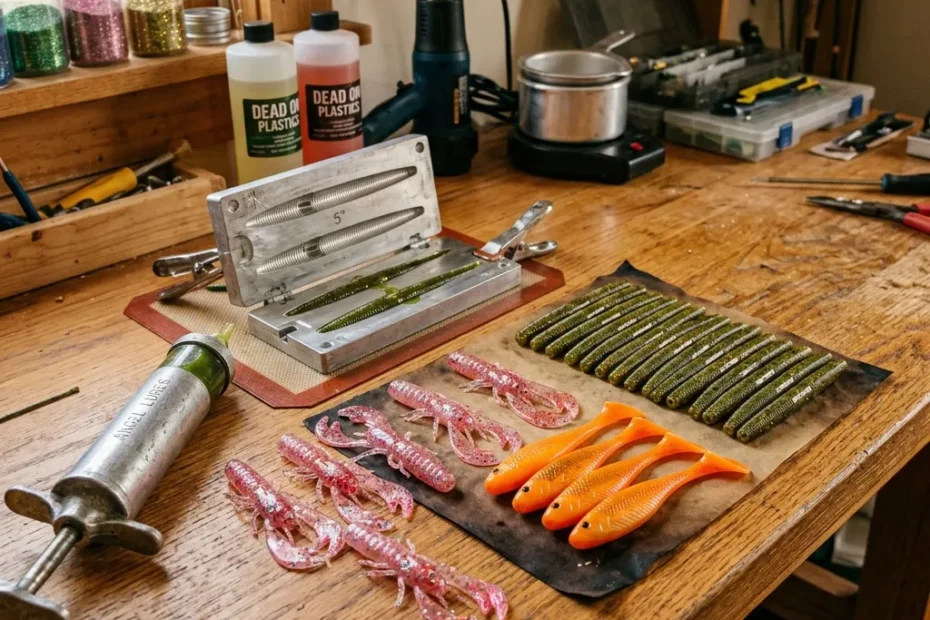
How to Melt and Customize Soft Plastic Baits
A step-by-step walk-through of the hot-pour lure customizing process.
1. Melt the Plastisol Scraps
Place liquid plastisol or clean scrap soft plastics into a microwave-safe cup. Heat in 30-second increments in a dedicated microwave until it reaches 320°F–350°F and becomes syrupy and clear.
2. Mix Colorants and Glitter
Stir in liquid plastic dyes drop by drop until you get the perfect shade. Gently blend in heat-resistant holographic glitter to create a reflective pattern that matches your target water clarity.
3. Draw Up and Inject
Put on heat-resistant gloves and safety glasses. Draw the hot liquid plastic into your aluminum injector, then slowly and steadily press it into the mold gate of your clamped aluminum senko mold.
4. Demold and Cure
Allow the mold to cool for 3–5 minutes. Carefully split the mold halves, retrieve the fresh soft bait, and place it flat in a water bath to cure completely for 24 hours.
How to Customize Soft Plastic Baits: A Simple Guide
Making your own baits is a fun process. Here are the steps to get great results.
1. Pick the Right Mold
Start with a mold that matches a bait you already like. This could be a creature, craw, worm, or swimbait. There are many molds available today. Finding one like your favorite bait helps you feel confident. It also lets you try new colors with a shape you know works.
2. Get Your Materials Ready
You will need a few main items. You can find them easily from Canadian suppliers.
- Plastisol: This is the main liquid for your bait. It comes in different types. Finesse is softer for small fish. Standard is harder for bass and pike.
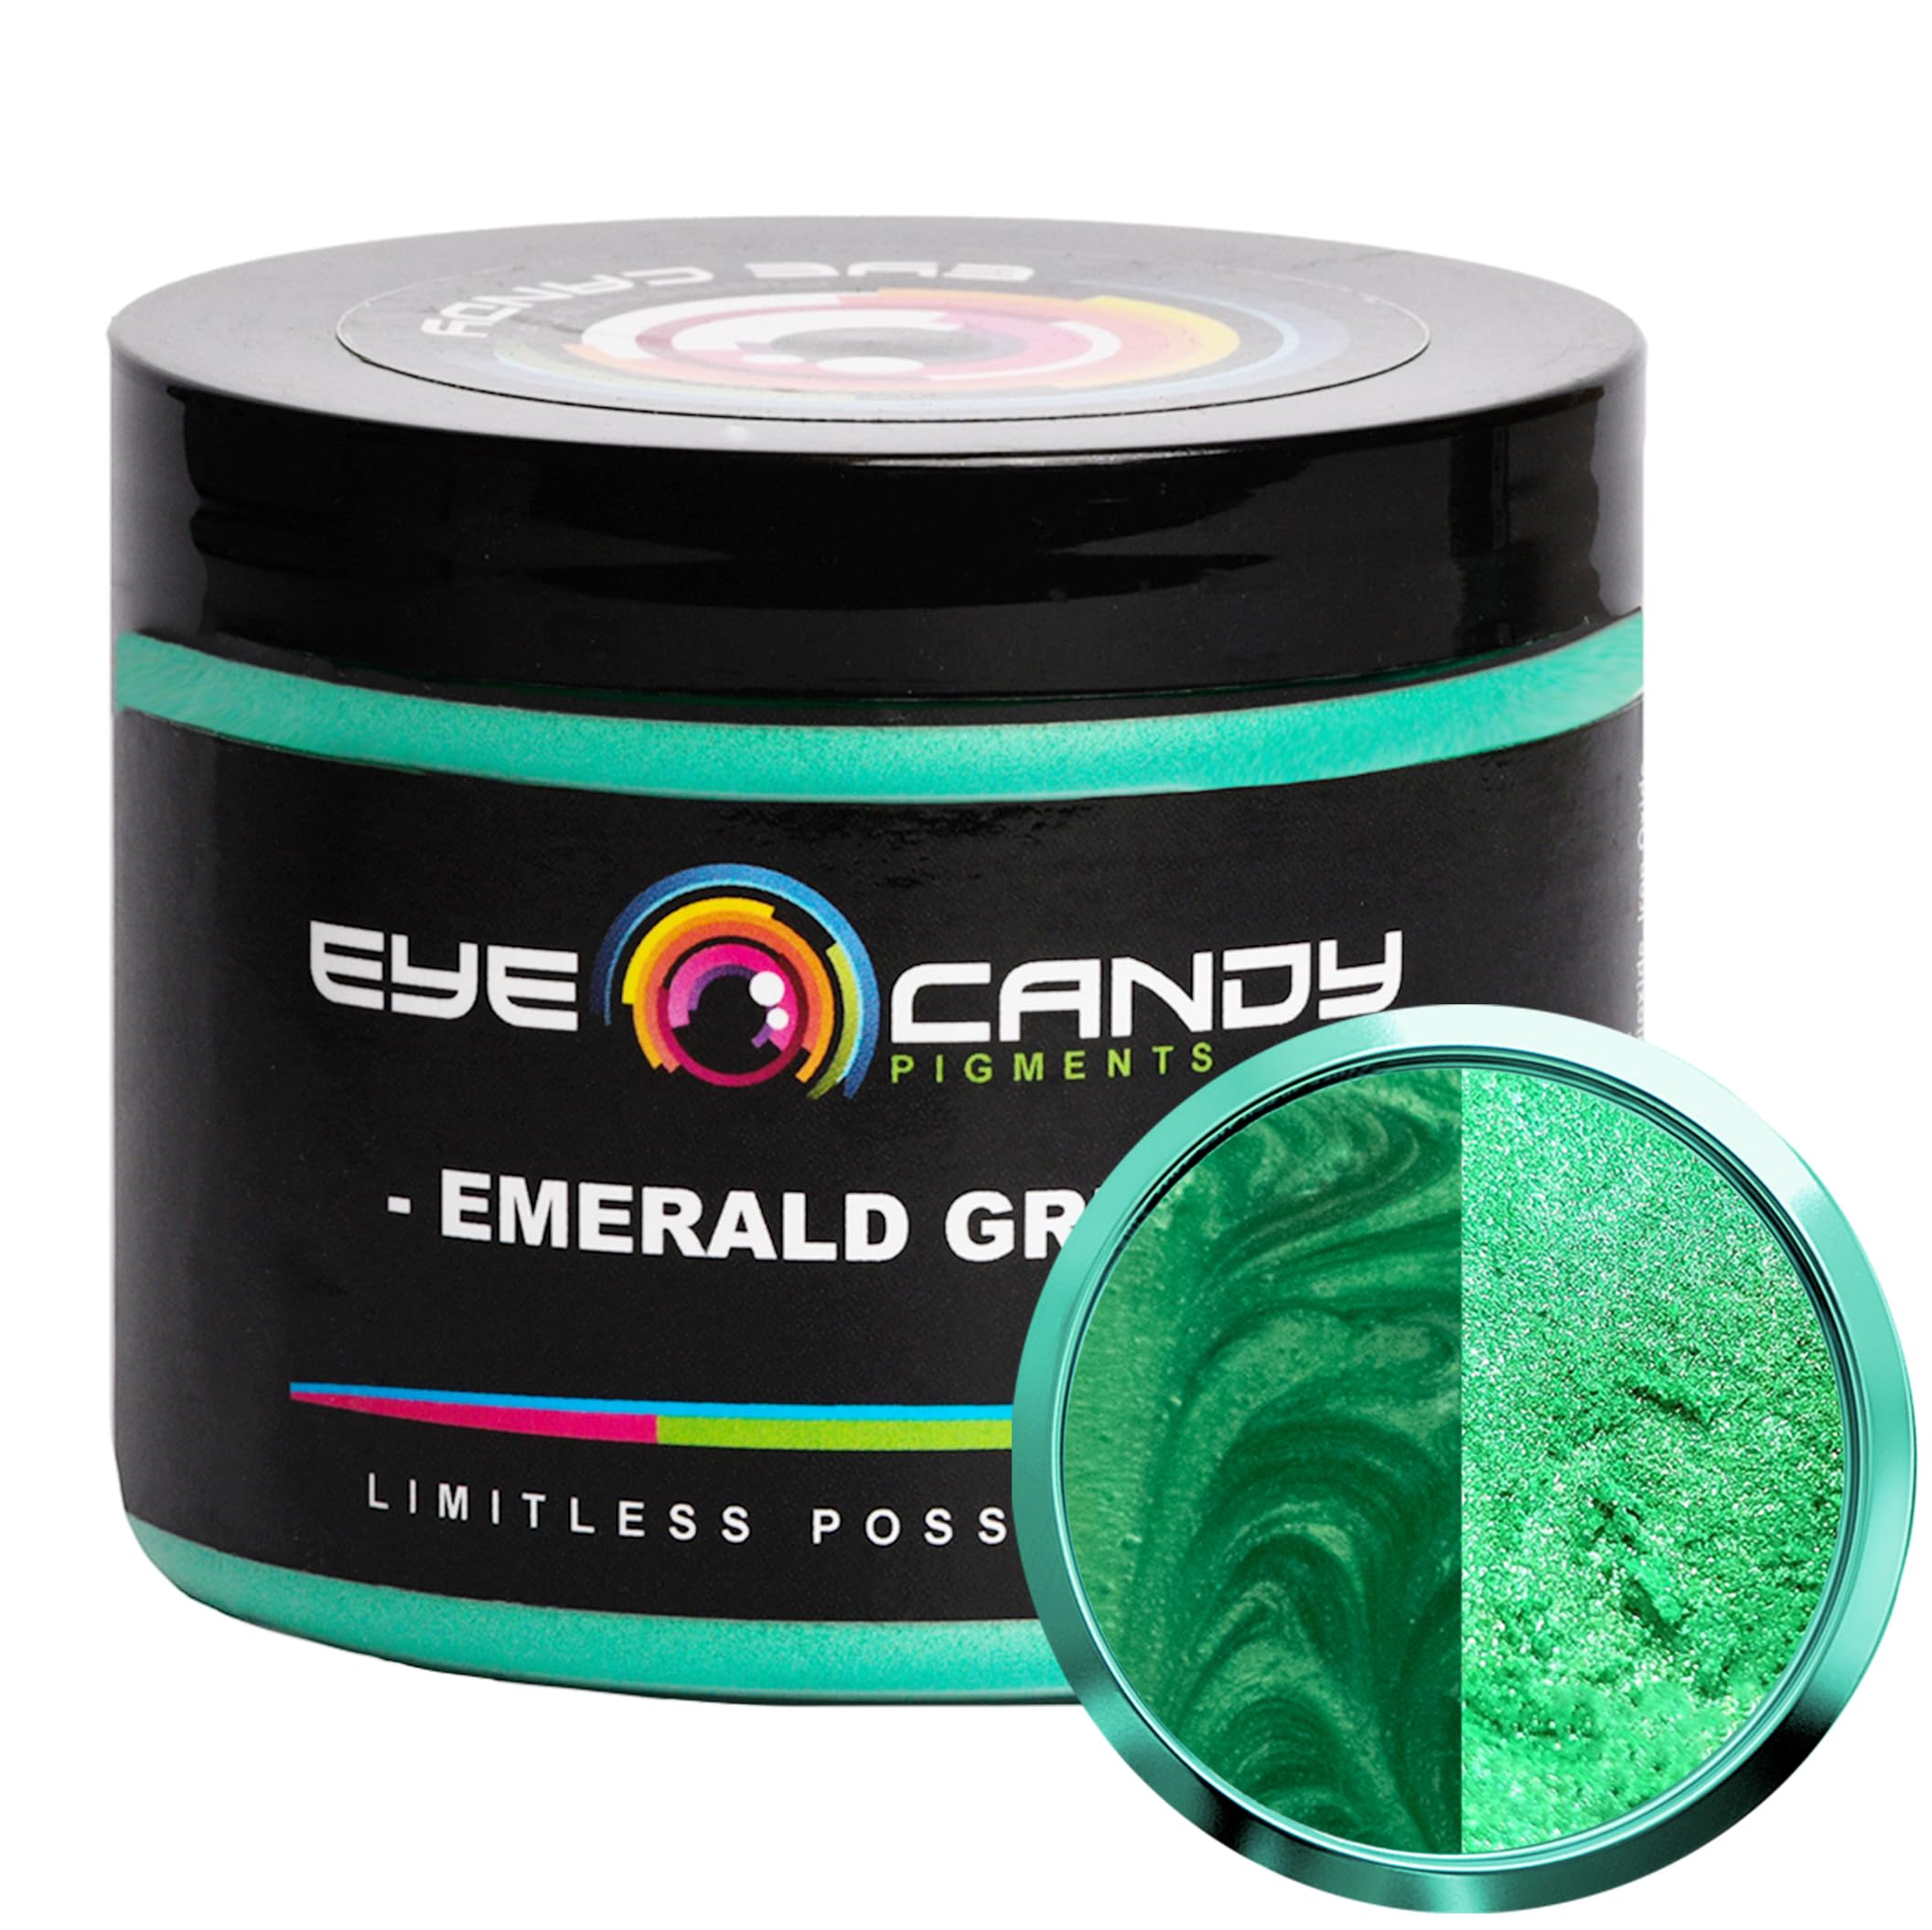
- Colors: Use pigments and dyes to color your baits. You can get bright, pearl, or color-changing powders. Mix them for cool looks.
- Glitter and Powders: Add glitter or glow powders to make baits more eye-catching.
- Scents: Put in smells that attract fish.
- Floating or Sinking Powders: Use these to make your bait float or sink. This helps with different fishing styles.
3. Melt and Mix
Heat the plastisol in a microwave-safe cup. Make sure it melts completely. Then, add your colors, glitter, and scent. Stir everything well. If you want baits with many colors or swirls, you can layer different colored plastics before pouring.
4. Pour or Inject the Mold
Pour the melted plastisol into your mold. For baits with many small details, use a special injector. This helps avoid air bubbles. For simpler shapes, just pour the liquid in.
5. Cool and Finish
Let your bait cool down. It needs to harden before you take it out of the mold. Some baits might need extra steps. You might trim off extra plastic. You could also paint small details or add scent gel.
6. Test and Improve
You must test your new baits when you go fishing. See how fish react. Change the color, scent, or hardness based on what you see. Keep trying new things. This helps you make very effective custom baits for your area.
New Trends in Custom Soft Plastic Baits
Several new ideas are shaping how people make custom baits.
- Real-Looking Colors: New ways of printing and painting make baits look very real. This helps them attract fish.
- Stronger Baits: New materials make baits tougher. They last longer against rocks, fish teeth, and many uses. This is good for Canadian waters where fish can be aggressive.
- Weedless and Slow-Sink: Special designs help baits move through weeds easily. Floating or sinking formulas give you more control. This is great for fishing near underwater plants.
- Eco-Friendly Materials: People care more about the environment. So, new bait formulas are safer for nature.
- Community Learning: Online videos and groups help new bait makers learn. They can share tips and ideas. You can find many helpful tutorials on YouTube.
Customizing Soft Plastic Baits for Canada
Canada has many different places to fish. This offers special chances for custom bait makers.
- Many Fish Types: Canada has bass, pike, muskie, walleye, and trout. Each fish likes different colors, sizes, and bait actions.
- Water Conditions: Lakes and rivers across Canada vary a lot. Water can be clear or cloudy, warm or cold. You need different baits for different conditions.
- Easy to Find Supplies: Canadian stores like CMA Outdoors and Great Canadian Fishing Store sell many bait-making items. This makes it simple to get what you need.
Success Stories
Many people share their journey from new to expert bait makers. They show the steps, mistakes, and good ideas they learned. These stories often suggest starting with baits you already like. Then, slowly try new shapes and colors as you get better. You can find many such stories on YouTube.
Canadian suppliers say the best custom bait makers pay attention to local fish. They watch what fish do and how seasons change. By copying good store-bought baits and then changing them, anglers make unique lures. These often catch more fish than regular ones.
| Aspect of Customizing Soft Plastics | Benefit/Description (Simple Terms) | Key Detail (Brief) |
|---|---|---|
| Mold Selection | You can match baits to fish types or copy your favorite lures. | Dozens of senko, swimbait, and craw molds are available. |
| Color & Pigments | Create unique patterns tailored for water clarity and light. | Glow, pearl, chameleon, and UV pigments. |
| Scent Additives | Attract fish from a distance and make them hold on longer. | Garlic, craw, salt, and anise oils. |
| Texture & Hardness | Adjust how soft the plastic feels to matching fish action. | Softer for finesse drop-shot, harder for toothy pike. |
| Buoyancy Control | Make baits float or sink for precise rigging. | Use microballoons to float baits or salt to sink them. |
Recommended Soft Plastic Making Gear
Vetted products to help you melt plastisol, inject molds, and color custom worms safely.

X-SOL – Starter Kit – Plastisol Fishing Lure Making Liquid Plastic Rubber
Vetted high-quality item for your custom soft bait crafting workspace. Crucial for clean, uniform results.

Soft Plastiс Lure Mold Making Injection Molds Yama Senko 5''
Vetted high-quality item for your custom soft bait crafting workspace. Crucial for clean, uniform results.

45 ml Plastic Injector for Making Soft Plastic Baits Lures
Vetted high-quality item for your custom soft bait crafting workspace. Crucial for clean, uniform results.

Spike-It 57000 Fix-A-Lure
Vetted high-quality item for your custom soft bait crafting workspace. Crucial for clean, uniform results.
Hemway Resin Glitter Silver Holographic 500g | Polyurethane & Epoxy Glitter for Resin Crafts, Tumblers, Coasters, Floor & Table Art
Vetted high-quality item for your custom soft bait crafting workspace. Crucial for clean, uniform results.
Affiliate Disclaimer: As an Amazon Associate, CanadaFever earns from qualifying purchases. This helps support our Canadian outdoor research at no extra cost to you.
Challenges and Solutions
Even with many good points, customizing baits has some challenges.
- Learning: New makers might find mixing or heating hard. But online videos and groups help a lot. Many YouTube channels offer great guides.
- Costs: Starting costs are low. But if you make many baits, you might need to buy more molds or tools. Buying in bulk or sharing gear can save money.
- Rules: Some areas have rules about bait use. Using eco-friendly materials helps protect the environment.
Future of Custom Baits
The future for customizing soft plastic baits in Canada looks good. There will be new materials, designs, and easier ways to make them. As more anglers try making their own baits, we might see:
- Better Tools: Easier and more exact tools for making molds and injecting baits.
- Green Materials: More use of materials that break down naturally and are better for nature.
- More Learning: More online help and local meetings to share ideas and tips.
Expert Tips for Beginners
- Start Simple: Pick a mold like a bait you already use. Try different colors and scents.
- Buy Good Supplies: Quality plastisol and colors make your baits work better.
- Learn from Others: Use YouTube, online groups, and local clubs. This helps you learn faster.
- Test Your Baits: The best way to make your baits better is to use them. Watch how fish react.
- Write Down Your Recipes: Keep notes on what you used and how it worked. This helps you make your best baits again.
In-depth discussion on the topic:
Listen to our expert discussion
1. What is the best material for making soft plastic baits?
Liquid plastisol is the industry standard. You can also melt down and recycle clean scraps of old soft plastic worms and trailers.
2. Is melting soft plastics safe?
Only if done with proper safety precautions. Molten plastic is extremely hot (320°F+) and releases harmful fumes. Always wear heat-resistant gloves, safety glasses, and work outdoors or under a strong ventilation hood.
3. How do I add scent to custom soft plastics?
Add oil-based scents (like garlic, anise, or craw) directly to the hot plastisol just before pouring. You can also apply scent to the finished baits in their storage bags.
4. How long do soft plastic lures need to cure?
They are cool enough to demold in 3-5 minutes, but they should cure flat on a tray or in cold water for 24 hours to reach their final durability.
5. Can I mix different colors of scrap plastic?
Yes, but melting different colors together will usually result in a dark brown or black bait. For best results, sort your scraps by color before melting.


