Stop losing lures! Learn to build & use a cheap, effective Homemade Fishing Lure Retriever. Save money & frustration with this easy DIY guide.
- Use DIY Homemade Fishing Lure Retriever to match species behaviour, habitat, season, and presentation to Canadian water conditions
- Check local regulations before fishing; limits, closures, bait rules, and licences can vary by province and waterbody
- Focus on practical setup: where to fish, what to cast or troll, how deep to work, and when to move
Bottom line DIY Homemade Fishing Lure Retriever gets simpler when you pair current rules with the right habitat, timing, and presentation
Test Your DIY Lure Retriever Know-How!
Losing expensive fishing lures to underwater snags is incredibly frustrating. Building your own homemade retriever is a smart, cheap way to rescue your gear! How prepared are you to make and deploy one? Test your knowledge on retriever design, materials, and techniques now.
Quiz Complete!
🎣 Ready to Save Your Lures?
Put your knowledge into action! The guide below outlines the exact components, assembly steps, and bouncing techniques you need to start retrieving 70-80% of your snagged baits. Let’s make losing lures a thing of the past.
Every angler knows the sinking feeling of getting a favorite, expensive crankbait or spinner jammed tight against an underwater log or rocky crevice. But you don’t have to keep yanking on your line until it snaps. By building a simple, highly effective Homemade Fishing Lure Retriever in 2026, you can recover 70-80% of your snagged lures, saving hundreds of dollars and helping protect Canadian lakes and rivers from plastic and lead pollution.
Whether you’re casting around rocky Canadian Shield lakes, navigating logjams in muddy rivers, or trolling deep weed lines, carrying a DIY retriever is the ultimate cost-saving gear hack. It’s inexpensive to build, fits easily in your tackle box, and can be customized with chains to handle even the most stubborn tree branch snags.
Key Takeaways
- Substantial Cost Savings: Commercial retrievers run $20 to $50+. A homemade model using spare bank sinkers, a heavy snap, and paracord costs less than $5 to build.
- Bouncing vs. Snagging: The retriever uses heavy weight impact to bump lures backward out of crevices. Short dangling chains can also hook into split rings for pulling power.
- Eco-Angling Conservation: Keeping lost lead sinkers and plastic lures out of Canadian waters prevents bioaccumulation and line entanglement risks for birds and fish.
Why DIY Lure Retrievers Are Your Secret Weapon
Fishing gear continues to grow more expensive, with modern premium crankbaits and glide baits easily costing between $15 and $30 a piece. Losing three or four of these on a rocky lake bottom or shoreline logs can quickly turn a fun day of angling into an expensive headache. That is where a homemade lure retriever comes in.
These simple sliding weights use momentum to solve the snag problem. When clipped onto your main line and slid down, the retriever does not simply tug at the lure; it delivers a hard physical impact right at the eyelet. This sudden jar frequently knocks the lure backward out of whatever crack it has wedged into. In cases where the hook is buried in soft wood, adding dangling metal chains to the retriever allows you to snag the lure’s hooks or split rings and pull them free using a separate, high-strength cord.
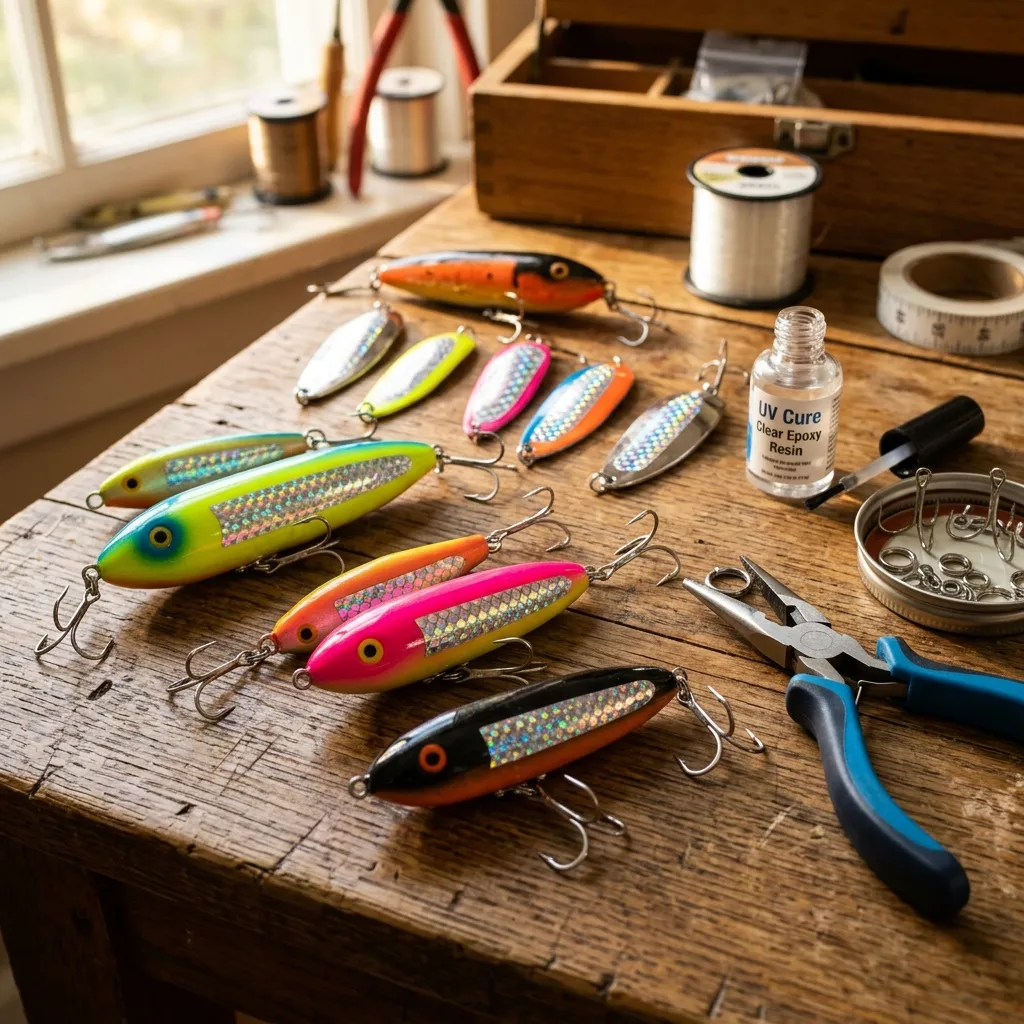
Essential Materials for a DIY Retriever
Building a lure retriever is a fantastic off-season project because it requires only a few basic, affordable parts. Many of these components are likely already lying around in your garage or tackle storage box. Here is the list of materials to gather:
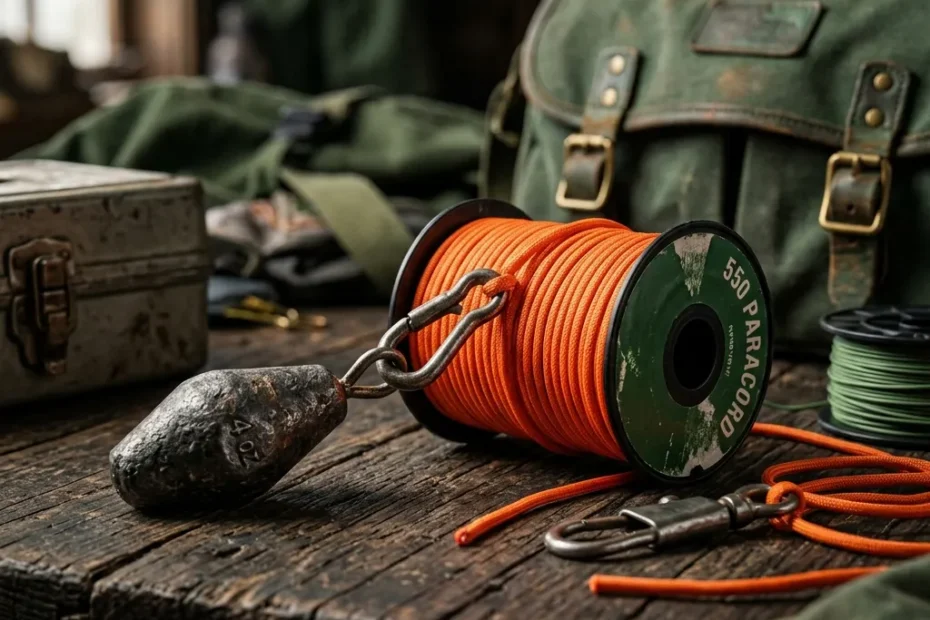
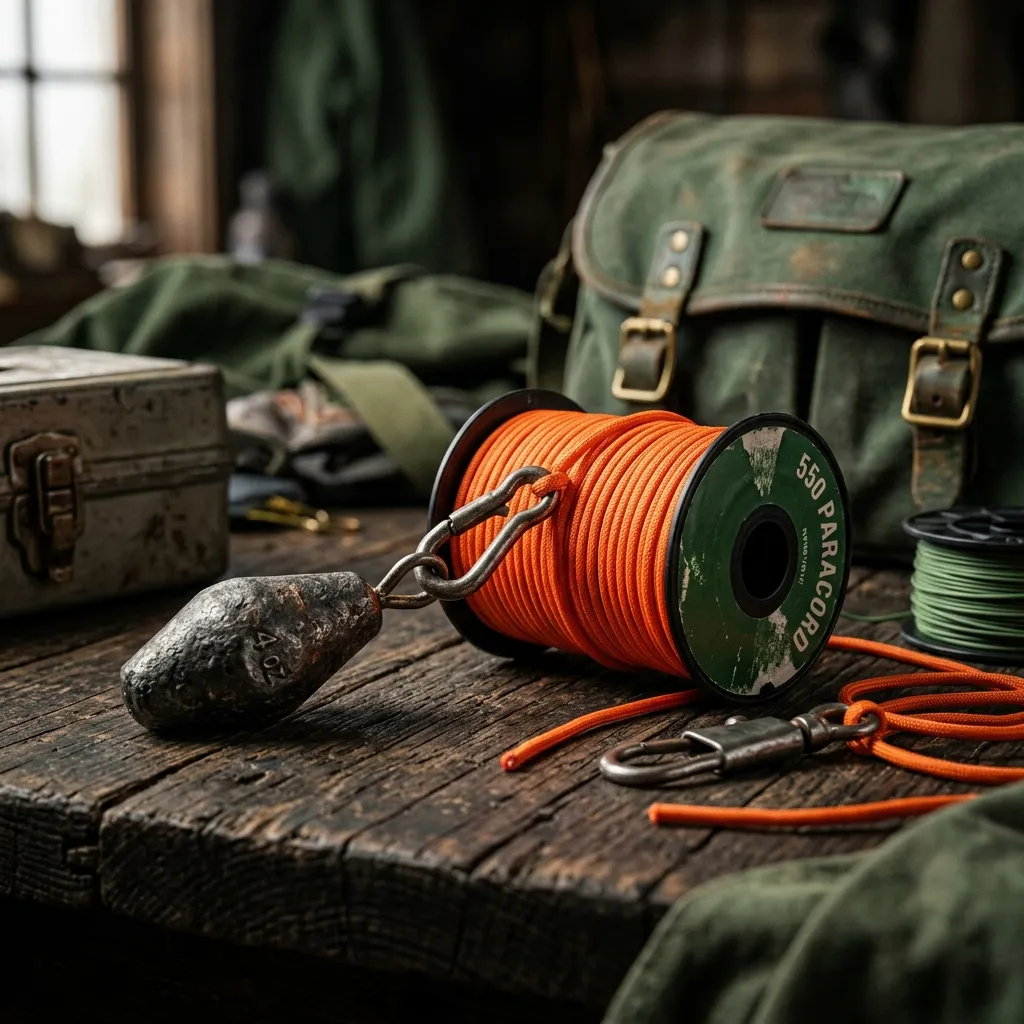
- Heavy Weight: You need enough mass to slide down the line through current and hit the lure hard. A 3 to 5 oz lead bank sinker, cannonball weight, or heavy steel bolts work perfectly.
- Duo-Lock Snap Swivels: Heavy-duty size 7 or 8 snaps are ideal for clipping the retriever securely onto your main line without damaging it.
- Brass Chain Grabbers (Optional): A few inches of small brass safety jack chain attached to the split rings help tangle and catch the hooks of your stuck lure.
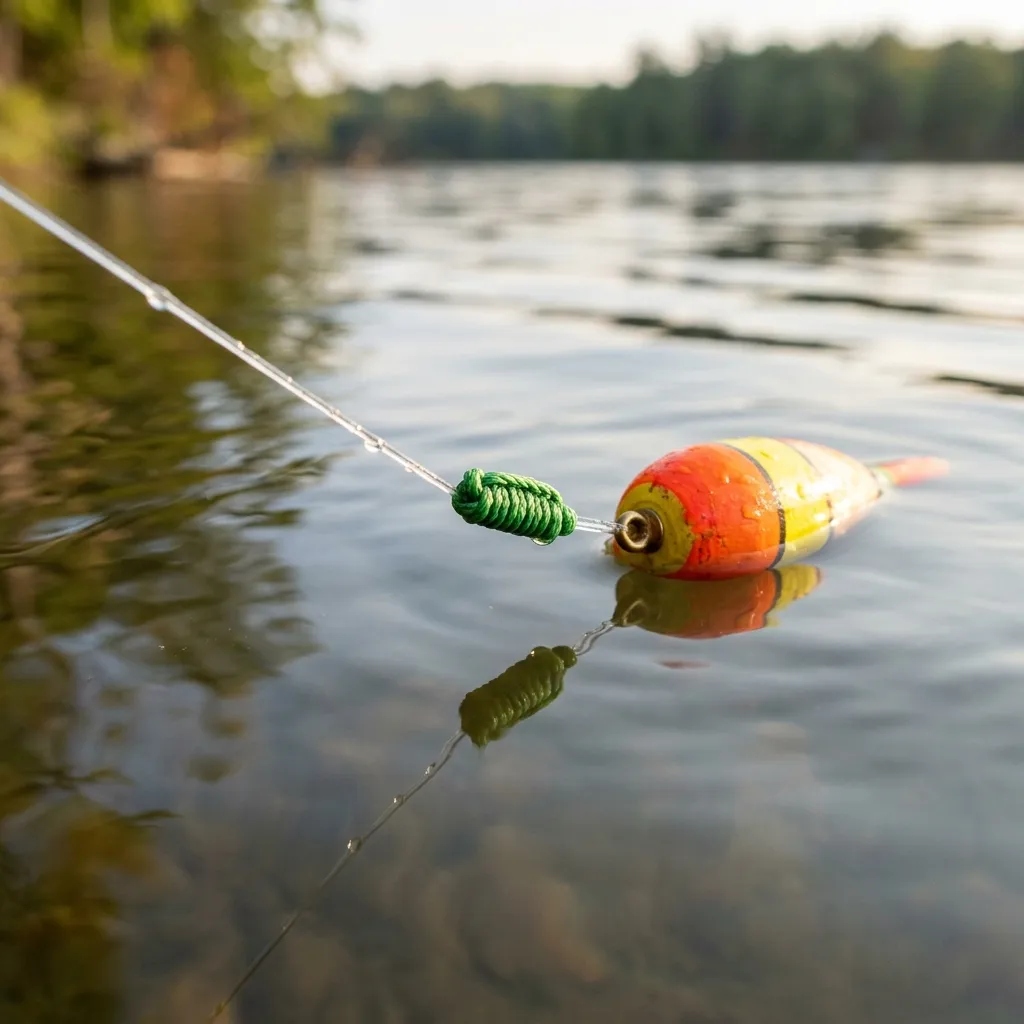
- Retrieval Cord: A separate, strong rope like 550 paracord or thick nylon line on a winder is required. This allows you to pull the retriever (and the snagged lure) back up safely. Never rely on your rod’s fishing line to pull the retriever!
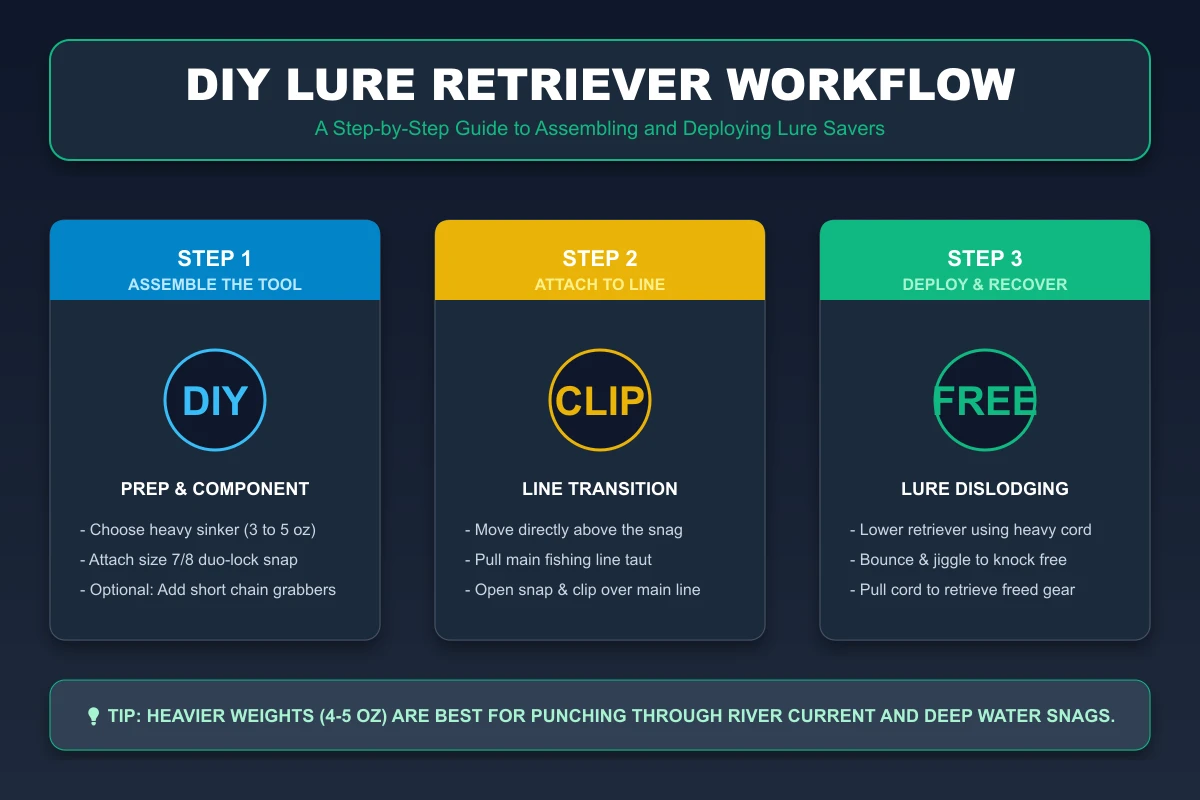
How to Assemble the Sinker & Snap Retriever
The fastest and safest DIY retriever design that requires no melting of lead.
1. Connect the Snap Clip
Open a large, heavy-duty duo-lock snap swivel and clip it directly onto the wire eyelet of your 4 oz bank sinker.
2. Add the Chain Grabbers
Attach two or three 3-inch lengths of brass safety jack chain onto the same snap clip using heavy split rings. These will hang loosely next to the sinker.
3. Tie the Retrieval Cord
Securely tie your 550 paracord retrieval line to the loop of the bank sinker or the base of the snap clip using a double Palomar or uniform loop knot.
4. Wind the Storage Reel
Wrap the remaining 50 feet of paracord cord around a plastic kite winder or wooden spool. This prevents tangles in your tackle bag and allows quick deployment.
How to Use Your Retriever Like a Pro
Once you are snagged, do not panic or yank hard. Yanking only drives the hooks deeper into logs or wedges the lure further into rock cracks. Instead, maintain steady, light tension on your rod line and prepare to lower the retriever:
- Get Vertical: If you are in a boat or kayak, maneuver directly over the snagged lure. If you are fishing from shore, stand as close to the snag as possible to get a steep downward angle.
- Clip to Main Line: Take the duo-lock snap on the retriever and clip it directly over your main fishing line. Make sure the snap lock closes completely.
- Lower Under Tension: Keep your main fishing line tight. Hold the winder spool and slide the retriever down your line. Let it travel by its own weight until you feel a firm “thump,” indicating it has hit the lure.
- Bounce and Jiggle: Lift the retriever cord by a few inches and drop it. This bouncing action beats against the lure, pushing it backward off the obstruction. If it remains stuck, bounce it again to allow the dangling chain links to catch the lure’s hooks.
- Pull and Lift: Once you feel the lure dislodge or hook into the retriever chains, pull up firmly on the paracord cord to recover both the retriever and the lure. Reel in your slack fishing line as they rise.
Snag Recovery Guide by Structure Type
- Rocks & Boulder Crevices (Difficulty: Medium)Recovery Strategy: Vertical positioning is crucial. Allow the retriever to hit the lure hard. The heavy impact is usually enough to bounce the lure backward out of the crevice.
- Submerged Wood & Log Jams (Difficulty: Hard)Recovery Strategy: Avoid hard yanking. Gently bounce the retriever to let the chain loops tangle with the lure’s hooks or split rings, then pull the paracord firmly to straighten the hook and free the bait.
- Thick Weed Beds & Lily Pads (Difficulty: Easy)Recovery Strategy: The weight of the retriever is often enough to slide down and tear the weeds away. Simply lower the tool and give a steady pull on the retrieval line.
- Man-Made Structures & Cables (Difficulty: Hard)Recovery Strategy: Be cautious of sharp edges that can fray lines. Guide the retriever slowly. Bouncing the lead body will often knock the hooks free without line damage.
DIY vs. Commercial Lure Retrievers
- Homemade DIY RetrieverCons: Requires some basic assembly time, may look less polished than commercial retail models.
- Commercial Retail RetrieverCons: Expensive ($30 to $100+), bulky to store in kayaks, and still carries a risk of getting lost.
Environmental Stewardship & Conservation
Beyond the obvious financial benefit of saving your $20 crankbaits, using a lure retriever is a key part of sustainable fishing and environmental stewardship. Every lure left snagged at the bottom of a lake is a source of plastic and metal pollution. Lead sinkers left behind can leach toxic compounds into the water table, affecting local fish and bird populations. Abandoned monofilament and braided line present a major entanglement hazard for waterfowl and aquatic animals.
By investing a few minutes to build and use a DIY retriever, you contribute directly to conservation efforts, keeping Canadian fisheries clean, healthy, and pristine for future generations of anglers.
Vetted Materials & Gear for Lure Retrievers
Highly rated gear to assemble, tie, and deploy your homemade lure saver.

Paracord Planet Paracord (50+ Colors) – 1,000 Foot spools – 250 Foot spools – 100 feet Hank
Heavy-duty utility item perfect for assembling and customizing your DIY fishing lure retriever.

Dr.Fish 100 Pack Duo Lock Fishing Snaps Stainless Steel 26-220LB Lure Snaps Freshwater Saltwater Quick Change Speed Fishing Line Weights Clips
Heavy-duty utility item perfect for assembling and customizing your DIY fishing lure retriever.
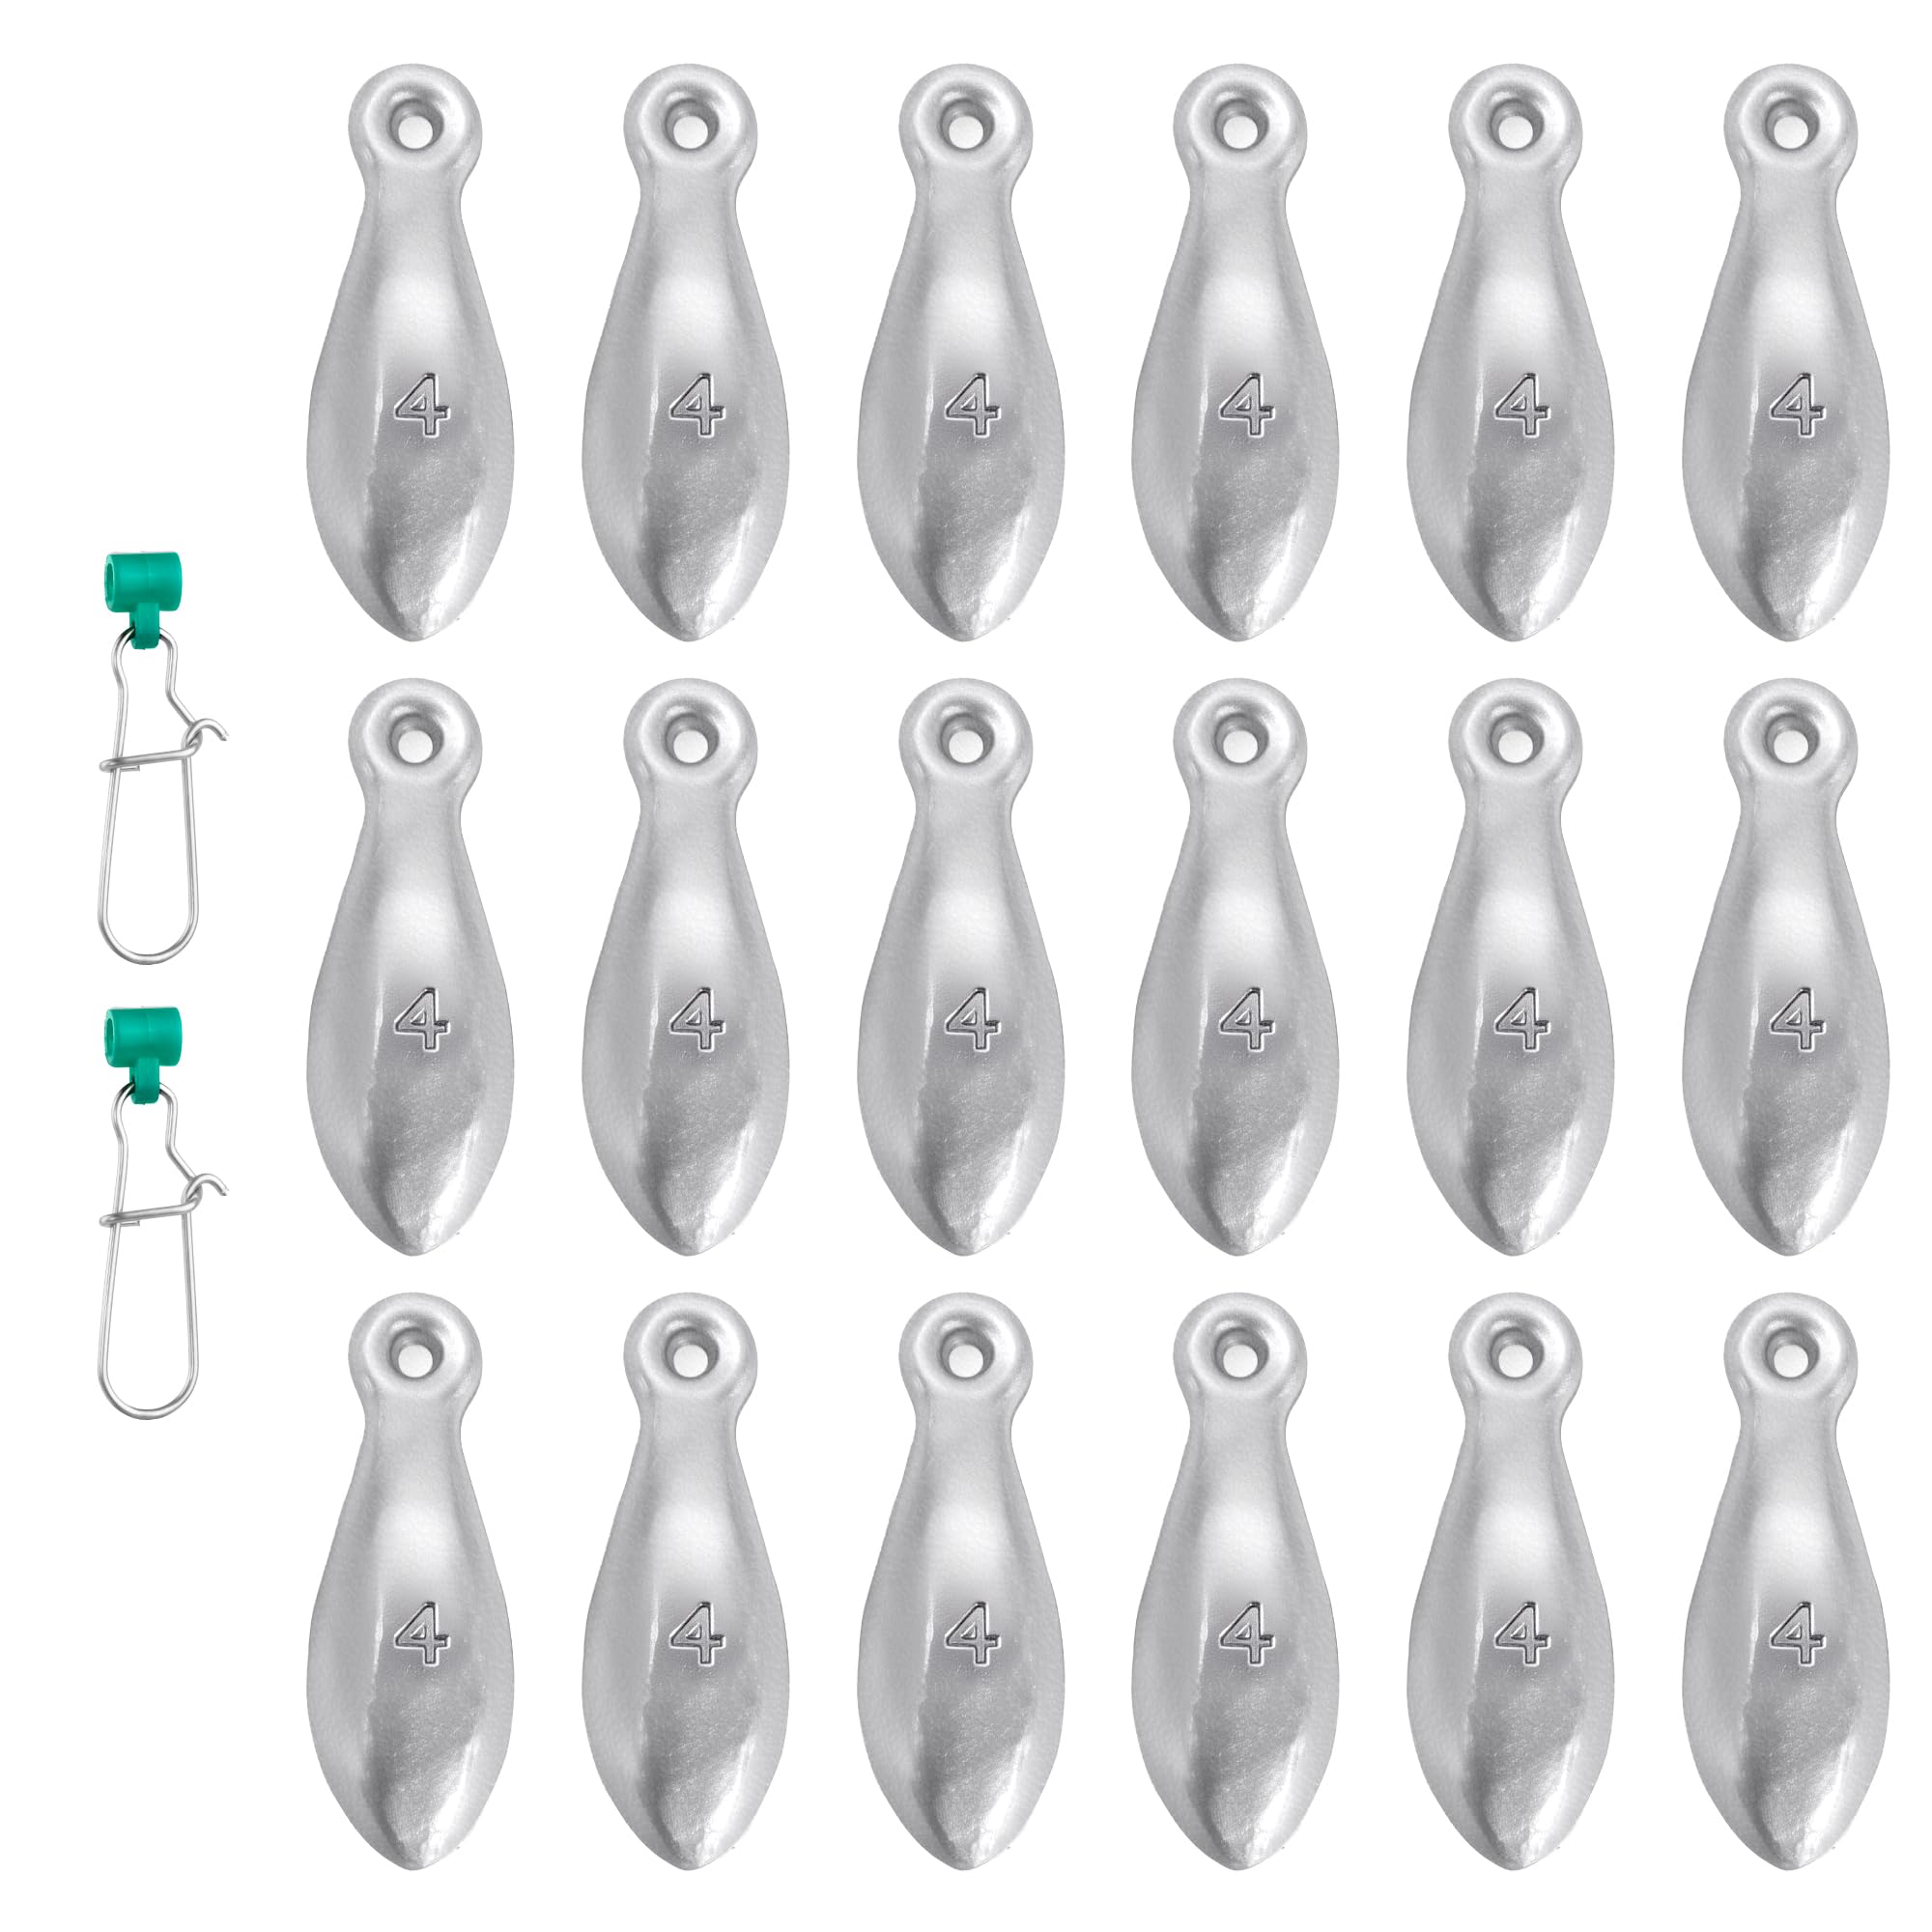
18PCS Fishing Weights Bank Sinkers Kit – 3oz/4oz Lead Sinkers with 2 Sinker Slides, Tangle-Free Saltwater & Freshwater Bullet Weights for Ocean, Pier, River Fishing – No Rolling, Line-Friendly Design
Heavy-duty utility item perfect for assembling and customizing your DIY fishing lure retriever.

Brady 23308 50 Feet Brass 16 Jack Chain
Heavy-duty utility item perfect for assembling and customizing your DIY fishing lure retriever.
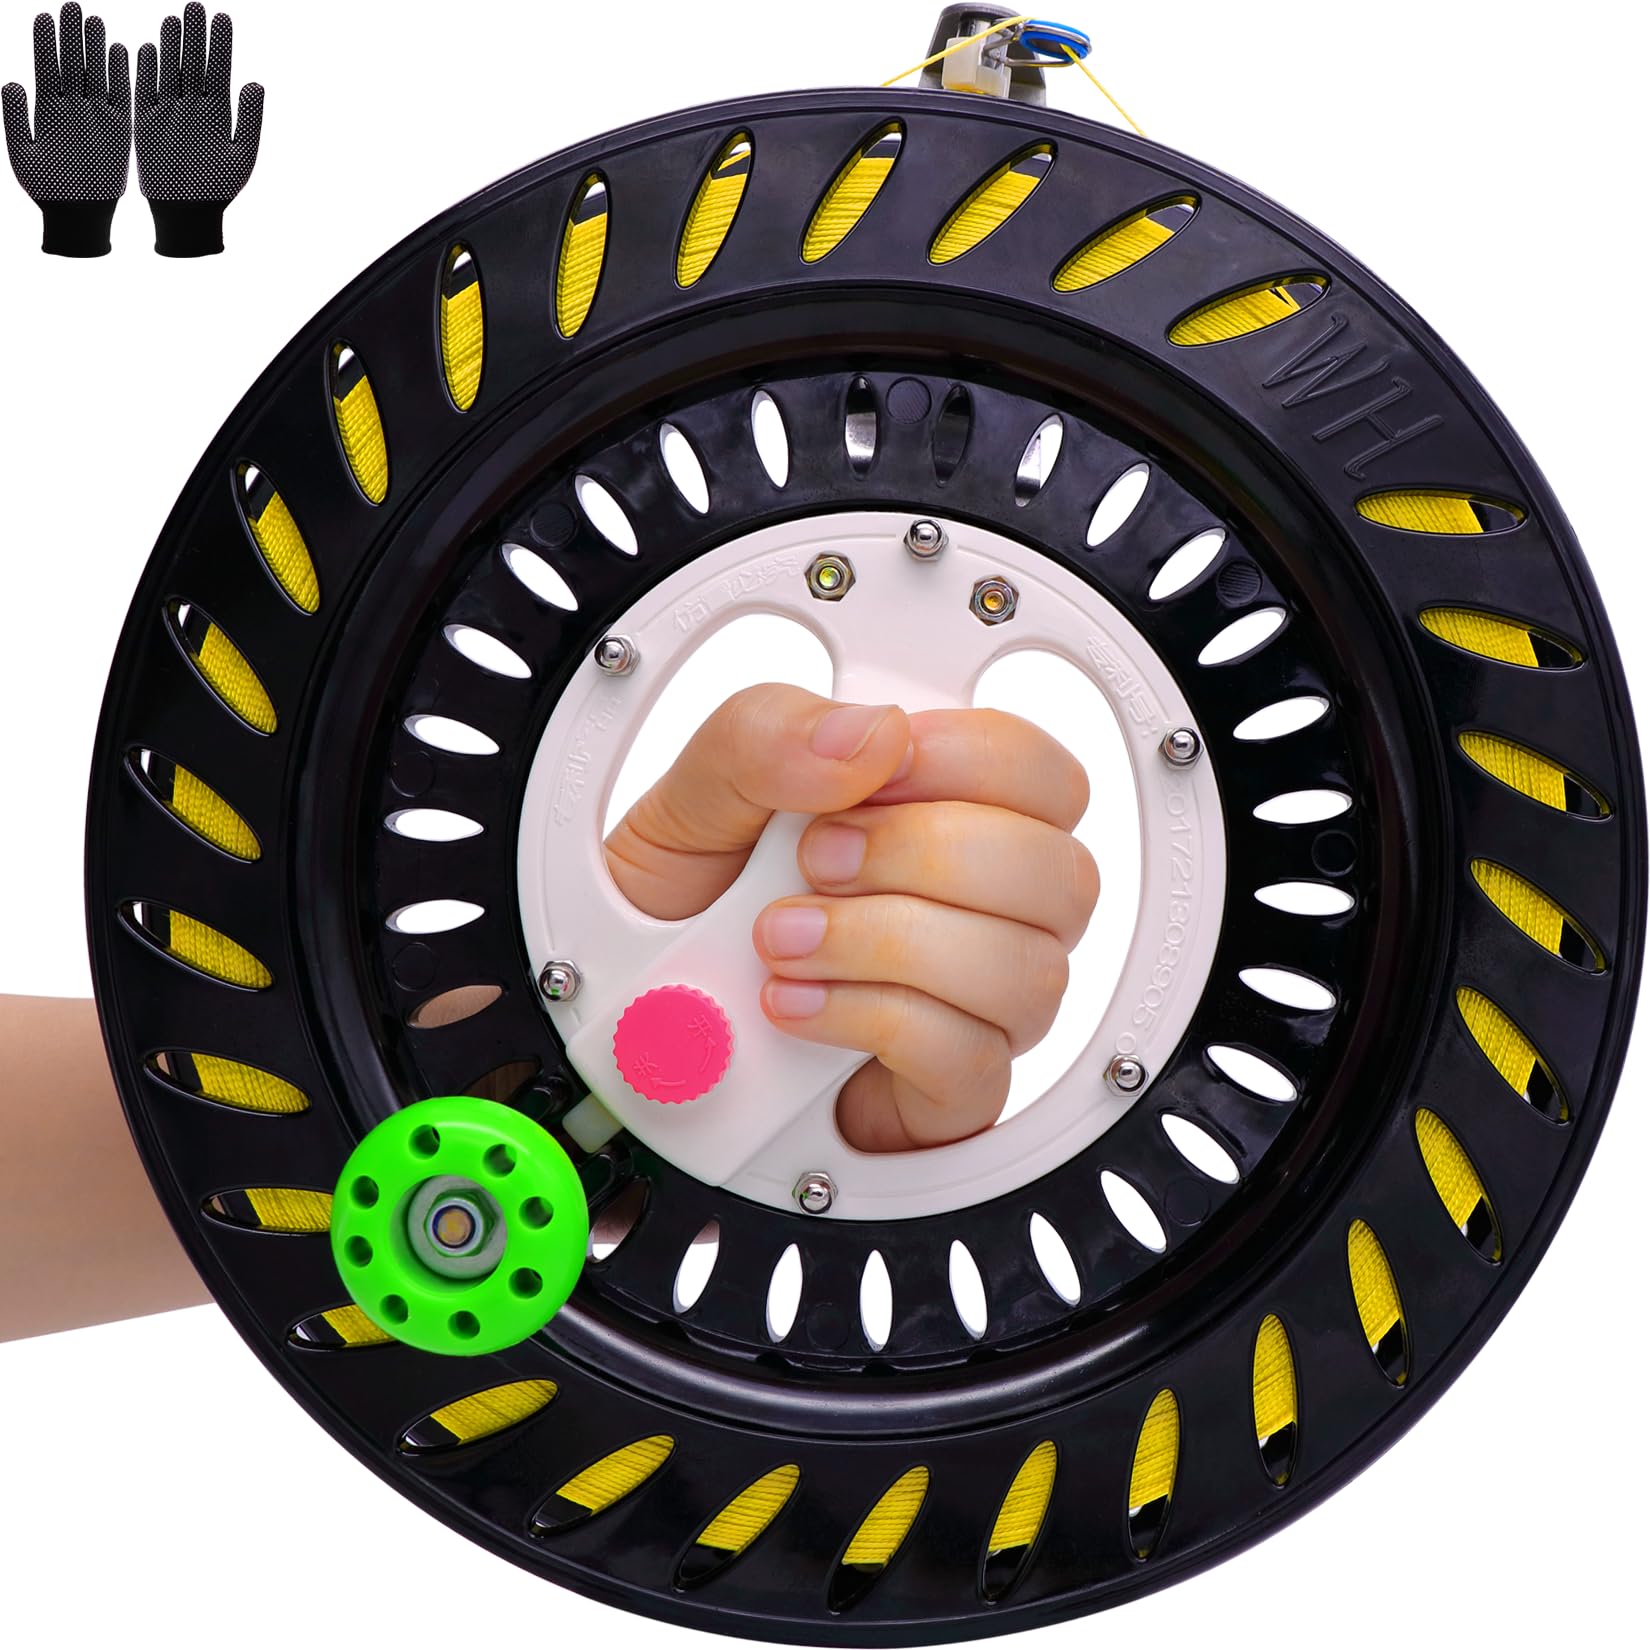
Kite Reel for Adults, 10.3 inches Dia with 2600ft String, Line Winder with Lock and Connector, Kite String Spool for Adults (Black)
Heavy-duty utility item perfect for assembling and customizing your DIY fishing lure retriever.
As an Amazon Associate, CanadaFever earns a small commission from qualifying purchases. This helps support our free content and conservation efforts.
Homemade Fishing Lure Retriever: Your Questions Answered
How does a fishing lure retriever work?
Lure retrievers slide down your main fishing line using a heavy weight (like a lead bank sinker). Once it hits the snagged lure, the physical momentum bumps it backward, freeing the hooks from rock crevices or wood. In tough wood snags, attached metal chain loops can grab the lure’s hooks or split rings, allowing you to pull it free with a separate strong cord.
Is it better to build or buy a lure retriever?
Building your own DIY retriever is highly recommended because it is extremely cheap, fully customizable, and takes under five minutes to assemble. Commercial slide retrievers are effective but cost significantly more, and there is always a risk of losing the tool itself on a permanent snag.
How do you retrieve a lure stuck in tree branches?
If the lure is stuck in underwater branches, slide the retriever down and bounce it gently so the chain loops can snag the hooks. If it is high in shoreline tree branches above the water, try the bow-and-arrow technique: pull the line back to create tension, open the reel bail, and let go. The rebound momentum often shakes the lure free.
What type of line should I use for the retriever cord?
Always use a dedicated, high-strength rope like 550 paracord or heavy-duty nylon cord on a winder spool. Never attach the retriever directly to your fishing line, as you need the high tensile strength of paracord to pull and dislodge snagged weights and hooks.