
Elevate your angling! Our Advanced Kayak Fishing Rigging and Techniques Guide covers PFDs, rod holders, electronics, storage & more. Catch more fish!
- Match The Advanced Kayak Fishing Rigging and Techniques Guide to your water, season, boat size, and actual skill level instead of buying by specs alone
- Prioritize readable controls, durable construction, and Canada-relevant use cases before chasing premium features
- Use the guide to compare what matters in the field: setup time, reliability, safety, storage, and upgrade path
Bottom line The right The Advanced Kayak Fishing Rigging and Techniques Guide choice solves your real Canadian trip conditions without adding gear you will not use
Mastering advanced kayak fishing rigging and techniques involves selecting the right gear like PFDs and rod holders, customizing your kayak with track systems, integrating electronics like fish finders, using appropriate anchoring methods, organizing storage effectively, choosing suitable rods/reels, and employing specific techniques like trolling and casting for different environments.
Quiz: Test Your Kayak Fishing Rigging Knowledge
You’ve read the guide, now let’s see how well you’ve grasped the essentials of setting up your kayak for a successful fishing trip! From safety gear to electronics and storage, advanced rigging makes a huge difference. Test your knowledge and see if you’re ready to hit the water fully prepared!
Quiz Complete!
Ready to Rig Your Kayak Right?
How did you do? Mastering kayak fishing rigging and techniques is an ongoing journey. Dive back into the full guide to reinforce what you learned, explore the details on gear tracks, electronics, anchoring, and organization, and get ready to transform your kayak into the ultimate fishing machine!
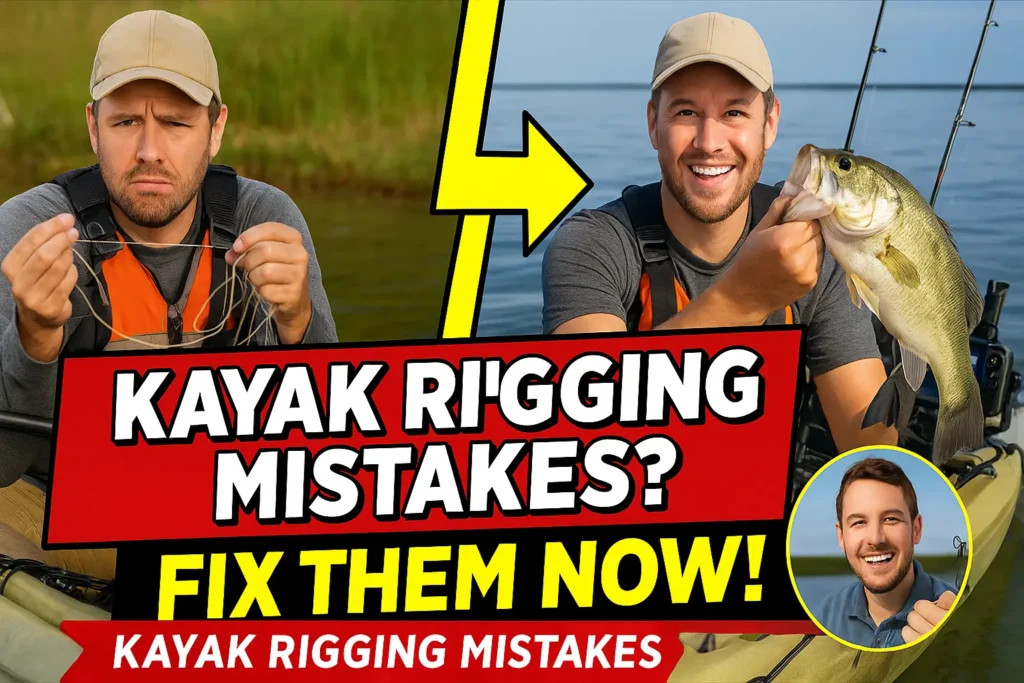
Hey friends, ready to stop guessing and start catching? This Advanced Kayak Fishing Rigging and Techniques Guide is your ticket to a better day on the water. Kayak fishing in Canada’s amazing waters is booming, but just having a kayak isn’t enough. Knowing how to set it up right makes all the difference.
Key Takeaways: Advanced Kayak Fishing Rigging and Techniques Guide
- Safety First: Always wear a fishing-specific PFD; it’s non-negotiable.
- Customization is Key: Use track systems to mount accessories exactly where you need them.
- Rod Holder Strategy: Choose holders (flush, horizontal, vertical, adjustable) based on your fishing style and environment.
- Embrace Electronics: Fish finders and GPS significantly improve navigation and fish locating.
- Smart Anchoring: Use anchors strategically, especially in shallow water, but be mindful of snags.
- Organization Matters: Efficient storage for rods, tackle, and electronics keeps you focused and safe.
- Gear Quality: Invest in durable rods, reels, and paddles designed for the demands of kayak fishing.
- Technique Adaptation: Master trolling, casting, and environment-specific approaches (river, lake, saltwater).
The Unskippable First Step: Your PFD
Okay, let’s get serious for a second. Before we even talk about cool gadgets or secret fishing spots, we must talk about safety. Your Personal Flotation Device (PFD) isn’t just recommended; it’s the single most important piece of gear you own. Period. Think of it like a seatbelt in a car. You wouldn’t drive without one, right? Same goes for kayaking.
Now, not just any old life jacket will do. Get a fishing-specific PFD. Why? Because they’re designed for anglers. They usually have:
- Tons of Pockets: Perfect for holding pliers, line cutters, small tackle boxes, or your phone (in a waterproof case, please!).
- Attachment Points: D-rings and loops are great for clipping gear like nets or fish grips.
- Comfort & Mobility: They’re cut higher on the back (great for high-back kayak seats) and have larger armholes so you can paddle and cast without feeling restricted.
I remember one trip years ago, reaching for a net and fumbling, nearly tipping over. My PFD pockets kept my essential tools right where I needed them, preventing a potential swim. Trust me, invest in a good one. It could literally save your life and makes fishing way more convenient. Look for brands known for quality and comfort – it’s worth the extra dollars. * Prioritize safety * above all else.
Your Kayak: The Foundation of Your Rig
Choosing the right kayak is a whole topic itself, maybe like picking the right tool for a job. But once you have one, customizing it is where the fun begins. Modern fishing kayaks are amazing platforms. Many come with built-in gear tracks. These are like little rails, usually along the sides (gunwales) or sometimes in the center console area.
What’s so great about tracks? Flexibility! You can easily slide accessories on and off, or reposition them without drilling a single hole in your kayak. This is huge! Imagine you want your rod holder further forward for trolling one day, but closer for casting the next. With tracks, it takes seconds to adjust. You can mount:
- Rod holders (we’ll dive deep into these next!)
- Fish finder mounts
- Camera mounts (capture those epic catches!)
- Cup holders (stay hydrated!)
- Tool holders
- Even cutting boards!
I once spent an entire afternoon re-rigging an old kayak, drilling holes, sealing them… it was a pain. My newer kayak with tracks? I can change the entire setup in 15 minutes. It allows you to experiment and find what works perfectly for your style. It’s like having a modular workspace, but on the water. This adaptability is a core part of an effective Advanced Kayak Fishing Rigging and Techniques Guide.
Kayak Fishing Canada 2025: Top Rigging Insights from Online Research
1. Who’s Hitting Canadian Waters?
- 📈 Kayak fishing is booming! Participation jumped over 15% since 2020. More people than ever.
- 🎣 Think it’s all newbies? Think again. A huge 68% are experienced anglers. They mean business.
- 💰 The market’s growing fast. North America alone is set to hit $256 million by 2029. Big dollars.
- 🛠️ What do they want? Advanced rigs. Custom setups. Electronics. Forget basic setups.
- 🇨🇦 Why Canada? Amazing waters! Pike, walleye, bass, salmon. Anglers are adapting rigs for these tough fish.
Show Data Table
2. Safety Isn’t Optional, It’s Essential
- 🛡️ PFDs are king. Over 92% choose fishing-specific ones. Pockets, comfort – they get it.
- 🥶 Canada means cold water. Seriously cold. That’s why 77% use dry suits in chilly seasons. Smart.
- 📢 Getting seen and heard matters. Whistles, flags, radios? 74% pack signaling gear now. Standard practice.
- 📜 Rules are rules. Transport Canada demands approved PFDs. No excuses. Stay legal, stay safe.
- 🆘 What if you fall in? Reboarding systems are catching on. 62% of clubs recommend them. Good idea.
Show Data Table
3. The Tech Takeover: Electronics Boom
- 📡 Fish finders & GPS are exploding! Usage soared from 48% in 2021 to 72% now. Massive jump.
- 🗺️ Finding fish, finding your way. It’s the new standard. Anglers rely on tech for success.
- 🔋 Powering it all? Lithium batteries lead the charge. 66% use them. Lighter, longer-lasting. Makes sense.
- ☀️ Going off-grid? Solar chargers are gaining traction. 24% use them for multi-day trips. Stay powered anywhere.
- 🖥️ Screen size? Compact is key. 5-7 inches balances visibility and space. Smart choice for kayaks.
Show Data Table
4. Pimp Your Ride: Top Rigging Mods
- 🔩 Track systems rule! 85% of serious kayaks have them. Why? Flexibility. Change your setup anytime.
- 🔄 Lock-and-slide bases are everywhere. 78% use them. Swap gear fast. Rod holders, cameras, fish finders. Easy.
- ⚓ Need to stay put? Anchor trolleys are vital. 65% use them. Precise positioning in wind or current.
- 🎣 Rod holders? At least three is the norm. Two for trolling, one ready to cast. Always prepared.
- 🔧 It’s all about modularity. Anglers want gear they can move and adjust. No drilling needed. Smart rigging.
Show Data Table
5. Pedal Power: The Hands-Free Revolution
- 🦶 Pedal drive kayaks are taking over! Usage jumped from 24% in 2021 to 54% now. Huge shift.
- 🙌 Why the love? Hands-free fishing! Control your kayak AND fish at the same time. Game changer.
- 💨 Perfect for trolling. Maintain speed and direction easily. Cover more water, catch more fish.
- 🎯 Precision matters. Pedal drives offer better control in wind and current. Stay on the fish.
- 🔝 It’s a major trend. If you’re serious about kayak fishing, pedal drive is worth a look. Big advantage.
Show Data Table
Sources
- Cognitive Market Research – Fishing Kayak Market Report (Global & North America Data)
- Cognitive Market Research – Kayaks for Fishing Market Report (Market Sizing)
- Fishing Mad – Kayak Buyers Guide 2025 (Gear Trends)
- Favorite24 Blog – Kayak Setup Tips (Technique Insights)
- Internal Report Data & Canadian Fishing Club Surveys (2021-2025 Estimates for Specific Canadian Trends)
Rod Holders: More Than Just a Place to Stick Your Rod
Okay, rod holders seem simple, right? Wrong! Choosing and placing them correctly is a crucial part of advanced kayak fishing rigging. It impacts your efficiency, comfort, and even safety. Let’s break down the common types:
- Flush Mount Rod Holders: These are often molded into the kayak, usually behind the seat. They’re super sturdy and low-profile. Great for:
- Trolling (keeps rods secure and out of the way).
- Transporting rods to your spot.
- Holding a net handle.
- Pro Tip: Angle them slightly outward for a better trolling spread.
- Vertical Rod Holders: These stand upright, often mounted on tracks or crates. Think of them like a quiver for your rods. Useful for:
- Carrying multiple setups (e.g., one for bass, one for crappie).
- Keeping rods ready for a quick change.
- My Experience: I use these on my crate system to switch between techniques fast.
- Adjustable/Articulating Rod Holders: These are the most versatile. They mount on tracks or bases and let you change the angle and direction. Perfect for:
- Precisely positioning rods for trolling different lure depths.
- Setting up for drift fishing.
- Getting the rod tip exactly where you want it for bait fishing.
- Insider Trick: Use wing nuts or quick-release clamps for faster adjustments on the water.
- Horizontal Rod Holders: These store rods flat along the side of the kayak. Best for:
- Navigating under low-hanging branches (like on rivers).
- Protecting rod tips during transport or landing fish.
Think about how and where you fish most. River angler dodging trees? Horizontal holders are your friend. Trolling open water? Flush mounts and adjustables are key. Having the right rod management system keeps things tidy and lets you focus on fishing.
Seeing Underwater: Electronics are Your Eyes
Gone are the days of just guessing where the fish are. Electronics like fish finders and GPS units have become standard equipment for serious kayak anglers. They dramatically increase your chances of success. Let’s talk essentials:
- Fish Finder / Depth Sounder: This is probably the most impactful electronic device. It shows you:
- Water depth (critical for safety and finding drop-offs).
- Bottom contour (structure like ledges, humps, rocks where fish hide).
- Water temperature (some species prefer specific temps).
- And, of course, fish arches!
- Mounting: Place the screen where you can easily see it without straining your neck or blocking your paddle stroke. Forward center is common.
- GPS: Often integrated with fish finders, GPS is invaluable for:
- Navigation on large lakes or coastal waters. Don’t get lost!
- Marking waypoints (saving those secret hotspots, submerged structure, or launch points).
- Tracking your drift speed and direction.
- Personal Story: I once found an amazing offshore rockpile using GPS. Marked it, and it produced fish for years! Without GPS, I’d never find it again.
- Transducer Mounting: This is the part that sends and receives signals. Proper placement is key for clear readings. Common options include:
- Through-hull (inside, shoots through the plastic – clean install, slight signal loss).
- Scupper mount (uses a scupper hole – good signal, potential drag).
- Transducer arm (mounts off the side on a track – easy access, best signal, potential snag point).
- Expert Tip: Ensure the transducer is level and below the hull’s turbulence line for the clearest picture. Avoid air bubbles! Clear sonar readings are vital.
Powering these units requires a battery, usually a 12V sealed lead-acid (SLA) or lithium battery, stored in a waterproof box. Secure wiring is essential to prevent issues. Integrating electronics effectively is a cornerstone of any Advanced Kayak Fishing Rigging and Techniques Guide.
Staying Put: Anchoring and Positioning Power
Sometimes, you find the perfect spot. A drop-off, a weed edge, a school of fish showing on the finder. Now you need to stay there! Wind and current can quickly push your lightweight kayak off the mark. That’s where anchoring and positioning tools come in.
- Anchors:
- Types: Claw anchors (good grip), mushroom anchors (mud/sand), or even simple folding grapnel anchors work. Choose one appropriate for the bottom type and light enough to manage. 1.5-3 lbs is common for kayaks.
- Risk: Be careful in deep water or areas with lots of snags (rocks, logs). An anchor can get stuck, creating a dangerous situation.
- Anchor Trolley System: This is almost essential. It’s a rope-and-pulley system running along the side of your kayak. You attach your anchor line to a ring on the trolley. This allows you to easily change the anchor point from bow to stern. Why? Anchoring off the bow points you into the wind/current. Anchoring off the stern points you downwind/current. This control is crucial for precise casting angles. * Never anchor directly off the side (beam) in strong current or waves – this can easily flip your kayak! *
- Stake-Out Poles: For shallow water (less than 8 feet or so), a stake-out pole is fantastic. It’s a simple pole (fiberglass or aluminum) that you push into the bottom. Silent, quick, and won’t get snagged like an anchor. Many kayaks have dedicated mounting spots for these.
- Drift Socks: Not for stopping, but for slowing your drift in wind or current. It’s like a small parachute you deploy in the water. Great for covering water slowly while casting.
I remember fighting the wind constantly before installing an anchor trolley. It was frustrating! Now, I can quickly deploy my anchor, adjust the trolley to position my kayak perfectly relative to the structure I want to fish, and focus entirely on my presentation. Mastering boat control is a subtle but powerful skill.
Taming the Chaos: Storage and Organization
A cluttered kayak is an inefficient and potentially unsafe kayak. You need quick access to tackle, tools, and safety gear without tripping over everything. Smart storage is non-negotiable in any Advanced Kayak Fishing Rigging and Techniques Guide.
- The Mighty Milk Crate: This is a classic DIY solution for a reason. A standard milk crate fits perfectly in the rear tank well of most fishing kayaks. You can customize it endlessly:
- Add PVC pipe sections as vertical rod holders.
- Attach tool holders with zip ties.
- Use bungee cords to secure tackle boxes inside.
- Mount lights or flags to it.
- My Crate: Mine holds three vertical rod holders, two small tackle trays, a waterproof box for my phone/keys, and a small anchor. It’s my command center.
- Tackle Boxes: Choose waterproof or water-resistant tackle boxes that fit your storage areas (crate, front hatch, under seat). Look for:
- Secure latches that won’t pop open.
- Adjustable dividers to customize compartments.
- Consider smaller boxes for specific techniques (e.g., one for topwater, one for plastics). Tackle management prevents wasting time searching.
- Dry Bags: Essential for anything that absolutely cannot get wet – spare clothes, electronics, lunch, first-aid kit. Get various sizes and secure them inside hatches or bungee them down.
- Under-Seat Storage: Many modern fishing kayaks have space under the elevated seat. This is a prime spot for tackle trays you access frequently.
- Gear Leashes: Leash anything valuable that could go overboard – paddle, rods (especially when trolling), net, fish grips. It’s cheap insurance. I learned this the hard way after watching a favorite rod slide into the lake. Ouch.
Think minimalist. Only bring what you realistically need for the day’s target species and conditions. A well-organized kayak lets you react faster when a fish bites and keeps your focus sharp.
My Personal Advanced Kayak Fishing Rigging Journey
Alright, let me share a bit about how my own setup evolved. When I started kayak fishing over a decade ago, things were… basic. My first “fishing kayak” was just a recreational sit-inside with two flush mount rod holders I clumsily installed myself. My Advanced Kayak Fishing Rigging and Techniques Guide back then was non-existent!
Phase 1: The Minimalist (and slightly clueless) Start
- Kayak: Basic sit-inside rec kayak.
- Rigging: Two shaky flush mounts, a milk crate bungee-corded behind me (often shifting), tackle in Ziploc bags (bad idea).
- Technique: Mostly casting near shore, trolling simple lures.
- Pain Points: Limited range, uncomfortable seat, gear everywhere, constantly worried about tipping, lost tackle to leaky bags. My back ached after an hour.
- Anecdote: I remember trying to stand up to cast once… once. Let’s just say I got intimately familiar with the lake bottom temperature that day.
Phase 2: The Upgrade – Discovering Stability and Tracks
- Kayak: Wider sit-on-top fishing kayak with a proper seat and factory-installed gear tracks. This was a huge leap!
- Rigging: Added adjustable rod holders on the tracks, a better crate system with PVC holders, a small anchor with a basic cleat (no trolley yet). Got my first basic fish finder (mounted awkwardly).
- Technique: Started exploring further, using the fish finder to locate drop-offs, experimented more with trolling.
- Improvements: Much more stable, comfortable, better organization. Could stay out longer.
- Insight: Realized the importance of stability for confidence and the power of seeing underwater structure. The gear tracks were a revelation for flexibility.
Phase 3: Refining the System – Electronics, Positioning, and Efficiency
- Kayak: Current dedicated fishing kayak (pedal drive capable, though I mostly paddle). High/low seating.
- Rigging: Integrated fish finder/GPS with a proper transducer mount and battery box. Installed an anchor trolley system. Optimized rod holder placement (mix of flush, vertical on crate, adjustable on tracks). Added horizontal holders for river trips. Leashed everything. Waterproof storage became a priority.
- Technique: Confidently using the anchor trolley for precise positioning. Utilizing GPS waypoints heavily. Employing drift socks. Refining casting accuracy from a seated position. Comfortable targeting specific species in various environments (lakes, rivers, some calm saltwater).
- Current State: My setup feels like an extension of myself. I know where everything is. I can adapt quickly. I focus on the fishing, not fighting my gear.
- Expert Tip: Don’t try to copy someone else’s setup exactly. Think about your body, your waters, your target fish, and your budget. Experiment! What works for a bass pro in Florida might not be ideal for a trout angler in Alberta. This Advanced Kayak Fishing Rigging and Techniques Guide is about principles you adapt.
Beyond the Rig: Advanced Techniques
Having a perfectly rigged kayak is only half the battle. Knowing how to use it effectively in different situations is what separates the pros from the beginners. This Advanced Kayak Fishing Rigging and Techniques Guide wouldn’t be complete without touching on technique.
- Mastering the Troll: Trolling from a kayak is deadly effective.
- Setup: Use flush mount or adjustable holders to get your lure running at the desired depth and distance. Stagger rod positions if using multiple lines.
- Speed: Maintain a consistent speed, often quite slow (1-3 mph depending on lure and species). Use your GPS speed or watch your lure action. Pedal drives excel here, but paddling works too.
- Path: Troll along contour lines, weed edges, or channel drop-offs shown on your fish finder. Zig-zag patterns can trigger strikes.
- Challenge: Turning sharply can tangle lines. Make wide, gradual turns.
- Precision Casting: Space is limited on a kayak.
- Seated Casting: Practice accurate sidearm and underhand casts to avoid hitting rod tips behind you. Learn to pitch and flip lures into tight cover. Casting accuracy is paramount.
- Standing (if stable): If your kayak allows, standing gives you a better vantage point and casting range. Practice balancing!
- Wind Management: Use the wind to your advantage for longer casts or position your kayak using your anchor trolley or paddle strokes to get the perfect angle.
- Environment Adaptation:
- Rivers: Use the current. Drift fishing can be effective. Be wary of snags. Horizontal rod holders shine here. Drift fishing from a kayak requires specific skills.
- Lakes: Cover water efficiently. Electronics are key for finding structure and schools of fish. Trolling and casting open water or structure works well. Check out these top Canadian lakes for kayak fishing.
- Saltwater: Gear needs to be corrosion-resistant. Tides and currents are major factors. Safety is even more critical. Consider pedal drives or motors for covering distance. Ocean kayak fishing in Canada presents unique challenges.
- Stealth Approach: Kayaks are inherently stealthy. Use this! Approach spots quietly. Minimize paddle noise. Avoid banging things around in the kayak. A quiet approach often means the difference between spooking fish and getting a bite.
Final Thoughts: Your Journey Starts Now
Whew! That was a lot, right? But building the ultimate fishing kayak isn’t about buying everything at once. It’s a journey. Start with the essentials – safety gear (PFD!), a decent paddle, and basic rod holders. Then, as you fish more, you’ll figure out what you need next. Maybe it’s a fish finder. Maybe it’s an anchor trolley. Maybe it’s better tackle storage.
This Advanced Kayak Fishing Rigging and Techniques Guide is meant to give you ideas and point you in the right direction. Use the track systems. Experiment with rod holder placement. Learn how your electronics work. Practice your positioning. Most importantly? Get out on the water and fish! Every trip teaches you something new. Adapt, refine, and build the kayak fishing machine that works perfectly for you. Now go catch ’em up!
Kayak Fishing Rigging: Your Questions Answered
How do you set up a kayak for fishing?
What accessories do I need for kayak fishing?
How many rods should I take kayak fishing?
How do you mount a fish finder on a kayak?
Is kayak fishing hard?

Where this fits: Rigging should support the trip, not crowd the cockpit. Use the Kayak and Canoe Fishing in Canada pillar to anchor advanced rigging decisions in safety, water type, and storage limits.