Learn how to make upcycled fishing lures! Easy DIY steps to turn old tackle into keychains, decor, or custom lures. Eco-friendly & fun!
- Use Shocking Ways How to Make Upcycled Fishing Lures! to match species behaviour, habitat, season, and presentation to Canadian water conditions
- Check local regulations before fishing; limits, closures, bait rules, and licences can vary by province and waterbody
- Focus on practical setup: where to fish, what to cast or troll, how deep to work, and when to move
Bottom line Shocking Ways How to Make Upcycled Fishing Lures! gets simpler when you pair current rules with the right habitat, timing, and presentation
You can easily make upcycled fishing lures by cleaning old lures, removing hooks, repainting or decorating them, and repurposing them into keychains, decor, or even modified fishing lures.
Ready to turn that forgotten tackle box treasure into something awesome? Learning how to make upcycled fishing lures is a fantastic, eco-friendly way to give old gear a second chance and keep fishing memories alive. It’s simpler than you think!
Quiz: Upcycled Fishing Lures
Ready to turn forgotten tackle box treasures into something awesome? Learning how to make upcycled fishing lures is a fantastic, eco-friendly way to give old gear a second chance. Test your knowledge on the materials, methods, and creative ideas for transforming old lures!
Quiz Complete!
Dive Deeper into Upcycling!
You’ve tested your knowledge on upcycling fishing lures! But there’s so much more to explore – from detailed metal restoration techniques to the art of remolding soft plastics and discovering endless creative project ideas. Keep reading the article to become a true upcycling pro and give your old tackle a brand new purpose!
Why let those old spinners and spoons just rust away? They hold stories! And with a little creativity, they can become unique gifts, cool decorations, or even effective, custom lures for your next trip. Let’s dive into giving that old tackle a brand new purpose.
Key Takeaways
- Eco-Friendly Crafting: Upcycling prevents plastic and lead waste from entering landfills while keeping fishing memories alive.
- Metal Restoration: Cleaning old metal spoons with wire brushes and applying primer before enamel paint gives a durable finish.
- Split Ring Pliers: Essential tool for safely removing old rusted treble hooks and attaching split rings.
- Endless Projects: Transform old lures into keychains, shadow boxes, wind chimes, or customized hybrid fishing baits.
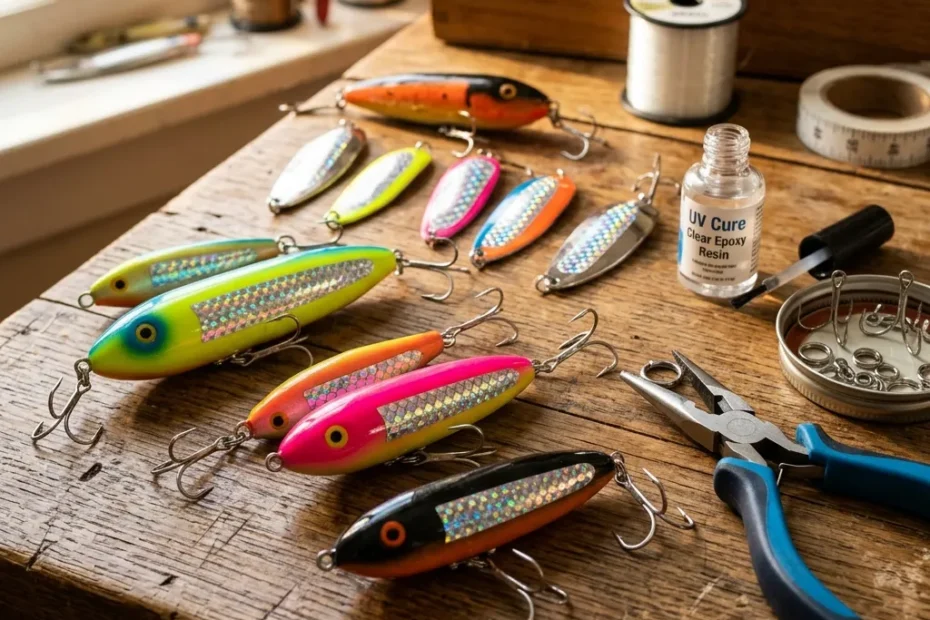
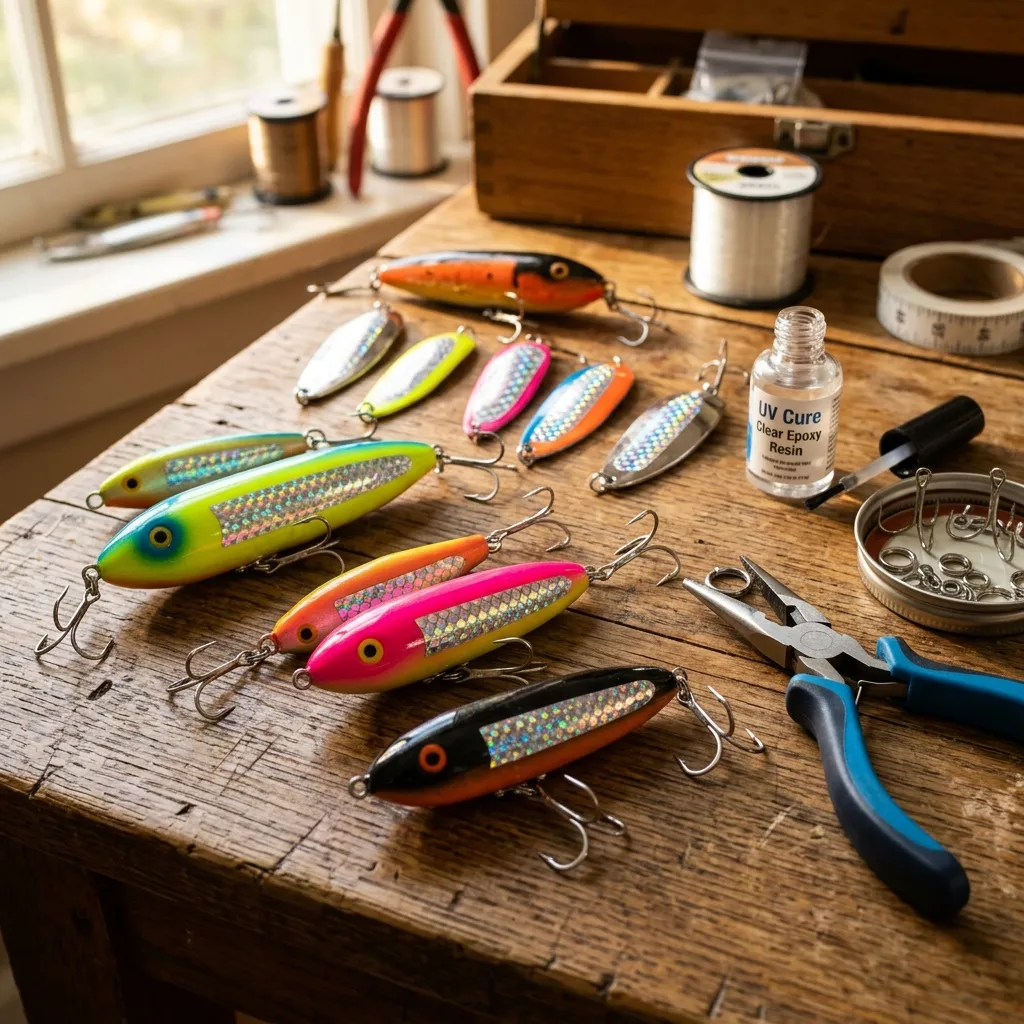
Gathering Your Upcycling Arsenal: Materials You’ll Need
Alright, before we jump into the fun part, let’s get our gear ready. Think of it like prepping your tackle box before a big fishing trip. You need the right stuff! Knowing how to make upcycled fishing lures starts with having the essential tools and supplies.
Here’s what you’ll likely need:
- The Stars: Your collection of old fishing lures. Dig deep! Spoons, spinners, plugs, even beat-up soft plastics. Anything goes.
- The Muscle:
- Split Ring Pliers: Absolutely essential for safely removing those stubborn hooks and split rings. Trust me, trying without them is a recipe for frustration (and maybe a poked finger!).
- Wire Cutters: Good for snipping off old wire leaders or trimming parts.
- The Glue Crew:
- Hot Glue Gun: Quick fixes and attaching bulky decorative bits. Easy peasy.
- Epoxy Resin: Super strong bond, great for durability, especially if the item will see some handling. It gives a nice clear coat too.
- Super Glue (Cyanoacrylate): For smaller, precise attachments. Dries fast!
- The Makeover Kit:
- Sandpaper (various grits): To rough up surfaces so paint sticks better. Start coarse, finish fine.
- Primer: Helps paint adhere, especially on metal or slick surfaces. Don’t skip this for metal lures!
- Paints: Acrylic paints are versatile and clean up easily. Enamel paints offer a harder, more durable finish. Spray paints work too for quick coverage. Think vibrant colors, metallics, even glow-in-the-dark!
- Clear Varnish or Sealant: Protects your masterpiece! Choose gloss or matte finish. Spray varnish is often easiest.
- The Bling: This is where your creativity shines!
- Beads, glitter, small charms, feathers, sequins, nail polish for fine details, permanent markers.
- Maybe even bits of fabric, yarn, or reflective tape.
- The Final Touch (for non-lure projects):
- Keychain rings, clips, jump rings.
- Small eye screws (if you need a new attachment point).
- Shadow box frames, small wood plaques, candle holders (for mounting).
Having these items on hand makes the process smooth and lets your imagination run wild. It’s like having a well-stocked tackle box makeover station!
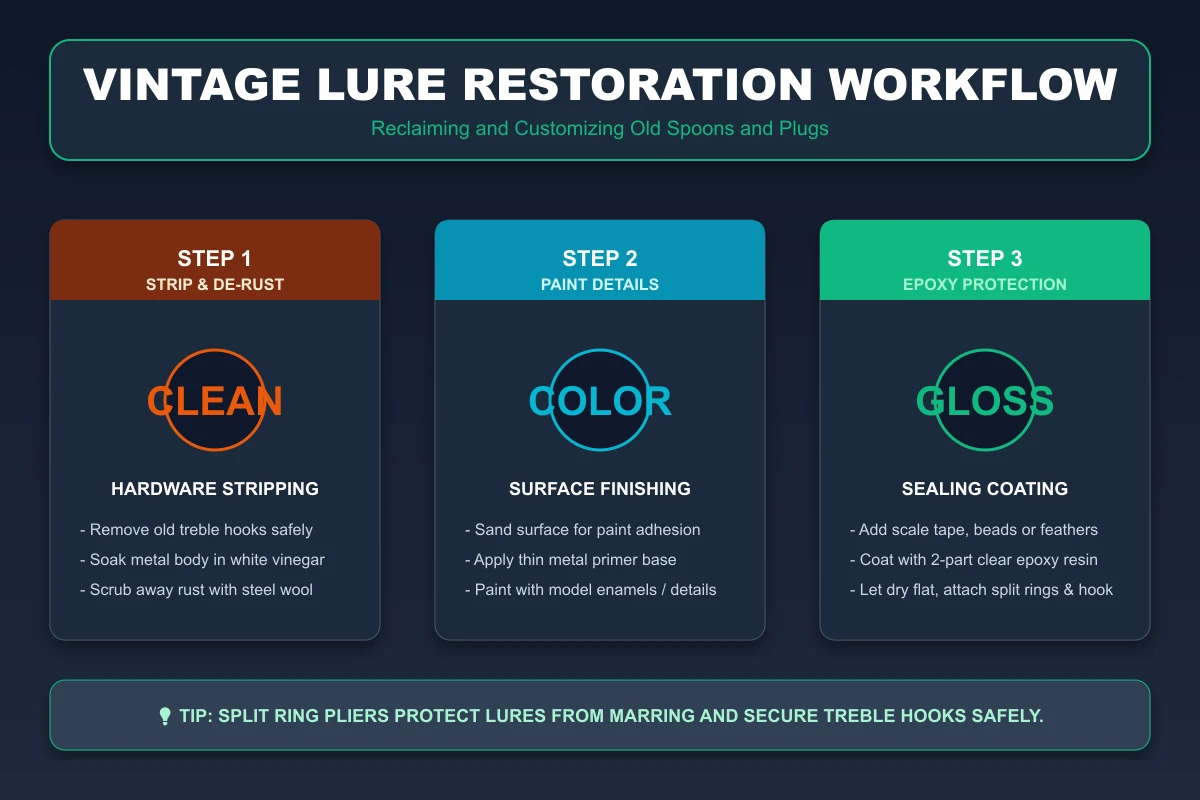
How to Upcycle and Restore Fishing Lures
A simple step-by-step method to give old lures a brand new purpose.
1. Strip and Clean
Use split ring pliers to safely remove rusted hooks and loops. Soak metal spoons in white vinegar to strip scale, then scrub clean with steel wool.
2. Sand and Prime
Slightly scuff the lure body with fine sandpaper to promote adhesion. Apply a thin coat of metal or plastic primer to prevent future corrosion.
3. Paint and Decorate
Apply model enamel or acrylic craft paint in vibrant, layered colors. Stick on holographic adhesive scale tape or add custom eyes and glitter.
4. Clear Coat Seal
Finish with a clear protective layer of 2-part epoxy resin or clear varnish. This seals the paint, adding a high-gloss finish and ultimate durability.
Beyond the Tackle Box: Creative Upcycling Ideas
So, you’ve got a pile of old lures. Now what? Sure, you could try to make them fishable again, but thinking outside the tackle box opens up a world of cool possibilities! Learning how to make upcycled fishing lures isn’t just about fishing; it’s about crafting and memory-keeping too.
Here are some ideas to get your creative juices flowing:
- Fishing Lure Keychains: This is the classic go-to. It’s super simple and practical.
- Carefully remove the hooks using split ring pliers. Safety first!
- Clean the lure. A little soap and water, maybe a gentle scrub.
- Attach a sturdy keychain ring or a carabiner clip directly to the lure’s existing split ring or eyelet. Voila! A unique accessory. I made one from my grandpa’s old red devil spoon – it’s a great conversation starter.
- Memory Lane Shadow Box: Got lures tied to specific catches or trips? Display them!
- Gather lures, maybe photos from that trip, a ticket stub, a map snippet, or even dried reeds from the lake.
- Arrange everything aesthetically in a shadow box frame. You can use hot glue or epoxy to fix items in place. It’s a fantastic way to honor those fishing memorabilia.
- Fishing-Themed Party Decor: Planning a birthday for an angler or a lake-house gathering?
- Clean up old bobbers and lures (hooks removed, obviously!).
- Paint them in party colors if you like.
- Attach name tags with ribbon to bobbers for unique place cards.
- String lures together (carefully!) to make a quirky garland.
- Quirky Home Decor: Add a touch of angler charm to your space.
- Candle Holder Accent: Glue a cleaned, hookless lure (maybe a cool old plug) onto the base of a simple glass hurricane vase or candle holder. Instant rustic chic.
- Cabinet Knobs/Drawer Pulls: Drill a small hole in the back of a sturdy lure (like a metal spoon) and attach it to a cabinet screw post. Needs some DIY skill, but looks amazing.
- Wall Art: Arrange several interesting lures on a piece of driftwood or a painted board. Hang it up!
These are just starting points. Think wind chimes, zipper pulls, ornaments… the possibilities are endless when you start repurposing gear.
Metal Lure Makeover: From Rusty to Radiant
Metal lures like spoons and spinners are prime candidates for upcycling. They’re durable and often have interesting shapes. But sometimes they look a bit… sad. Rusty, dull, paint chipped. No worries! Giving them a new lease on life is totally doable. This part of learning how to make upcycled fishing lures is like a mini restoration project.
Let’s break down the process:
Phase 1: The Teardown (Disassembly)
- Hooks Off! First things first, get those hooks off using your split ring pliers. Be careful, even old hooks can be sharp. Set them aside (or dispose of them safely).
- Rings and Things: Remove any split rings, swivels, or other hardware you don’t want or plan to replace. Keep track of small parts if you intend to reuse them. Sometimes just replacing a rusty split ring makes a big difference.
Phase 2: The Deep Clean
- Wash Away the Grime: Give the lure body a good scrub with soap and water. An old toothbrush works wonders for getting into crevices.
- Rust Busting: If there’s rust or corrosion, attack it!
- Mild Rust: A wire brush (brass bristles are less abrasive) or steel wool can often do the trick.
- Stubborn Rust: You might try soaking the lure in white vinegar for a few hours, then scrubbing. Rinse thoroughly afterward!
- Dry Completely: Make sure the lure is bone dry before moving on. Compressed air can help blast water out of nooks.
Phase 3: Prep for Paint
- Scuff it Up: Smooth, shiny surfaces don’t hold paint well. Lightly sand the entire surface with fine-grit sandpaper (maybe 220 grit). You’re not trying to remove all the old paint (unless it’s flaking badly), just creating a slightly rough texture for the new paint to grab onto.
- Wipe Down: Clean off any sanding dust with a tack cloth or a slightly damp rag.
Phase 4: The Color Pop (Painting)
- Prime Time: Apply a thin coat of metal primer. This makes a HUGE difference in paint adhesion and durability. Let it dry completely according to the manufacturer’s instructions.
- Lay Down the Color: Now for the fun part! Apply your chosen paint.
- Thin Coats: Multiple thin coats are always better than one thick coat. Avoid drips!
- Techniques: Brush painting gives control. Spray painting gives smooth coverage (use light passes). Airbrushing lures allows for detailed patterns.
- Get Creative: Try fades, spots, stripes, or even use stencils. Nail polish works great for adding small dots or eyes.
- Drying is Key: Let each coat dry fully before adding the next or moving to varnish. Patience pays off!
Phase 5: Seal the Deal (Varnish)
- Protect Your Work: Apply 1-2 thin coats of clear varnish or sealant (like an acrylic spray sealer or clear epoxy). This protects the paint from chipping, adds gloss (or a matte finish, your choice), and makes it more water-resistant if it might get wet. Again, let it dry completely.
Phase 6: Putting it Back Together (Reassembly)
- Hardware On: Reattach any split rings or swivels (use new ones if the old ones were rusty).
- Add the Bling: If you’re adding beads, feathers (maybe tied on with wire or thread), or other decorative elements, now’s the time. Use epoxy or super glue for secure attachment.
- Final Purpose: Attach a keychain ring, eye screw for hanging, or maybe even new, sharp hooks if you’re creating a revitalized, custom lure for fishing!
This process transforms a forgotten piece of metal into something eye-catching and useful again. It’s a rewarding part of mastering how to make upcycled fishing lures.
Soft Plastic Surgery: Reshaping and Reviving Baits
Soft plastic baits – worms, grubs, swimbaits – often end up torn, missing tails, or just unused in the bottom of the bag. Tossing them feels wasteful, right? Good news! You can definitely upcycle these too. Learning how to make upcycled fishing lures includes giving these flexible fellas a second act. It might involve a bit more “surgery” or even melting!
Here’s the lowdown on reviving soft plastics:
Method 1: Cut, Combine, and Create (No Melting)
This is great for plastics that are mostly intact but maybe torn or just boring.
- Clean ‘Em Up: Gently wash the soft plastics with mild soap and water. Dirt and fish slime won’t help with adhesion. Pat them dry.
- The Chop Shop: Get creative with a sharp craft knife or scissors.
- Trim Damage: Cut off torn sections cleanly.
- Combine Colors/Shapes: Cut interesting parts from different lures (e.g., the curly tail from one worm, the body of another).
- Modify Shapes: Cut notches, add fins, shorten or lengthen baits.
- Sticking Together (Optional): Sometimes you can “weld” pieces together. Carefully use a lighter or soldering iron to briefly melt the cut edges of two pieces and press them together. This takes practice and good ventilation! Alternatively, specialized soft plastic glue exists, but results can vary. Often, just using the modified single piece is easier.
- Paint & Decorate:
- Plastic-Friendly Paint: Regular acrylics might flake off flexible plastic. Look for paints designed for fabric or flexible surfaces. Some anglers use permanent markers (like Sharpies) for patterns or coloring tips. Lure eyes can often be glued on with super glue.
- Embed Glitter/Flair: You can sometimes press glitter or small reflective flakes into the surface while the paint is tacky, or mix it into a clear sealant.
- Seal (Optional): A flexible clear coat might help protect added paint, but it can sometimes stiffen the bait. Test on a scrap piece first.
Method 2: The Meltdown (Remolding)
If you have a bunch of scrap soft plastics, you can melt them down and pour them into new shapes! This is more advanced but offers total customization.
- Safety First! Melting plastic releases fumes. Work in a VERY well-ventilated area, preferably outdoors or with an exhaust fan. Wear heat-resistant gloves and eye protection. A respirator rated for organic vapors is highly recommended.
- Sort by Type/Hardness: Different plastics melt at different temps and have different hardness. Try to melt similar types together if possible. Cut the scraps into small, uniform pieces.
- Melting Pot: Use a dedicated pot you won’t use for food (a cheap one from a thrift store is perfect). A microwave-safe glass measuring cup (like Pyrex) can also work for small batches in the microwave. Never use your kitchen microwave for this if you can avoid it; dedicate an old one if possible.
- Gentle Heat: Heat the plastic slowly and stir frequently.
- Microwave: Heat in short bursts (15-30 seconds), stirring in between. Don’t overheat or burn it!
- Stovetop/Hot Plate: Use low heat and stir constantly.
- Additives (Optional): While molten, you can stir in liquid plastic colorant, glitter, or scent specifically made for lure making.
- Pouring: Carefully pour the molten plastic into lure molds (you can buy these online – fishing supplies shops often carry them). Work quickly but safely.
- Cooling: Let the molds cool completely according to the plastic/mold instructions. Don’t rush it.
- Demolding: Carefully remove your new plastic baits! Trim any excess flash (thin plastic seepage) with scissors or a craft knife.
Remolding takes practice, but it’s the ultimate form of sustainable fishing craft – turning pure scrap into usable lures! Whether cutting or melting, you’re saving plastic from the landfill.
Creative Upcycling Projects
- 1. Keychain (Difficulty: Very Easy)Materials Needed: Keychain split rings and connector clips.Best For: Quick gifts, personal accessories, and using single cool lures.
- 2. Shadow Box Art (Difficulty: Easy to Medium)Materials Needed: Shadow box frames, hot glue/epoxy, and other memorabilia (photos, maps, etc.).Best For: Displaying memorable lures and creating personalized fishing decor.
- 3. Party Decor (Difficulty: Easy)Materials Needed: Clean bobbers, ribbon/string, paper tags, and paint (optional).Best For: Fishing-themed parties and adding a fun touch to family events.
- 4. Candle Holder Accent (Difficulty: Easy)Materials Needed: Simple glass candle holder or hurricane vase, and strong epoxy glue.Best For: Rustic cabin home decor, especially using visually interesting plugs.
- 5. Revitalized Fishing Lure (Difficulty: Medium)Materials Needed: Sandpaper, primer, paint, varnish, and new hooks/split rings.Best For: Reusing the lure for actual fishing, custom colors, and practicing painting techniques.
- 6. Remolded Soft Plastics (Difficulty: Medium to Hard)Materials Needed: Heat source (microwave/hot plate), melting pot, molds, colorant/glitter, and safety gear.Best For: Using up scrap plastic, creating completely new baits, and sustainable crafting.
Pro Tips & Tricks for Awesome Results
Okay, you’ve got the basics down for how to make upcycled fishing lures. But like any good angler knows, a few extra tricks can make all the difference between a snag and a trophy catch (or in this case, a trophy craft!). Here are some insider tips I’ve picked up along the way:
- Material Matters: When picking lures to upcycle, think about their destiny.
- Sturdy Metal Lures (Spoons, Spinners): Great for keychains, decor, or repainting for fishing. They hold up well.
- Old Plugs/Crankbaits: Often have cool shapes perfect for decorative pieces. Their buoyancy can be neat for floating keychains (test first!).
- Soft Plastics: Best for remelting/remolding or minor modifications. Less ideal for keychains unless sealed well.
- Surface Prep is NON-Negotiable: I can’t stress this enough. If you’re painting, especially metal, take the time to clean, sand, and prime. I learned this the hard way when my first painted spoon started flaking after a week because I skipped the primer. Doh! Think of it like prepping a wall before painting your house. Same principle.
- Embrace the Imperfections: Sometimes an old lure has dents, scratches, or faded glory. Don’t feel you have to make it look brand new! Lean into the vintage vibe. A clear coat over the existing patina can look really cool and preserve its history. Lure restoration doesn’t always mean making it look factory-fresh.
- Think in Layers (Paint): When painting, build up color slowly. Start with a base coat, then add details. Use painter’s tape for sharp lines. Try dry brushing (using very little paint on the brush) to highlight raised details. Nail polish is surprisingly awesome for small, precise details like eyes or gills.
- Hardware Upgrade: Replacing old, rusty split rings and hooks (if making a functional lure) instantly improves the look and performance. It’s a small cost for a big impact. Check out resources like Angler’s Workshop for lure components.
- Safety Isn’t Optional: Seriously.
- Sharp Stuff: Wear gloves when handling hooks or cutting materials. Pliers are your friends.
- Fumes: Good ventilation is crucial when painting, using epoxy, or especially melting plastic. If it smells strong, you need more air. Consider a respirator for melting plastics.
- Eyes: Safety glasses are a must. You don’t want paint, plastic bits, or chemical splashes in your eyes.
Learning how to make upcycled fishing lures is a journey. Don’t be afraid to experiment! Your first attempt might not be perfect, but you’ll learn something. That weird paint job might actually attract fish, or that lopsided keychain might become your favorite. Have fun with it!
My Journey: How to Make Upcycled Fishing Lures Became My Thing
Let me tell you, I didn’t start out as some kind of lure-upcycling guru. Far from it! My journey into how to make upcycled fishing lures began out of pure necessity and a touch of sentimentality. I had this old tackle box, inherited from my uncle. It was crammed with lures – some classics, some… well, let’s just say they’d seen better decades. They were too beat up to fish with confidently, but throwing them out felt wrong. They were part of his story, you know?
My first project? A disaster, mostly. I decided to make a keychain from a battered old Mepps spinner. Simple, right?
- Step 1: Hook Removal. Okay, I didn’t have split ring pliers yet. Cue ten minutes of wrestling with rusty treble hooks using needle-nose pliers, nearly embedding one in my thumb. Lesson learned: get the right tools!
- Step 2: Cleaning. Easy enough, soap and water. But the tarnish on the blade was stubborn. I tried scrubbing, then vinegar. It helped, but wasn’t perfect.
- Step 3: “Decorating.” I thought, “I’ll paint it!” Grabbed some old model car paint. No sanding, no primer. Just slapped on some bright blue. Looked okay… for about an hour. Then it started to peel. Ugh.
- Step 4: Assembly. Attached a cheap keychain ring. Done. It looked… homemade. Very homemade.
But here’s the thing. Even though it was kinda ugly, I loved that keychain. It was Uncle Jim’s lure! I carried it everywhere. It sparked conversations. And it made me think: I can do better.
So, I started researching. Watched YouTube videos like the ones from Matt Luna Fishing. Scoured Pinterest boards like Dan Brockmann’s “Lure Making”. I learned about proper sanding, the magic of primer (seriously, game-changer!), different paint types (acrylic paints vs. enamel), and the importance of a good clear coat.
My next projects were much better. I started making shadow boxes for fishing buddies, incorporating lures from memorable trips. I experimented with repainting spoons, trying different patterns – dots, stripes, even attempting a perch pattern (which took several tries!). I discovered that adding beadwork or small feathers could really elevate a simple lure into a piece of fishing art.
One unique insight I stumbled upon: using clear nail polish with glitter mixed in makes a fantastic, durable top coat for small decorative lures, adding sparkle without expensive supplies. Little tricks like that come from just trying stuff.
Now, I have a whole system. A dedicated space in the garage (well-ventilated!), my trusty split ring pliers, a collection of paints and varnishes, and boxes sorted with potential angler projects. It’s become a relaxing, creative outlet that connects me to my love of fishing and preserves those tangible memories. Learning how to make upcycled fishing lures wasn’t just about saving old gear; it was about finding a new way to engage with the fishing hobby.
Lure Paint & Finish Options
- Acrylic Craft PaintPros: Wide color range, easy cleanup with water, low odor, fast drying, budget-friendly.Cons: Less durable on metal/plastic without primer and sealer; scratches easily.Best Use Case: Decorative items (keychains, art), applying details over primer, kid-friendly projects.
- Model Enamel PaintPros: Hard, durable finish, good metal adhesion (especially with primer), high gloss.Cons: Strong odor (needs ventilation), longer drying times, cleanup requires solvents.Best Use Case: Repainting metal lures meant for handling or active fishing use.
- Spray PaintsPros: Quick coverage for larger areas, smooth finish, specific formulas for metal/plastic.Cons: Needs outdoor ventilation, potential for drips or unevenness, less control for fine details.Best Use Case: Base coating lures quickly, applying primer or varnish evenly.
- Nail PolishPros: Built-in brush for details, wide range of colors/glitters, relatively durable, easily accessible.Cons: Can be thick, small quantity, strong odor, may react with some plastics.Best Use Case: Adding fine details (eyes, dots, gills), glitter accents, quick color pops on small areas.
- 2-Part Clear EpoxyPros: Extremely durable, high gloss, waterproof, seals decals/paint well, can embed items.Cons: Requires mixing, longer curing time, needs careful application to avoid drips, strong fumes.Best Use Case: Top coating lures for maximum durability (especially if fishing), sealing artwork, creating a thick, glossy finish.
- Fabric/Flexible PaintPros: Stays flexible when dry, adheres better to soft plastics than standard acrylics.Cons: Limited color range compared to craft paints, may still rub off with heavy use.Best Use Case: Painting or adding details to modified soft plastic baits.
Recommended Lure Restoration & Upcycling Supplies
Vetted products to help you swap hooks, paint scale details, and seal lures with durable epoxy coatings.

danco Karl 5" Split Ring Fishing Plier– Stainless Steel, Corrosion Resistant, Saltwater Safe Line Cutter – Compact Split Ring Fishing Tool
Vetted premium item for your lure crafting bench. Essential for split ring removal and durable gloss coating.

Caliart 24 Colors Acrylic Paint Set Large Bottles 4oz/120ml with 12 Brushes, Craft Painting kit for Adults Artists Beginners, Rich Pigment Non-toxic, Canvas Pumpkin Ceramic Wood Rock Art Supplies Paints
Vetted premium item for your lure crafting bench. Essential for split ring removal and durable gloss coating.
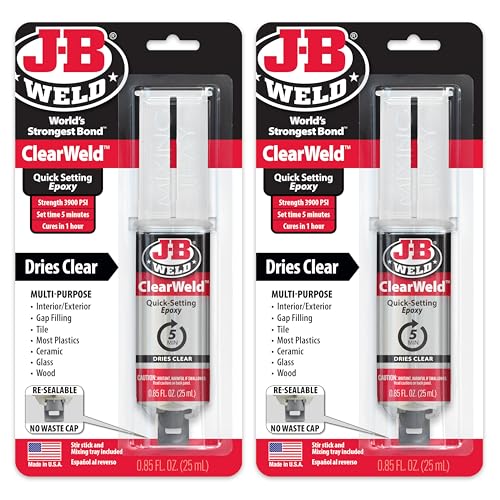
J-B Weld ClearWeld 5 Minute Epoxy, Clear, Syringe, 2 Pack, 50112-2
Vetted premium item for your lure crafting bench. Essential for split ring removal and durable gloss coating.

200 Pack Fishing Treble Hooks Kit High Carbon Steel Hooks Strong Sharp Round Bend with Split Rings for Lures Baits Saltwater Freshwater Fishing Size 2# 4# 6# 8# 10#
Vetted premium item for your lure crafting bench. Essential for split ring removal and durable gloss coating.

Fishing Lures Tape Reflective Fish Scales Sticker Holographic Adhesive Film Flash Lure Tape for Fishing Lure Making DIY Crafts Tool
Vetted premium item for your lure crafting bench. Essential for split ring removal and durable gloss coating.
Affiliate Disclaimer: As an Amazon Associate, CanadaFever earns from qualifying purchases. This helps support our Canadian outdoor research at no extra cost to you.
Finding Inspiration and Connecting with Crafters
You’re not alone on this creative fishing journey! One of the best parts about learning how to make upcycled fishing lures is the community and the wealth of ideas out there. Whether you’re stuck for inspiration or want to learn a specific technique, resources abound.
Here’s where to look:
- YouTube University: This is a goldmine. Seriously. Search for “DIY fishing lures,” “upcycled fishing lures,” or “lure painting.”
- Channels like Matt Luna Fishing and Marking 16 (mentioned in the source info) often show detailed processes, from basic repaints to complex builds. You can find tutorials on specific techniques like airbrushing lures or pouring soft plastics. Visual learning is powerful here!
- Don’t just watch lure making videos; check out fishing crafts channels too for broader ideas.
- Pinterest Power: Visual discovery platforms like Pinterest are fantastic for sparking ideas.
- Search terms like “fishing lure crafts,” “upcycled tackle,” “DIY fishing gifts.”
- Boards like Dan Brockmann’s “Lure Making” are curated collections of cool projects and techniques. You’ll find everything from simple keychains to elaborate fishing art. Pin your favorites to create your own inspiration board!
- Fishing Forums & Online Communities: Connect with fellow anglers and crafters.
- Websites dedicated to fishing often have DIY or tackle-making sections in their forums. Places like In-Fisherman might have articles or forum discussions.
- Look for Facebook groups centered around lure making, tackle crafting, or even general fishing groups where members share their projects. Ask questions! People are usually happy to share tips.
- Blogs and Websites: Many fishing and outdoor websites offer DIY content.
- Sites like Take Me Fishing provide articles with creative reuse ideas.
- Check out blogs from Field & Stream or Outdoor Life – they sometimes feature DIY projects and unique fishing gifts ideas. You might even find tips on using specific fishing with artificial lures.
- Your Local Tackle Shop: Don’t underestimate the knowledge at your local shop! Staff might have tips, know local crafters, or point you towards useful fishing supplies like lure components or paints. Plus, you can check out the best fishing bait and lures for Canada to see what styles are popular locally.
Exploring these resources not only gives you ideas but also helps you refine your techniques. Seeing how others solve problems (like getting paint to stick or creating realistic patterns) can save you a lot of trial and error. Dive in, get inspired, and maybe even share your own creations!
Your Turn to Make a Splash!
So there you have it. The world of how to make upcycled fishing lures is wide open, waiting for your creativity. It’s more than just recycling; it’s about breathing new life into objects that hold memories, saving gear from the landfill, and crafting something truly unique with your own hands.
Whether you make a simple keychain that reminds you of a great catch, a piece of art for your cabin wall, or even a revitalized lure that lands you the big one, the process itself is rewarding. It connects you to the fishing hobby in a different way. It’s practical, it’s creative, and it’s environmentally conscious. What’s not to love?
Don’t let that box of old tackle gather dust any longer. Pick a lure, grab some basic tools, and give it a go. Start simple, experiment, and don’t be afraid to make mistakes – that’s how you learn the best tricks! You might just discover your new favorite pastime. Now go forth and upcycle!
1. What is the best way to clean rusty metal lures?
Soak the lures in white vinegar or a rust-remover solution for a few hours, then scrub them with a wire brush or steel wool. Dry them completely before priming.
2. Do I need special pliers to change hooks?
Yes, split ring pliers are highly recommended. They feature a specialized tip that wedges open split rings, letting you swap hooks easily and safely.
3. Can I actually fish with upcycled lures?
Absolutely! If you paint them with durable enamel or seal them with a strong 2-part clear epoxy, they can catch fish just like new lures.
4. What can I make out of old lures besides fishing gear?
Common upcycling projects include keychains, shadow box artwork, wind chimes, ornament decorations, and customized zipper pulls.
5. How do I seal the paint on my upcycled lures?
A thin coat of 2-part clear epoxy resin is the most durable sealer. For decorative items, a spray-on clear acrylic varnish or lacquer works perfectly.


