

Discover expert tips for fishing tackle setup for kayaks and organize your gear efficiently. Learn how to maximize storage space and keep essential equipment within reach.
- Match Fishing Tackle Setup for Kayak Anglers to your water, season, boat size, and actual skill level instead of buying by specs alone
- Prioritize readable controls, durable construction, and Canada-relevant use cases before chasing premium features
- Use the guide to compare what matters in the field: setup time, reliability, safety, storage, and upgrade path
Bottom line The right Fishing Tackle Setup for Kayak Anglers choice solves your real Canadian trip conditions without adding gear you will not use
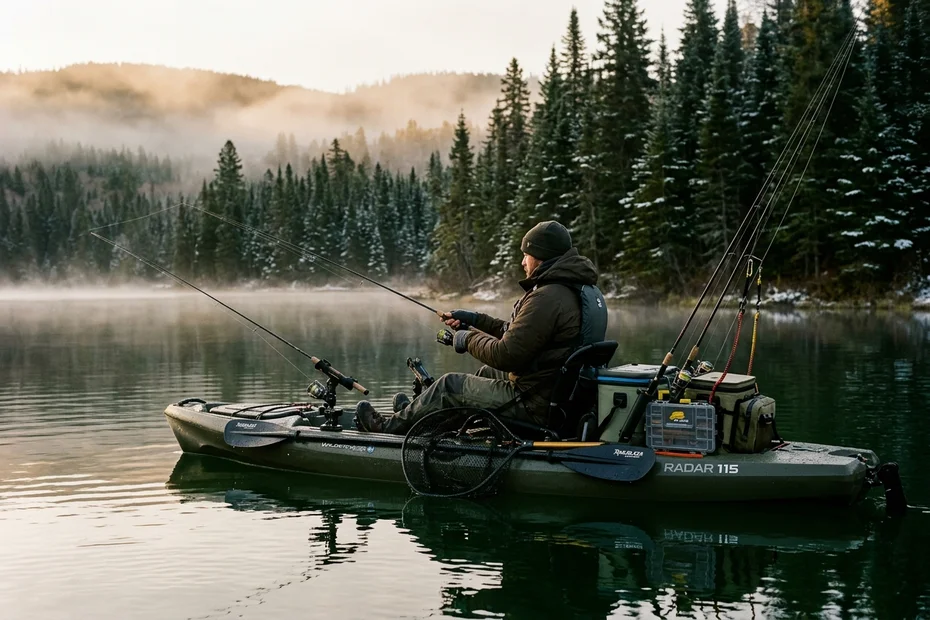
Rigging a paddle or pedal fishing kayak requires a disciplined approach to balance, reach limits, and weight distribution. Unlike wide fiberglass motorboats or aluminum bass hulls, a kayak operates as a narrow displacement craft where every pound of gear directly influences your center of gravity, paddle clearance, and primary hull stability.
When Canadian anglers overload their rear tankwells with heavy tackle boxes or mount excessively long rods vertically behind their seats, they create severe handling penalties. Long rods catch low alder branches along northern shorelines, while heavy rear crates cause the stern to squat, increasing drag and making the bow wander in crosswinds. By establishing clean reach arcs around the cockpit, choosing shorter rods that clear the bow during frantic fish runs, and modularizing tackle into sealed utility trays, you transform a cramped plastic deck into a highly capable, seaworthy angling platform.
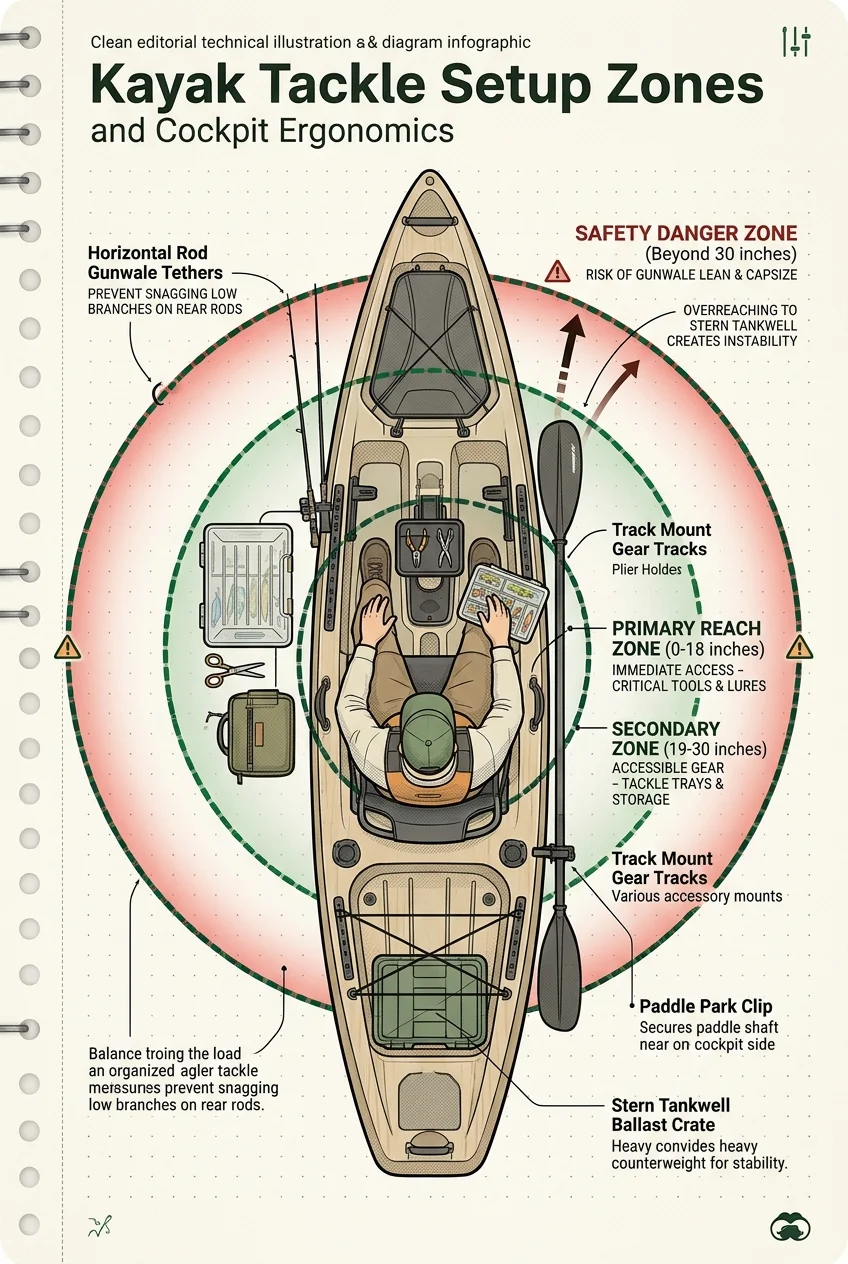
1. Cockpit Ergonomics, Reach Arcs & Hull Stability
The primary constraint of kayak fishing is space limitation combined with dynamic stability. When you sit in a kayak, your hips rest near the waterline, establishing your pivot axis. Any movement that forces your head and upper chest outside the vertical boundary of the gunwales shifts your center of gravity dramatically.
In calm water, a wide rotomolded polyethylene kayak might tolerate a minor lean. However, on cold northern Canadian waters like Georgian Bay, Lake Simcoe, or the Saint Lawrence River, unexpected boat wakes or sudden wind gusts can tip an overextended kayak past its secondary stability limit in a split second.
To eliminate unsafe movement, successful kayak anglers divide their deck layout into three distinct ergonomic radiuses measured from the center of the seat:
- Zone 1: Primary Working Radius (0 to 18 Inches): This zone covers the space immediately in front of your chest and beside your thighs. You should be able to touch every item in this zone with your elbows bent and your back pressed firmly against your seat backrest. High-priority items placed here include split-ring pliers in a sheath, braid cutters on a retractable lanyard, an active lure tray, your paddle park clip, and your primary rod holder.
- Zone 2: Secondary Pivot Radius (19 to 30 Inches): This zone requires rotating your torso without lifting your hips off the seat. It covers the forward pedal drive console, gunwale gear tracks, and the forward edge of your rear cargo tankwell. Gear stored here includes your landing net handle, dry storage bag with extra layers, fish finder display head, and your rear milk crate tackle boxes.
- Zone 3: Dangerous Lean Perimeter (Beyond 30 Inches): Any gear placed farther than 30 inches requires unweighting your hips and leaning your torso across the gunwale. On a kayak, reaching to the extreme bow tip or the far stern while on the water is an invitation to capsize. All items placed in these remote areas must be tethered gear that you only retrieve when beached ashore.
| Cockpit Reach Zone | Distance from Seat | Required Body Movement | Assigned Tackle & Equipment | Capsize Risk Level |
|---|---|---|---|---|
| Zone 1: Primary Strike Arc | 0 to 18 in (0 to 45 cm) | Zero torso lean; elbows bent, back against seat | Split-ring pliers, braid cutters, active lure box, paddle clip, VHF radio | Negligible (Safe in heavy waves) |
| Zone 2: Secondary Pivot Arc | 19 to 30 in (46 to 75 cm) | Seated torso twist; hips remain centered | Tackle crate front edge, landing net handle, fish finder screen, anchor trolley ring | Low (Maintain center of gravity) |
| Zone 3: Danger Lean Perimeter | Beyond 30 in (>75 cm) | Hip lift, torso over gunwale, loss of seat contact | Bow tip hatch, stern rudder pin, remote transducer mounts | Severe (High capsize probability) |
2. Rod Length Selection & Horizontal Gunwale Storage
Casting from a seated position inches above the water presents unique mechanical challenges. Anglers stepping out of tournament bass boats often bring 7’6″ to 8’0″ flipping sticks and long casting rods onto kayaks. On open water, these long rods quickly become awkward hindrances.
When a five-pound smallmouth bass or northern pike makes a frantic dive under your kayak hull, a long rod forces you to stretch your arms out over the gunwale to clear the bow, compromising your balance. Conversely, a compact rod between 6’6″ and 7’0″ gives you tight leverage, allows you to sweep your line effortlessly around the kayak bow and stern, and lets you reach the tip guide to untangle wind knots without standing up.
Rod storage orientation is equally significant. Factory fishing kayaks usually feature molded vertical rod tubes directly behind the seat. While vertical tubes keep reels out of surface splash, they create two serious hazards on Canadian waters:
- Low Tree Branch Collisions: When paddling along timber-lined shorelines on the French River, Rideau Canal, or Kenora-area Shield lakes, low-hanging cedar and spruce branches catch vertical rod tips. A single snagged rod can bend double and snap the graphite blank before you can back-paddle.
- Aerodynamic Drag and Wind Drift: Three or four rods standing vertically act like small sails in open-water winds. On large lakes like Lake of the Woods or Lake Ontario, crosswinds push vertical rod setups relentlessly, spinning the stern and requiring constant paddle correction.
- Paddle Stroke Clearance: Vertical rod holders placed too close to the seat interfere with high-angle paddle strokes, banging against carbon paddle shafts on every forward stroke.
- Tethering Vulnerability: Vertical rods in loose tubes can bounce out when the kayak impacts a submerged rock or boat wake. Every rod must be secured with an elastic bungee collar or braided leash.
Recommended Rod Specifications for Canadian Kayak Angling
For maximum utility across northern multi-species waters, build your kayak battery around three versatile rod setups:
- Setup 1 (Finesse Spinning): 6’8″ Medium-Light power, Fast action graphite rod paired with a 2500-size spinning reel. Spooled with 10 lb braided main line tied to an 8 lb fluorocarbon leader. Perfect for drop shotting smallmouth, tossing ned rigs, and working walleye jigs along granite drop-offs. Pair this setup with our detailed tactical guide on drop shot baits for smallmouth bass.
- Setup 2 (All-Around Casting): 6’10” Medium power, Fast action casting rod paired with a compact low-profile baitcaster. Spooled with 30 lb braid tied to a 12 lb fluorocarbon leader. Excellent for casting spinnerbaits through cabbage weeds, working jerkbaits, and skipping docks for largemouth bass.
- Setup 3 (Heavy Cover & Trolling): 7’0″ Medium-Heavy power, Moderate-Fast action casting rod paired with a high-capacity reel. Spooled with 40 lb braid tied to a 20 lb fluorocarbon or wire leader. Dedicated to pulling deep crankbaits, trolling spoons for lake trout, and wrestling northern pike out of dense wild rice bays. Compare your tactics with our comprehensive breakdown of walleye fishing across Canadian waters.
3. Modular Tackle Crate Systems & Water-Tight Trays
The cardinal rule of kayak tackle organization is simple: downsize before you launch. Packing massive multi-pocket soft bags loaded with hundreds of lures clutters the tankwell, absorbs water, and creates chaos on deck. Instead, prepare your kayak using a modular system based on standard 3600-size or 3700-size utility boxes housed in a rigid milk crate or specialized kayak tackle carrier.
A standard 13×13 inch heavy-duty milk crate fits precisely into the rear tankwell of almost every modern fishing kayak. By outfitting the crate with corner rod holders, stainless carabiners, and bungee cords, you establish an organized, bombproof storage hub. Inside the crate, organize your lures into three dedicated waterproof trays:
- Tray A (Terminal Hardware & Weights): Tungsten cylinder drop shot sinkers, round jig heads (1/8 oz to 3/8 oz), wide-gap worm hooks, barrel swivels, snap clips, and fluorocarbon leader spools. Keep this box in your seat-side pocket or directly at your feet in Zone 1.
- Tray B (Hard Baits & Search Lures): Suspending jerkbaits, squarebill crankbaits, topwater poppers, inline spinners, and compact spoons. Ensure all treble hooks are fitted with plastic safety caps to prevent snags when pulling boxes out of your crate.
- Tray C (Soft Plastics & Jigs): Scent-impregnated soft plastic tubes, paddle-tail swimbaits, finesse worms, and weedless creature baits stored flat in their original manufacturer resealable bags to preserve attractant oils and prevent chemical melting between plastic compounds.
Equally critical is managing your landing net around this tackle configuration. Stowing a landing net carelessly across your rear crate can foul lure hooks or catch your paddle on the backstroke. As detailed in our complete kayak fishing net comparison, pairing a folding net handle with a dedicated track-mounted holder behind your hip ensures smooth, single-handed deployment without turning around or disturbing your tackle boxes.
| Storage Configuration | Capacity | Water Resistance | Deck Footprint | Best Canadian Angling Application |
|---|---|---|---|---|
| Modified Heavy Milk Crate | 3 to 5 Plano 3600 boxes + 3 rods | Open drainage; requires waterproof boxes | 13 x 13 in (33 x 33 cm) | General Shield lake bass, walleye, and pike day trips |
| Molded Enclosed Kayak Krate | 4 Plano 3700 boxes + dry hatch lid | High splash resistance; gasket-sealed lid | 14 x 18 in (36 x 46 cm) | Big water Great Lakes drifts and rainy coastal fjord trips |
| Under-Seat Slider Trays | 1 to 2 Plano 3600 low-profile boxes | Direct bilge exposure; requires O-ring seals | 11 x 7 in (28 x 18 cm) | Zone 1 immediate access on elevated frame seat kayaks |
| Bow Hatch Dry Bag Insert | Bulky camping gear, rain gear, soft packs | 100% submersible dry protection | Variable internal hull bow space | Multi-day river camping trips on the French or Algonquin rivers |
4. 5 Practical Steps to Rig Your Kayak Cockpit
Proper cockpit outfitting is a systematic process of mounting accessories so they work together smoothly. Follow this five-step sequence when setting up a new fishing kayak or re-rigging your current deck for the upcoming season:
Step 01: Establish Seated Center of Gravity and Paddle Stroke Arc
Sit in your kayak on dry ground or calm shallow water with your seat adjusted to your normal paddling height. Hold your paddle and execute complete forward and sweep strokes on both port and starboard sides. Observe where your paddle blades enter and exit the water relative to the gunwales.
Mark this paddle clearance zone on your kayak deck with masking tape. Never mount rod holders, fish finder brackets, or camera poles inside this stroke corridor.
Step 02: Mount Starboard and Port Aluminum Gear Tracks
Install high-strength anodized aluminum gear tracks along both gunwales immediately forward of your paddle stroke zone (typically 14 to 22 inches forward of your seat back). Use marine-grade 316 stainless steel machine screws with rubber-backed fender washers and nylon locknuts underneath the deck. Never use sheet metal self-tapping screws on rotomolded plastic hulls without backing plates, as rod pressure from a hard strike will rip them out.
Step 03: Secure the Stern Tankwell Ballast Crate with Heavy Cam Straps
Place your tackle crate centered in the rear tankwell. Fasten it to deck pad eyes using heavy-duty 1-inch polyester cam buckle straps instead of standard stretchy bungee cords.
Bungee cords stretch when the kayak pitches over boat wakes, allowing a heavy crate to slide laterally and compromise secondary stability. Cam buckle straps lock the crate rigidly to the hull, keeping ballast weight centered.
Step 04: Rig Horizontal Rod Leashes and Paddle Park Retainers
Install rubber-coated paddle park clips or molded bungee retainers along the non-dominant gunwale. Attach track-mounted horizontal rod clips along the opposite gunwale with protective foam padding. Connect durable braided core safety leashes with brass swivel snaps to every rod reel seat, clipping them to deck anchor rings so an accidental capsize or brush strike does not send expensive tackle to the bottom of the lake.
Step 05: Build the Zone 1 Primary Reach Tool Station
Mount your split-ring pliers, braid cutting shears, and lip grip tool within your 18-inch primary reach arc. Use molded sheath attachments riveted directly to your seat frame or clipped to your gear track. Keep every cutting tool attached with a 24-inch coiled urethane lanyard so you can unhook toothy fish like pike or walleye without laying sharp tools loose across your seat cushions.
5. Kayak Cockpit Loadout & Ballast Weight Calculator
Proper weight distribution is primary for kayak speed, tracking, and safety. Rotomolded hulls are designed to sit level on their designed waterline. When an angler places excessive weight in the rear tankwell without forward counterweight, the stern digs into the water (stern squat).
Stern squat increases hull drag, lifts the bow into the air where wind catches it like a weather vane, and dramatically increases the risk of taking water over the rear deck. Conversely, too much weight in the bow causes bow plow, making the kayak sluggish to turn and prone to spearing oncoming waves.
Use the interactive calculator below to evaluate your kayak loadout, check your center of gravity offset, and verify your hull stability rating before heading onto the water.
Kayak Cockpit Loadout & Ballast Calculator
Select your kayak specifications and equipment weights to calculate trim balance, center of gravity offset, and capsize safety index.
Cockpit Ballast & Stability Evaluation
Your weight distribution is well within safe operating tolerances. The 8 lb bow ballast counterbalances the 22 lb rear crate, providing clean tracking in moderate wind chop.
| Hull Trim Condition | Waterline Behavior | Paddling & Steering Impact | Capsize Susceptibility | Corrective Action |
|---|---|---|---|---|
| Neutral Trim (0 to 0.8 deg Aft) | Bow and stern meet designed waterline evenly | Optimal glide speed, crisp rudder response, low windage | Minimum (Full secondary stability active) | Maintain current loadout distribution |
| Excessive Stern Squat (>1.8 deg Aft) | Stern submerged past scuppers; bow pointed skyward | Severe drag; bow blown sideways by crosswinds; sluggish turning | Moderate (Vulnerable to rear wake wash) | Shift battery or anchor forward to bow hatch |
| Bow Plow (<0.2 deg Fwd) | Bow submerged; stern lifted clear of water | Heavy steering; kayak darts unpredictably; wet ride | High in chop (Bow spears oncoming rollers) | Move heavy gear rearward into tankwell |
6. Canadian Waterway Safety Rules & Cold Water Precautions
Operating a human-powered fishing kayak in Canada falls under federal jurisdiction governed by the Transport Canada Office of Boating Safety. Under the Small Vessel Regulations, every non-motorized pleasure craft, including sit-on-top and sit-inside kayaks, must carry mandatory safety equipment at all times when afloat.
Enforcement officers from the Ontario Provincial Police (OPP), Sûreté du Québec, conservation authorities, and the Royal Canadian Mounted Police (RCMP) actively inspect kayak anglers on public waters. Failing to carry mandated safety gear results in federal fines exceeding $200 per missing item.
The mandatory safety equipment checklist for Canadian kayak anglers includes:
- Canadian-Approved PFD or Lifejacket: One Transport Canada, Canadian Coast Guard, or Fisheries and Oceans Canada approved personal flotation device properly sized for the paddler. In a kayak, an inherently buoyant foam paddling vest with high-cut mesh backs is strongly recommended because inflatable suspender vests do not provide automatic buoyancy if you are knocked unconscious by a hull strike.
- Sound Signaling Device: A pealess marine safety whistle clipped directly to the shoulder strap of your PFD. Pealess whistles (such as the Fox 40 Classic) operate reliably even after submersion in freezing water, producing a 115-decibel blast audible over motorboat engine noise.
- Buoyant Heaving Line: At least 15 meters (49.2 feet) of buoyant floating rope stored in an accessible grab bag. This line allows a companion or rescuing craft to pull you to safety without approaching your tipping hull.
- Watertight Flashlight or Navigation Light: If operating between sunset and sunrise or during periods of restricted visibility (heavy fog, rainfall), you must have an electric torch or lighted lantern showing a white light ready to exhibit in time to prevent collision.
- Bailing Device: A manual bilge pump or bailing bucket. (Note: Sit-on-top kayaks with open cockpit drain scuppers that freely clear water are legally exempt from the bailer requirement, but sit-inside kayaks must carry one).
In addition to marine vessel safety laws, always verify your provincial fishing licenses and local fish sanctuary boundaries before fishing. Review current catch quotas and seasonal sanctuary dates using the Ontario Fishing Regulations Summary or the British Columbia Freshwater Fishing Regulations depending on your home watershed.
Verified Kayak Fishing Tackle & Rigging Gear
Rigging a dependable kayak deck requires rugged, corrosion-proof accessories that withstand continuous freshwater and saltwater spray. The following gear selections have been tested on Canadian waters for durability, secure attachment, and cockpit ergonomics.
Affiliate Disclosure: CanadaFever is a reader-supported publication. When you purchase through our verified Amazon links below, we earn an affiliate commission at no additional cost to you.
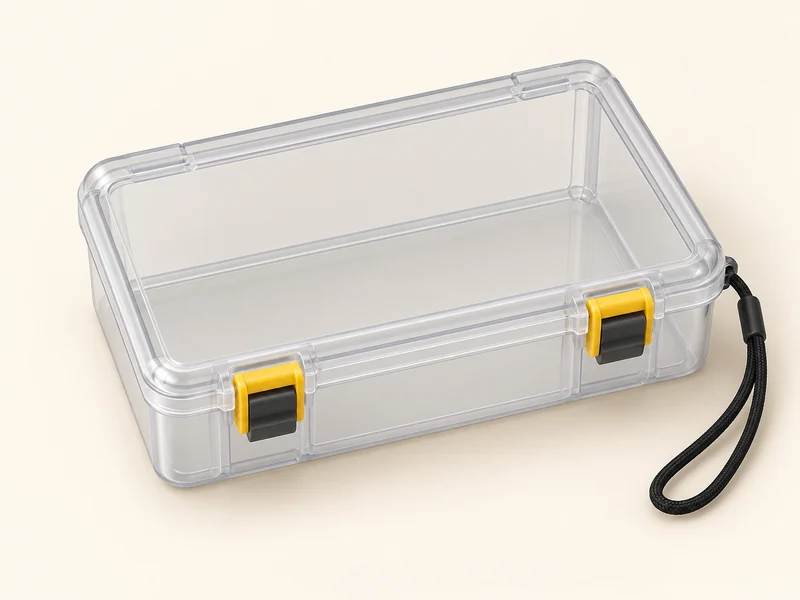
Plano Guide Series 3600 Field Box (Medium, 11 × 7 × 4 in)
- Medium polycarbonate field box listed at 11 × 7 × 4 inches for organizing terminal tackle or small deck essentials in Zone 1.
- Clear and yellow protective case includes a wrist strap to help prevent accidental loss overboard during kayak launches.
- Inspect the latch closure and seal rating before storing moisture-sensitive electronics in wet bilge or scupper splash zones.
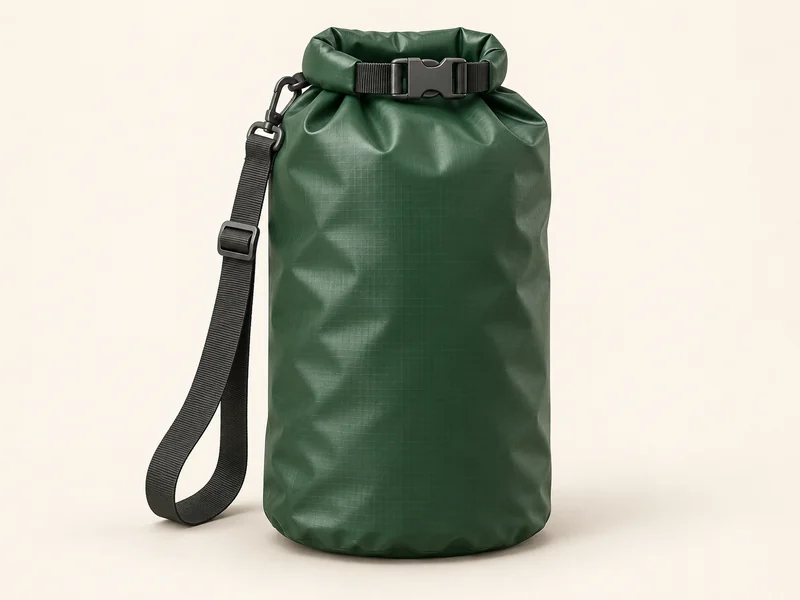
Earth Pak 20 L Roll-Top Dry Bag (20 L, Orange)
- Selected variant is the 20-litre high-visibility orange roll-top dry bag for stowing spare layers and safety gear in the bow hatch.
- Roll-top closure design helps keep stored clothing and emergency items dry against paddle drip and wave spray; listing includes a waterproof phone case.
- Check packed dimensions against your kayak bow hatch opening and follow the manufacturer's three-roll folding instructions.
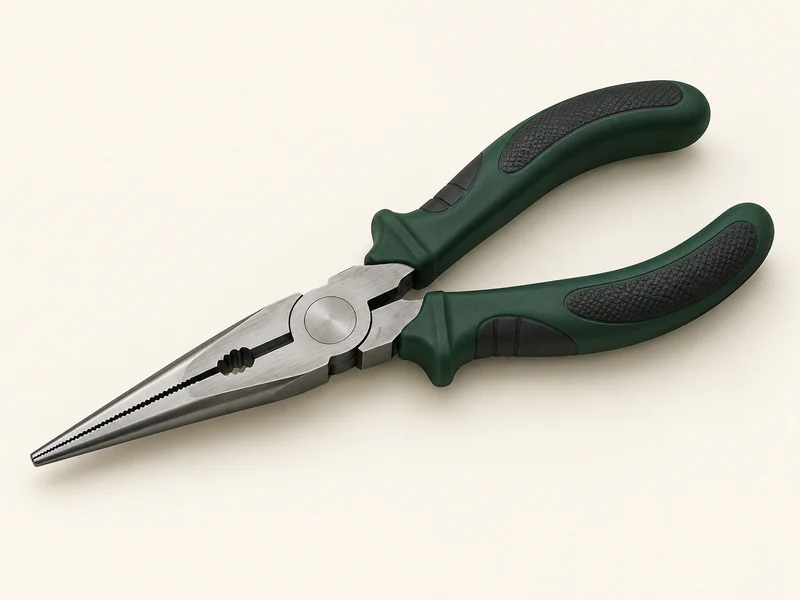
Rapala 6½-inch Fisherman's Pliers
- Compact 6½-inch pliers format fits cleanly into PFD pockets, seat-frame tool holsters, or gunwale gear track sheaths within Zone 1 reach.
- Nickel-plated carbon steel jaws with co-moulded grips provide a firm hold when pinching barbs or backing out hooks beside the kayak.
- Check jaw reach against your target species; larger treble hooks on deep-bodied pike lures may require a longer unhooking tool.
Search related kayak fishing rigging components on Amazon: Kayak Fishing Crates | Waterproof 3600 Tackle Trays | Rod Leashes & Paddle Tethers
Frequently Asked Questions About Kayak Tackle Rigging
What rod length is best for kayak fishing?
Rods between 6'6" and 7'0" are the ideal length for kayak fishing. Shorter blanks provide greater leverage from a seated position, allow you to clear the rod tip without leaning over the gunwale, and make it easy to steer hard-fighting fish around the bow and stern of your kayak during landings.
Should fishing rods be stored horizontally or vertically on a kayak?
Horizontal gunwale storage is strongly recommended for secondary rods, especially when paddling along forested shorelines or river banks. Horizontal rods lie flat along the deck, eliminating the risk of snapping rod tips on low-hanging tree branches and drastically reducing wind resistance on open lakes. Vertical rod tubes should only be used for active rods in wide, obstacle-free basins.
How many tackle boxes should I carry on a fishing kayak?
Limit your tackle to two or three 3600-size waterproof utility boxes. Packing excessive tackle clutters the cockpit, adds unnecessary ballast weight, and increases the risk of tackle loss. Keep one box of primary terminal tackle within arm's reach in Zone 1, and place two species-specific lure trays in your rear tankwell crate.
Why are waterproof O-ring tackle trays necessary on kayaks?
Kayaks sit directly at the water level, meaning cockpit decks frequently experience paddle drip, wave wash, and standing bilge water. Standard unsealed tackle boxes allow moisture inside, which causes hook rust, corrodes split rings, and ruins expensive crankbaits within days. Trays with silicone O-ring gaskets and cam latches keep tackle completely dry even if submerged.
What safety gear is legally required on a kayak in Canada?
Under Transport Canada Small Vessel Regulations, every human-powered kayak must carry a Canadian-approved PFD or lifejacket, a sound signaling device (such as a pealess whistle), a 15-meter buoyant heaving line, and an electric watertight flashlight or navigation light if operated in low light or darkness. Failing to carry these items carries federal fines exceeding $200 per violation.
How do I prevent a fishing kayak from tipping over while landing a fish?
To maintain hull stability when landing a fish, keep your head and upper chest centered over the middle line of the kayak. Never lean your torso across the gunwale to reach for a fish. Guide the fish alongside the cockpit within your 18-inch primary reach zone, use a short-handled landing net, and scoop the fish into the net bag while keeping your back firmly against your seat.
References & Related CanadaFever Guides
- Landing Net Guidelines: Consult our complete kayak fishing net comparison to select the right hoop size, net bag depth, and folding handle for your deck layout.
- Species Tactics: Explore our detailed guides on walleye fishing across Canadian waterways and tactical presentations for drop shot smallmouth bass.
- Transport Canada Safety: Review mandatory equipment requirements at the Transport Canada Office of Boating Safety.
- Provincial Regulations: Always consult the official Ontario Fishing Regulations Summary and British Columbia Freshwater Fishing Regulations for current sanctuary dates and fish harvest limits.