

Make one cold adjustment to a known soft bait, then compare it with an untouched lure. Practical trimming, hook-fit, colour and storage decisions for Canadian anglers.
- Identify the bait material before adding treatments.
- Change one feature and check straight hook fit.
- Keep unknown scraps out of heated production projects.
Bottom line An untouched reference bait makes a small modification easier to judge.
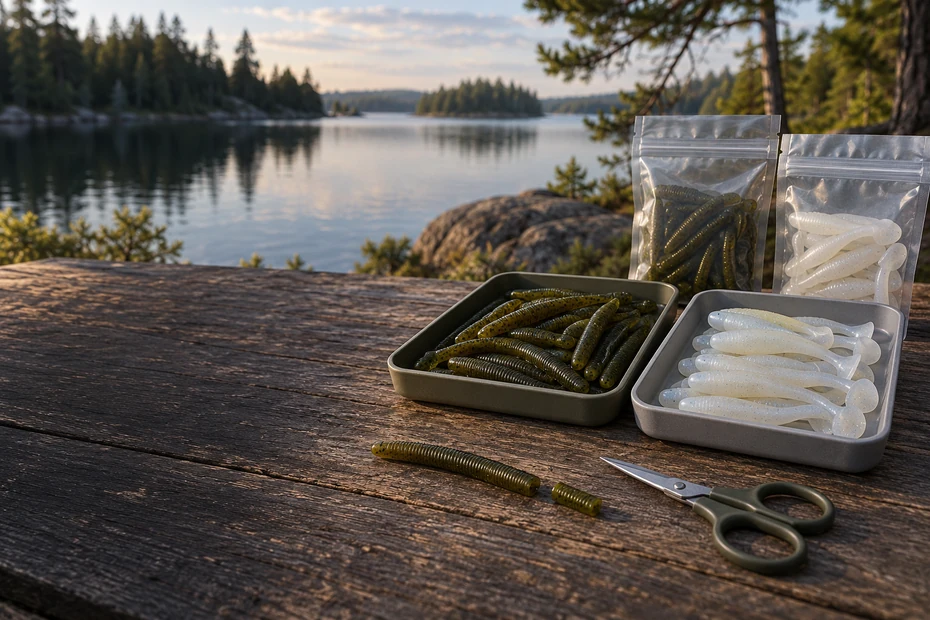
Start with one change to a bait you know
Customizing soft plastic baits is easiest when you change the fit or action of a familiar lure and compare it with an untouched one. A shorter worm, a smaller trailer or a restrained colour accent can solve a specific presentation problem. Identify the material first so the modification, product and storage method fit that bait.
For a first project, work cold. Use a clean bait, a small pair of scissors and a reference lure from the same packet. Check how both sit on the intended hook before cutting. Cold work lets you compare profile and rigging before taking on a pouring setup.
Canadian anglers also need to choose the presentation for legal waters and seasons. A workshop project does not change hook or bait restrictions. Check our Canadian fishing-regulations guide and the current rules for the exact destination before testing a modified lure.
Choose the first adjustment
- Identify the lure’s material and keep incompatible types separate.
- Change a specific feature, then inspect the hook fit.
- Compare action with the original bait before changing anything else.
Identify PVC, ElaZtech and other bait materials
Soft baits use several material families. Many conventional baits use PVC plastisol. Z-Man’s ElaZtech is a different material family. Other manufacturers use their own formulations, and a packet of salvaged lures may contain several of them. Appearance and stretch alone cannot establish a complete material identity.
Read the packet and the manufacturer’s instructions. Keep the brand, model, colour and material together in your notes. If you cannot identify an old lure, keep it out of chemical and heated projects. A cold trim may still be a reasonable experiment, but its unknown composition remains a limit on what you can do next.
Z-Man explains its material in The Z-Man Difference. A product designed for conventional PVC is not automatically suitable for ElaZtech. Ask the lure manufacturer about a marker, dye, adhesive or coating before applying it to an unfamiliar formula.
Buoyancy also needs a product-specific check. Z-Man announced sinking ElaZtech products in 2026, so a blanket claim that every ElaZtech lure floats is outdated. Its sinking ElaZtech announcement identifies that separate formula. Test the exact lure and rig you own.
| Bait identity | Suitable first project | Check before chemicals or heat |
|---|---|---|
| Known conventional PVC bait | Cold shortening or hook-fit adjustment | Compatibility of the exact dye or adhesive |
| Identified ElaZtech or another TPE | Rigging and cold-profile comparison | A product specifically approved for that material |
| Unknown used bait | Separate inspection and simple cold experiment | Do not add it to a mixed remelting batch |
| Documented lure-making plastisol | Manufacturer-guided production project | Current instructions, SDS and dedicated equipment |
Keep separate original packets together by material. Flatten the lure into its natural shape without forcing a folded tail. Store chemicals as their labels require, outside the bait packet. A bottle that leaks inside the tackle bag can affect other lures even when you never intended to treat them.
Fix the rigging before cutting the lure
Rig straight first
- A lure that rolls or corkscrews may be crooked on the hook.
- Lay it beside the jig head or offset hook and mark the intended exit point with your eye before threading it.
- Insert along the centreline, bring the point out at the planned place and inspect the body from above and from the side.
The body should sit naturally. A bunched nose or stretched belly changes the shape you are trying to evaluate. Remove and rig it again if the hook is pulling it out of line. Repeated holes can weaken a nose, so practise slowly on one bait instead of forcing every new lure onto the same mismatched hook.
Hook gap must leave room for the actual body. A bulky creature bait can fill a gap that works with a thin worm. Check the rig’s movement by hand with the point controlled, and avoid crowding the bend. Our Carolina-rig component guide shows why bait profile and hook choice need to be considered together.
A keeper can also be too aggressive for a small or stretchy bait. Use the head or keeper recommended for that model where the manufacturer specifies one. If the nose tears during rigging, compare the hardware with the bait’s dimensions before blaming the lure material or adding glue.
For a trailer behind a skirted lure, fit the body to the hook and skirt first. Inspect whether appendages are trapped in the skirt or folded against the bend. A shorter trailer may be useful, but a different hook position or compatible profile can solve the interference while preserving the original bait.
Check your connection too. A slipping knot or damaged line can obscure every lure comparison. Use the hook-tying guide for material-appropriate knot choices and inspect the entire rig before casting. Keep the knot and leader unchanged when testing a small bait modification.
Customizing soft plastic baits with cold trimming
Shorten from a deliberate reference point
Choose the cut
Lay the lure straight on a clean surface and put the untouched reference beside it. Decide which part you want to preserve. Cutting a little from a stick bait’s nose changes its length while retaining the tail shape; removing a paddle or a curl tail changes the action mechanism itself.
Trim and collect
Make one small cut with suitable sharp scissors and collect the offcut immediately. Keep the cutting edge away from hook points and fingers. A general fishing scissor can be useful for light bench work if it makes a clean cut, but do not force thick material or treat a braid-cutting claim as a promise about every bait.
Check the hook fit
After shortening, lay the modified lure beside the intended hook again. Recalculate the exit point from the new nose. The original threading marks no longer describe the shorter body. If you keep using the old exit point, the bait can bunch up and make the trim appear to have ruined its swimming action.
Leave enough body to hold the hook or keeper. A tiny piece cut to imitate a finesse lure may tear immediately if it has no supported mounting area. Compare with a purpose-made smaller bait before cutting repeatedly. Buying the correct size can be more practical than removing most of a large lure.
Reduce a trailer’s bulk without losing its working parts
A creature bait has a central body and appendages with different jobs. Shortening the body can reduce the overall trailer length, while removing an appendage changes its outline and movement. Decide which result you want and alter only that feature for the first comparison.
Keep paired features balanced when a straight retrieve is the goal. An uneven cut may produce roll or a one-sided drag. That can be an experiment in its own right, but record it as intentional. Otherwise, trim both sides consistently and inspect the lure’s centreline before rigging it.
Do not cut into a narrow tail joint merely to make the lure look neater. That joint may support the part that moves. A damaged joint can break later, leaving an offcut in the water. If the only way to achieve the desired profile is to weaken the working tail, compare a different original bait.
For a damaged worm, examine the remaining body before reusing it as a shorter presentation. A tear that extends into the new hook position can continue spreading. If the sound material cannot support the rig, retire the bait and keep it in the waste container.
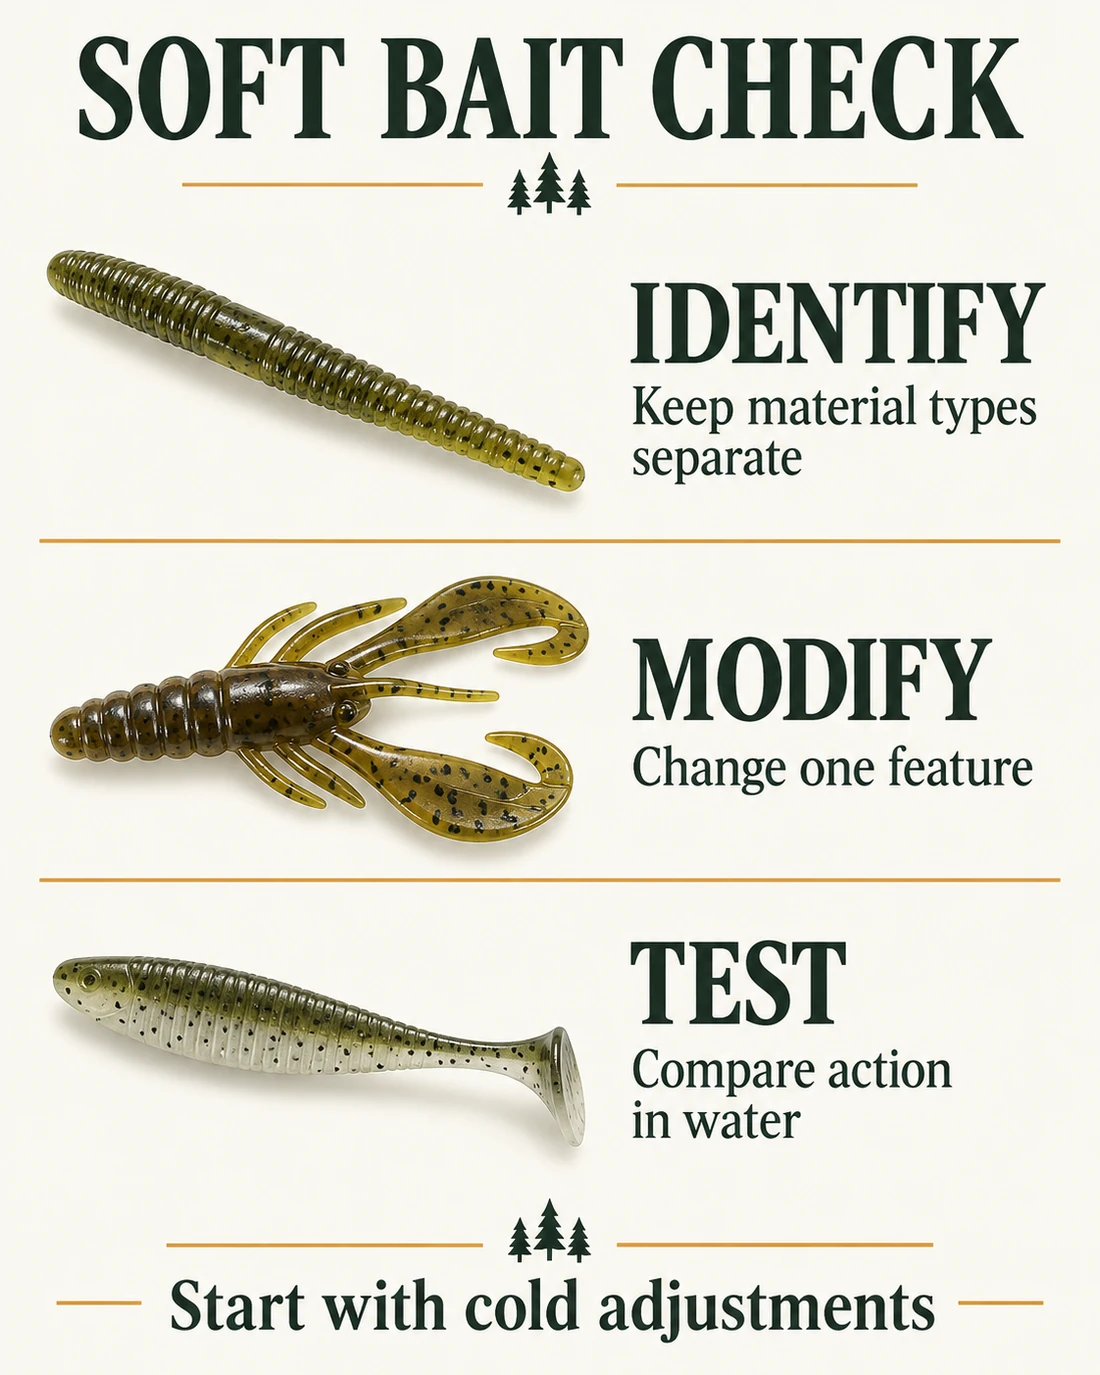
Use material-compatible colour products sparingly
Start with a small patch on a spare bait from the same packet. A tail accent or a few spots gives you a clear comparison without coating the whole lure. Follow the product label for ventilation, contact time, drying and handling. Keep the untreated reference away from the work surface until the treated bait is ready to compare.
Choose a product made for the actual material. Spike-It describes ElasTint as a separate product for non-PVC and TPE-style lures. Check the compatibility statement for the exact dye and lure before using it.
Dyes and coatings also behave differently. A dye changes colour within compatible material; a coating forms a surface layer. Read the maker’s directions for the exact product. A paint intended for a hard lure may make a soft lure stiff, crack during flexing or fail to adhere.
Use a covered work surface and keep bottles capped when you are finished. Check the safety data sheet for gloves, ventilation and storage requirements. Ordinary office markers, household paint and improvised solvent mixtures lack a useful compatibility basis for a fishing lure project.
After the stated drying or curing period, flex the test lure and inspect the treated area. Look for damage, tackiness, flaking or colour transfer into a separate test packet. If the treatment changes the material unexpectedly, stop using that combination and ask the manufacturer before treating more baits.
Repair only a compatible, structurally useful bait
A small tear in an otherwise sound bait can be a candidate for a purpose-made repair product. Read both the lure and adhesive instructions first. The phrase soft-bait glue does not prove compatibility with every formulation, and a broad shop description should not override a specific material restriction.
Inspect the location of the tear. A split through the main hook-support area is different from a minor surface nick. Consider how the lure will flex and where the load sits. A repaired bait should still rig straight and retain its intended movement after the product’s prescribed cure.
Clean or prepare the surface only as instructed by the product maker. An arbitrary solvent wipe adds another chemical interaction. Use the specified amount of adhesive, keep the join aligned and allow the stated time before handling. More adhesive does not necessarily create a stronger or more flexible repair.
Household superglue is not a universal replacement. It can create a rigid spot and may be unsuitable for the material or the job. If a lure manufacturer recommends a particular adhesive for a keeper, follow that narrowly defined use. Do not extend it into a recipe for repairing, joining and coating the entire bait.
Joining two baits into a new hybrid adds a stressed seam and can change balance. Start with a compatible repair project before attempting a longer assembly. Check the finished connection on dry land and compare action in controlled water. If the joint fails or loosens, collect the pieces and stop fishing it.
A lure that repeatedly tears in the same place deserves a rigging review. A larger or different keeper, a more suitable hook gap or a purpose-made smaller bait may reduce the problem. For northern pike, use an appropriate bite-resistant leader and tackle system; stretching a soft plastic does not protect the line from teeth. Our northern pike guide covers the species context.
Keep cold customization separate from lure production
Use a named product and its current instructions if you want to make new lures. Obtain the safety data sheet from the supplier, identify approved moulds and additives, and establish a dedicated workspace. Household food preparation tools and a shared kitchen microwave should remain outside the setup.
The CCOHS guide to safety data sheets explains where to find handling, storage and exposure-control information. Match the sheet to the product identity and intended use. Obtain the supplier’s current process directions too; a general sheet does not provide a universal heating recipe for commercial lure scraps.
Injection equipment adds pressure and hot material to the process. The injector, mold, seals and method must belong to a compatible system. A printed prototype or a craft mold does not become suitable because it resembles an aluminium lure mold. Ask the equipment maker about the intended material before applying heat or pressure.
Do not melt ElaZtech together with conventional PVC baits. Keep unknown salvaged lures out of the production stream. If a manufacturer permits reuse of its own material, follow those exact conditions and maintain the identity of that batch. A claim that all soft plastics are recyclable by reheating skips the compatibility problem.
A beginner can learn profile, rigging and colour through cold work first. If those comparisons show a need for a custom shape, move into documented lure-making with appropriate practical instruction. For metal weights, the DIY sinker-mold guide explains a separate material-matching process; the two types of molds and casting should not be confused.
Tools for a small cold-customization kit
As an Amazon Associate, CanadaFever earns from qualifying purchases. These are product examples for the stated jobs, not hands-on test results. Check the selected variant and delivery options for Canada.

Spike-It 16001 garlic-scented marker four-pack
A colour-accent option for compatible soft baits. This selected pack adds garlic scent, so it changes more than colour during a comparison.
- Exact variant: four markers in chartreuse, red, orange and blue.
- Garlic-scented 16001 pack, not the unscented marker line.
- Follow the label and verify compatibility with the actual lure material.

Rapala SRLS Salt Angler Super Line Scissors
A compact tackle-tool option for line work alongside a cold-customization project. For bait trimming, use it only where it makes a clean light cut without forcing the material.
- Exact listing: Rapala SRLS Salt Angler model.
- Stainless steel and serrated edge designed to grip braided line.
- Oversized finger holes; not a purpose-made soft-bait manufacturing tool.
Compare modified and original action
Begin with a controlled visual check where you can retrieve both lures and all parts. Keep the hook point controlled, or use an appropriate unhooked comparison where possible. Check the shape at rest, then move the bait at the retrieve speed you intend to use. Record whether it rolls, folds or swims straight.
Keep the comparison consistent
- Use the same head or hook arrangement and weight for both baits.
- Change one component at a time.
- If you trim a body, switch hook sizes and add a heavier head together, you cannot tell which adjustment caused the difference.
- Keep an unchanged rig as the reference for each comparison.
A shallow visual test shows action, not a catch-rate result. Water depth, current and the complete rig will change how the bait behaves during fishing. Inspect the lure again after the check, particularly around the keeper and any trimmed or repaired section.
| Problem | First check | Useful adjustment |
|---|---|---|
| Bait corkscrews | Centreline and hook exit | Rig straight before cutting again |
| Trailer crowds the skirt | Body length and attachment position | Try a small nose trim or a smaller original |
| Tail stops moving | Joint damage and retrieve speed | Compare the untouched lure on the same rig |
| Colour treatment damages bait | Exact material and product compatibility | Stop that combination and contact the maker |
| Nose tears repeatedly | Keeper fit and existing holes | Use compatible hardware or a sound bait |
For a lake session, keep the casting area, depth and retrieve reasonably comparable. Switch back to the original lure periodically instead of assuming every bite confirms the modification. Note wind, cover, rig and the change you made. Catching one fish provides a useful observation, but it cannot prove that a specific colour or trim is universally better.
Our fishing-techniques guide helps match presentations to conditions. If the fish are not near the depth you are covering, repeated bait edits will not fix that positioning problem. Revisit location and presentation before filling a tackle tray with increasingly elaborate variants.
Three small projects with clear comparisons
A shorter stick bait on the same presentation
Keep one bait intact and shorten a second at the nose, preserving its other end. Fit both to suitable hooks and record any hardware change required by the shorter body. Compare how each sits and falls. If the shorter lure forces a major hook change, treat that as a different complete presentation when judging the result.
This project is useful when a packet contains a size that crowds your intended rig. It also reveals how quickly a small trim changes the available mounting area. Stop cutting once the sound body no longer supports the hook or keeper comfortably.
A compact creature trailer
Start with the trailer rigged correctly and check where the skirt and body interfere. Shorten the central body only if that addresses the interference while preserving the working appendages. Compare both versions behind the same lure. Inspect the trimmed mounting area after repeated rigging and retrieve checks.
If the complete lure remains bulky, compare a purpose-made compact trailer. Saving a few unused baits is a reasonable reason to experiment, but it should not leave you fishing a fragile attachment or a profile that never sits straight.
A small compatible colour accent
Use the labelled colour product on a spare known bait, leaving the reference untouched. Keep the accent small and allow the prescribed drying period. Store the treated test separately, then compare its appearance and flexibility with the original. If the product also adds scent, write that in your notes so the comparison remains honest.
Look for a compatible treatment that gives you the appearance you intended. Assess the treated bait in the conditions where you plan to fish; a photograph alone cannot establish its underwater visibility or catch performance. Use a presentation whose action you can observe.
Store the results and collect every offcut
Store the baits and collect scraps
- Return untreated baits to their original packaging and keep material types separate.
- Label modified samples so that you can repeat the change later.
- Include the original model, the alteration and any chemical product used.
- If a treatment needs a different storage method, follow the label and lure maker’s advice.
- Keep a small closed container for torn baits and bench scraps.
- Empty your cutting surface into it before putting tools away.
- On the water, collect detached pieces whenever you can do so safely.
- A small tail tip is still discarded tackle; making it smaller does not make it appropriate to leave behind.
Check municipal disposal guidance and any genuine manufacturer take-back programme before calling scrap recyclable. Do not put loose lure material into a general recycling stream on the assumption that all plastics are accepted. Store waste out of reach of children and animals until it can be disposed of appropriately.
For a beginner kit, keep the number of experiments small enough to understand. The starter fishing-gear guide helps you build a matched setup, and the DIY fishing hub offers other practical projects. Keep the unmodified reference lure until you have recorded what the change achieved.
Soft-bait customization questions
What is a useful first modification?
Try a small cold nose trim on a known bait while keeping another one untouched. Check hook fit before and after cutting, then compare action on the same presentation. Preserve enough sound body for the keeper. A simple modification gives you a clearer result than changing shape, colour and rig at once.
Can I remelt all my damaged soft plastics together?
Keep unknown scraps and different material families out of a mixed heating batch. Commercial soft baits are not one universal formulation, and ElaZtech differs from conventional PVC. Use a documented lure-making material with current supplier instructions if you want to produce new baits. Cold customization is the simpler starting project.
Will a conventional lure dye work on ElaZtech?
Check the exact product’s compatibility with the lure material. Spike-It offers a separate ElasTint line for non-PVC and TPE-type baits, which demonstrates why the distinction matters. Do not assume a conventional marker or dip has the same approval. Test a spare sample under the maker’s instructions before treating more lures.
Why does the bait spin after trimming?
Check straight rigging, the hook exit point and the balance of the cut. Shortening changes where the hook should emerge; using the old position can bunch the body. Compare the untouched bait on the same rig. If both spin, review the presentation before removing more material.
Can a repaired bait be treated as good as new?
Inspect the cured repair and test the bait’s fit and action before fishing. A tear through the hook-support area can remain a weak point, and product compatibility is specific to the material. Retire a bait whose joint loosens or whose nose repeatedly tears. Collect the pieces instead of allowing a failing bait to break apart in the water.
Manufacturer references
Check current labels and safety data sheets for the exact lure and treatment. References were reviewed on 3 October 2026; product compatibility and production instructions remain specific to the supplied formula.