

Build a winter walleye deadstick system with better bait height, rod loading, hole spacing, electronics use and Canadian ice-safety checks.
- Set bait height from fish marks, not from habit
- Use a soft-loading rod and secure holder with a safe drag setting
- Separate jigging and deadstick holes enough to prevent tangles
Bottom line Set bait just above the fish, let the rod load naturally and treat ice safety as a separate decision.
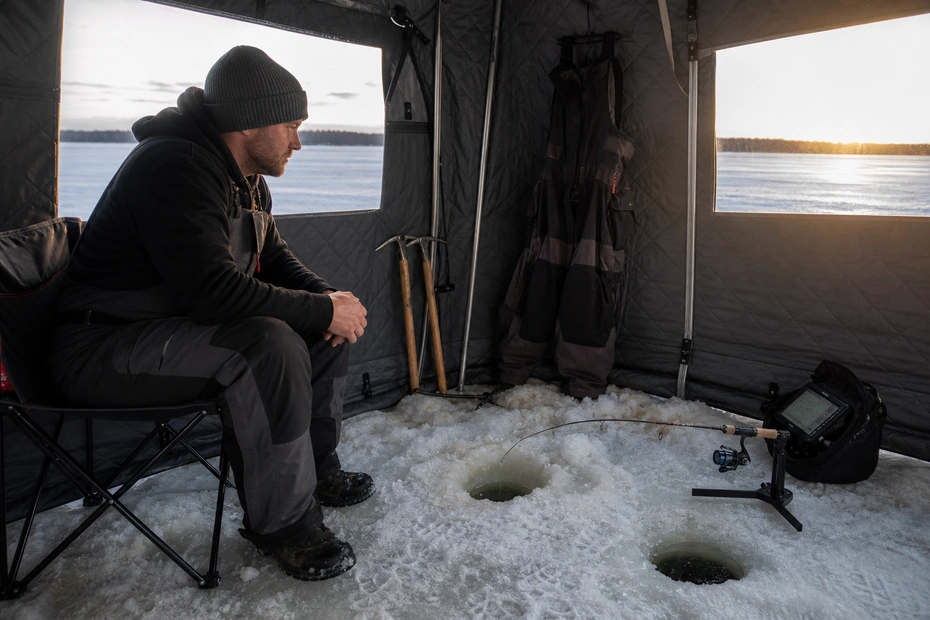
Deadsticking for winter walleye is not “doing nothing.” It is a controlled second presentation that holds natural bait at a measured height while another lure searches or attracts fish.
The system works only when the rod can load without excessive resistance and the angler can reach it safely before the fish drops the bait.
Quick Answer
- Set bait height from fish marks, not from habit.
- Use a soft-loading rod and secure holder with a safe drag setting.
- Separate jigging and deadstick holes enough to prevent tangles.
- Confirm line limits, bait rules and ice safety for the exact water.
Use this guide beside CanadaFever’s walleye fishing and ice fishing in Canada. Those pages provide the wider species or technique context; this one stays focused on the decisions that make deadsticking for winter walleye work.
How Deadsticking for winter walleye Actually Works
A deadstick uses natural bait movement, current and the minnow’s own action instead of constant rod input. The rod tip becomes both suspension and strike indicator.
The setup must let a walleye take the bait without immediately feeling a rigid rod or locked drag. At the same time, it cannot be so loose that the fish carries line into nearby gear.
Electronics help set height. If fish consistently appear above bottom, move the bait to them instead of waiting for every fish to drop.
A soft tip should show the take without alarming the fish. Wait for steady load, then lift in one controlled motion rather than striking at the first twitch.
The Guide’s Log
When I edit a technique guide, I picture a mid-winter basin edge where active jigging raises fish but repeated follows fade before the strike. That picture forces a better question than “What bait should I use?” It asks what the fish can see, where the presentation must travel and what the angler can control from cast to landing.
The common failure in this situation is placing the deadstick at a memorized distance off bottom. It feels active, but it hides the real problem. A lure can be moving perfectly and still be outside the fish’s lane, entering from the wrong direction or attached to a setup that cannot communicate what happens next.
The correction is matching bait height to the repeated marks and reducing resistance at the holder. That creates a repeatable test. If the fish responds, keep the useful variable. If it does not, change one thing and observe again instead of emptying the tackle box.
I also want the method to survive ordinary field pressure: a wind shift, one snag, cold fingers, fading light or a boat that drifts a little faster than expected. A useful system has a visible baseline and one quick reset. It does not depend on perfect conditions or a lucky first cast.
The field lesson is simple: the passive rod becomes precise when its position is measured. That is the standard used throughout this guide. It is an editorial field framework, not a claim that one formula replaces local knowledge, current regulations or conditions on the day.
Build the Setup Around the Job
Tackle should solve the presentation rather than dominate it. CanadaFever’s ice-fishing techniques and advanced ice electronics help with the broader equipment and progression choices.
| Component | Best decision | Mistake to avoid |
|---|---|---|
| Rod | Soft tip with visible progressive load | Stiff rod that telegraphs resistance |
| Holder | Stable and reachable without crossing holes | Loose bucket edge or awkward angle |
| Drag | Light enough to protect the setup | Locked drag that pulls holder or tears bait |
| Bait height | Set to current fish position | Leaving it on bottom all day |
Read the Spot Before You Make the Presentation
Start with places that give the method a defined lane: the shoulder of a winter point; a basin edge used at low light. Then test the deep side of a reef; a travel lane between feeding flat and depth when the first locations do not produce a useful response.
Do not fish the label on the map. Break the spot into an entry point, strike lane and exit. That keeps the bait in useful water longer and shows whether the method is failing or the cast simply missed the zone.
The Local Secret
Use the jigging hole to learn, not only to catch. If several fish rise to the active lure but stop below it, lower the deadstick bait to that exact level rather than changing both presentations.
Deadsticking for winter walleye: The Repeatable Sequence
Deadsticking for winter walleye — Step 1: Confirm safe ice and establish the travel route
Make the first move deliberately and use it to establish a baseline.
Step 2: Mark fish and set bait slightly above their level
Watch the line, lure and fish response before adding another input.
Step 3: Position the holder where the tip is visible and reachable
This is where most bites or useful rejections occur; keep the movement measurable.
Step 4: Recheck bait condition and height after every interaction
End the sequence on purpose, record what changed and reposition when the lane is spent.
Adjust to Conditions Without Starting Over
| Condition | Best adjustment | Mistake to avoid |
|---|---|---|
| Clear pressured water | Natural bait; minimal resistance | Overworking beside deadstick |
| Fish tight to bottom | Short lift above bottom | Burying bait in debris |
| Suspended marks | Raise bait above fish | Waiting below the school |
| Multiple anglers | Stagger depths and holes | Crossing lines in a small shelter |
The table is a reset tool. Change one variable, give it enough casts to create evidence, then keep or reject the adjustment. Random lure rotation produces activity but very little learning.
A Short Practice Plan That Produces Evidence
Practice 1: Make confirm safe ice and establish the travel route
Start where the behaviour is visible and the consequence of a mistake is low. Use the shoulder of a winter point as the first reference, or reproduce the same geometry beside the boat, from shore or on open practice ground when casting is the skill. The objective is not a fish. It is a clean baseline you can recognize again.
Practice 2: Repeat the key control
Repeat this action deliberately: Mark fish and set bait slightly above their level. Keep the setup, target and timing the same for several attempts. Consistency makes a small error obvious; constant novelty hides it.
Practice 3: Change one variable
Use clear pressured water as the first test condition and apply this adjustment: natural bait; minimal resistance. Do not change colour, weight, depth and location together. One controlled change shows whether the method is improving or merely becoming different.
Practice 4: Finish with a move rule
End the drill by following the final sequence cue: Recheck bait condition and height after every interaction. A move rule protects the day from stubbornness. It also turns an unproductive location into useful evidence because you know what was tested before leaving.
When This Method Is the Wrong Choice
No technique deserves every cast. Switch or reposition when multiple anglers makes the presentation less controllable, when the setup cannot reach the fish without unnecessary snagging or handling risk, or when regulations close the species, water or tackle option.
- Choose a simpler presentation when you cannot tell what the lure or rig is doing.
- Change location when repeated fish responses stop producing new information.
- Stop when weather, ice, light, fatigue or fish-care conditions cross the limit set before the trip.
Canadian Rules, Safety and Fish Care
Line limits, live-bait rules and ice-hut requirements vary. Ice thickness is never a universal guarantee; local conditions, current, springs, pressure cracks and weather can change safety quickly.
For the wider legal framework, use the Canadian fishing regulations. For handling and trip decisions beyond this one method, continue with best ice-fishing rods in Canada.
This article is general information, not legal or professional safety advice. Rules and conditions change. Follow current official guidance, manufacturer instructions and local closures, and stop when safe fish handling or travel is doubtful.
Common Mistakes and the Fastest Correction
- Setting bait height without reading fish position
- Using a rod too stiff to load naturally
- Locking the drag beside an unsecured holder
- Placing holes where anglers cross lines
- Treating yesterday’s ice report as today’s guarantee
The fastest correction is rarely a complete rebuild. Return to the first uncertain decision—position, depth, angle or connection—then make one clean test.
The Pre-Trip Protocol
- Step 1: Confirm the exact water, season, tackle rules, weather and access.
- Step 2: Tie or rig one baseline setup and test it where you can see how it behaves.
- Step 3: Choose one target, one adjustment rule and one clear reason to move.
Practical gear match
A Purpose-Built Option for This Technique

Ice-combo reference
13 FISHING Wicked Longstem Ice Combo
A medium-power ice rod and reel reference for anglers building a dedicated second line for deadstick presentations.
- Confirm that the 25-inch medium model fits the shelter space and bait size.
- Test drag startup after the outfit has cooled, not only indoors.
- Choose a softer or longer rod when the bait and fish require a slower load.
Affiliate disclosure: CanadaFever may earn a small commission from qualifying purchases at no extra cost to you. Amazon.com links use OneLink for supported regions. Check the current listing for the exact model and included components.
FAQ About deadsticking for winter walleye
How far off bottom should a deadstick be?
Start from the fish’s current height. Position bait slightly above marks rather than following a fixed number.
What rod works best?
A rod with a soft, visible tip and progressive load helps walleye take the bait with less immediate resistance.
Should the reel drag be loose?
It should protect the setup and line without creating uncontrolled runs. Test it with the rod in the actual holder.
Can I deadstick and jig at the same time?
Where line limits allow, the active lure can attract fish while the deadstick offers a quieter target.
How do I know the ice is safe?
There is no universal guarantee. Use current local information, check conditions as you travel and avoid hazards such as current and pressure cracks.
Make the Next Cast Explain Something
The best version of deadsticking for winter walleye is not the most complicated one. It is the version that reaches the right lane, communicates what is happening and gives you a clear next decision.
Verify the water, protect the fish and keep the experiment simple enough that the next cast can teach you something.