

Use ice-fishing electronics as a decision system for cone coverage, lure tracking, fish response, hole spacing and safer Canadian mobility.
- Know the cone or viewing area at the actual depth
- Make sure the lure is visible before interpreting fish behaviour
- Separate “fish present” from “fish catchable.”
Bottom line Use sonar to test fish response and movement—not as proof that the ice is safe.
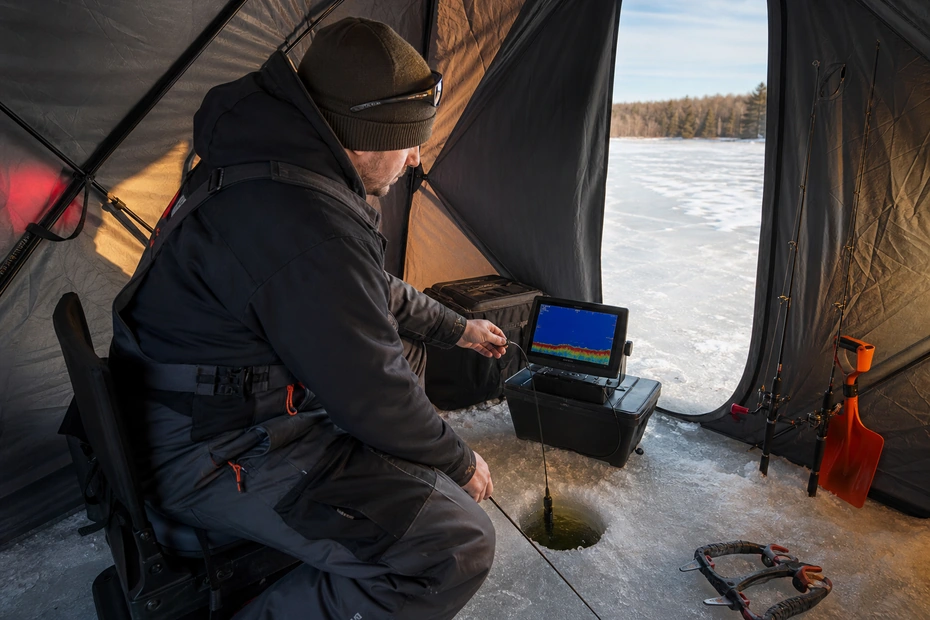
Advanced ice fishing with electronics is not about staring harder at the screen. It is about turning marks into a controlled test: confirm coverage, track the lure, measure fish response and move when the hole stops teaching you.
Flashers, sonar and forward-facing systems differ, but the decision loop stays the same.
Quick Answer
- Know the cone or viewing area at the actual depth.
- Make sure the lure is visible before interpreting fish behaviour.
- Separate “fish present” from “fish catchable.”
- Set a move rule and keep ice safety ahead of screen time.
Use this guide beside CanadaFever’s ice fishing in Canada and ice-fishing techniques. Those pages provide the wider species or technique context; this one stays focused on the decisions that make advanced ice fishing with electronics work.
How Advanced ice fishing with electronics Actually Works
Traditional sonar displays return strength and position inside a cone beneath the transducer. The deeper the water, the larger the footprint—unless settings or transducer design change it.
A mark is not automatically your target species, and a rising mark is not automatically a bite. Watch the full sequence: appearance, approach, follow, rejection or strike.
Where visibility allows, an underwater ice-fishing camera can add visual species and bait-response detail that a sonar mark alone cannot show.
Electronics are strongest when paired with controlled experiments. Change one variable—height, cadence, profile or location—then observe instead of changing everything at once.
Give each hole a defined test and record the response. Move when the next hole can answer a location question—not simply because the screen is quiet for a minute.
The Guide’s Log
When I edit a technique guide, I picture a Canadian lake where a bright screen shows repeated marks but the same fish follows and fades on every drop. That picture forces a better question than “What bait should I use?” It asks what the fish can see, where the presentation must travel and what the angler can control from cast to landing.
The common failure in this situation is treating activity on the display as proof the hole is productive. It feels active, but it hides the real problem. A lure can be moving perfectly and still be outside the fish’s lane, entering from the wrong direction or attached to a setup that cannot communicate what happens next.
The correction is changing one presentation variable, then moving to a new structural position when the response stays unchanged. That creates a repeatable test. If the fish responds, keep the useful variable. If it does not, change one thing and observe again instead of emptying the tackle box.
I also want the method to survive ordinary field pressure: a wind shift, one snag, cold fingers, fading light or a boat that drifts a little faster than expected. A useful system has a visible baseline and one quick reset. It does not depend on perfect conditions or a lucky first cast.
The field lesson is simple: electronics should shorten bad decisions, not decorate them. That is the standard used throughout this guide. It is an editorial field framework, not a claim that one formula replaces local knowledge, current regulations or conditions on the day.
Build the Setup Around the Job
Tackle should solve the presentation rather than dominate it. CanadaFever’s best fish finder for ice fishing and best ice-fishing flasher help with the broader equipment and progression choices.
| Component | Best decision | Mistake to avoid |
|---|---|---|
| Transducer | Level and centred in a clean hole | Hanging against the ice edge |
| Range/gain | Enough detail without clutter | Maxing gain until noise looks like fish |
| Lure tracking | Visible through working depth | Interpreting marks before seeing lure |
| Power/cables | Protected and secured from cold/water | Loose cable across the walking path |
Read the Spot Before You Make the Presentation
Start with places that give the method a defined lane: the shoulder of a point or reef; a basin edge with roaming fish. Then test a weedline pocket with known depth change; a grid of holes across a structural transition when the first locations do not produce a useful response.
Do not fish the label on the map. Break the spot into an entry point, strike lane and exit. That keeps the bait in useful water longer and shows whether the method is failing or the cast simply missed the zone.
The Local Secret
A fish that rises halfway and stops is giving you a ceiling. Raise the lure slightly above that stopping point on the next approach; making the fish look up can change the decision without a new bait.
Advanced ice fishing with electronics: The Repeatable Sequence
Advanced ice fishing with electronics — Step 1: Confirm transducer position and lure visibility
Make the first move deliberately and use it to establish a baseline.
Step 2: Observe one complete fish response
Watch the line, lure and fish response before adding another input.
Step 3: Change only height, cadence or profile
This is where most bites or useful rejections occur; keep the movement measurable.
Step 4: Move when repeated responses stop producing new information
End the sequence on purpose, record what changed and reposition when the lane is spent.
Adjust to Conditions Without Starting Over
| Condition | Best adjustment | Mistake to avoid |
|---|---|---|
| Shallow water | Reduce clutter; understand narrow window | Assuming no mark means no fish |
| Deep water | Track footprint and lure angle | Reading another angler’s lure as yours |
| School roaming | Stagger holes along travel edge | Waiting after the school leaves |
| Neutral followers | Change one variable at a time | Cycling baits without learning |
The table is a reset tool. Change one variable, give it enough casts to create evidence, then keep or reject the adjustment. Random lure rotation produces activity but very little learning.
A Short Practice Plan That Produces Evidence
Practice 1: Make confirm transducer position and lure visibility
Start where the behaviour is visible and the consequence of a mistake is low. Use the shoulder of a point or reef as the first reference, or reproduce the same geometry beside the boat, from shore or on open practice ground when casting is the skill. The objective is not a fish. It is a clean baseline you can recognize again.
Practice 2: Repeat the key control
Repeat this action deliberately: Observe one complete fish response. Keep the setup, target and timing the same for several attempts. Consistency makes a small error obvious; constant novelty hides it.
Practice 3: Change one variable
Use shallow water as the first test condition and apply this adjustment: reduce clutter; understand narrow window. Do not change colour, weight, depth and location together. One controlled change shows whether the method is improving or merely becoming different.
Practice 4: Finish with a move rule
End the drill by following the final sequence cue: Move when repeated responses stop producing new information. A move rule protects the day from stubbornness. It also turns an unproductive location into useful evidence because you know what was tested before leaving.
When This Method Is the Wrong Choice
No technique deserves every cast. Switch or reposition when neutral followers makes the presentation less controllable, when the setup cannot reach the fish without unnecessary snagging or handling risk, or when regulations close the species, water or tackle option.
- Choose a simpler presentation when you cannot tell what the lure or rig is doing.
- Change location when repeated fish responses stop producing new information.
- Stop when weather, ice, light, fatigue or fish-care conditions cross the limit set before the trip.
Canadian Rules, Safety and Fish Care
Electronics do not confirm ice safety. Route planning, local conditions and ongoing checks remain separate. Line limits, bait rules and shelter requirements vary by province and waterbody.
If your legal setup includes a separate stationary line, compare ice-fishing tip-ups by flag visibility, deployment and the attention each system requires.
For the wider legal framework, use the Canadian fishing regulations. For handling and trip decisions beyond this one method, continue with deadsticking for winter walleye.
This article is general information, not legal or professional safety advice. Rules and conditions change. Follow current official guidance, manufacturer instructions and local closures, and stop when safe fish handling or travel is doubtful.
Common Mistakes and the Fastest Correction
- Interpreting marks before confirming the lure
- Running gain so high that clutter becomes information
- Changing several variables at once
- Staying because the screen looks busy
- Letting cables, holes or attention create an ice-safety hazard
The fastest correction is rarely a complete rebuild. Return to the first uncertain decision—position, depth, angle or connection—then make one clean test.
The Pre-Trip Protocol
- Step 1: Confirm the exact water, season, tackle rules, weather and access.
- Step 2: Tie or rig one baseline setup and test it where you can see how it behaves.
- Step 3: Choose one target, one adjustment rule and one clear reason to move.
Practical gear match
A Purpose-Built Option for This Technique

Portable ice sonar
Garmin STRIKER Vivid 5cv Ice Fishing Bundle
A portable sonar bundle reference for anglers ready to turn depth, bottom, lure and fish marks into a disciplined search-and-test workflow.
- Verify the exact display, ice transducer, battery and carrying components in the listing.
- Use gain and range to answer a specific question instead of chasing every mark.
- Charge, secure and cold-protect the power system before travel.
Affiliate disclosure: CanadaFever may earn a small commission from qualifying purchases at no extra cost to you. Amazon.com links use OneLink for supported regions. Check the current listing for the exact model and included components.
FAQ About advanced ice fishing with electronics
What is the first electronics setting to adjust?
Set the depth range and gain so your lure is visible with minimal clutter, then refine from there.
How wide is the sonar cone?
It depends on transducer angle and depth. Use the manufacturer’s current specifications and remember the footprint grows with depth.
Why can I see fish but not catch them?
Presence is only one step. Depth, lure profile, cadence, line angle and fish mood still determine commitment.
When should I move holes?
Move when repeated responses stop teaching you something or the fish leave the viewing area.
Can electronics tell me whether ice is safe?
No. Sonar is not an ice-safety tool. Use current local information and physically assess conditions.
Make the Next Cast Explain Something
The best version of advanced ice fishing with electronics is not the most complicated one. It is the version that reaches the right lane, communicates what is happening and gives you a clear next decision.
Verify the water, protect the fish and keep the experiment simple enough that the next cast can teach you something.