

Build an ice fishing kit around the actual outing. Compare matched tackle, a manual auger and a gear sled, with practical clothing, packing and local-rule checks.
- Use Ice Fishing Gear Essentials to match destination, season, access, and budget to the kind of trip you actually want
- Check licences, local rules, travel logistics, weather, and booking windows before locking in dates
- Compare locations by practical fit: target species or activity, remoteness, services, safety, and backup options
Bottom line Ice Fishing Gear Essentials becomes easier when you choose the destination around timing, access, rules, and your real trip style
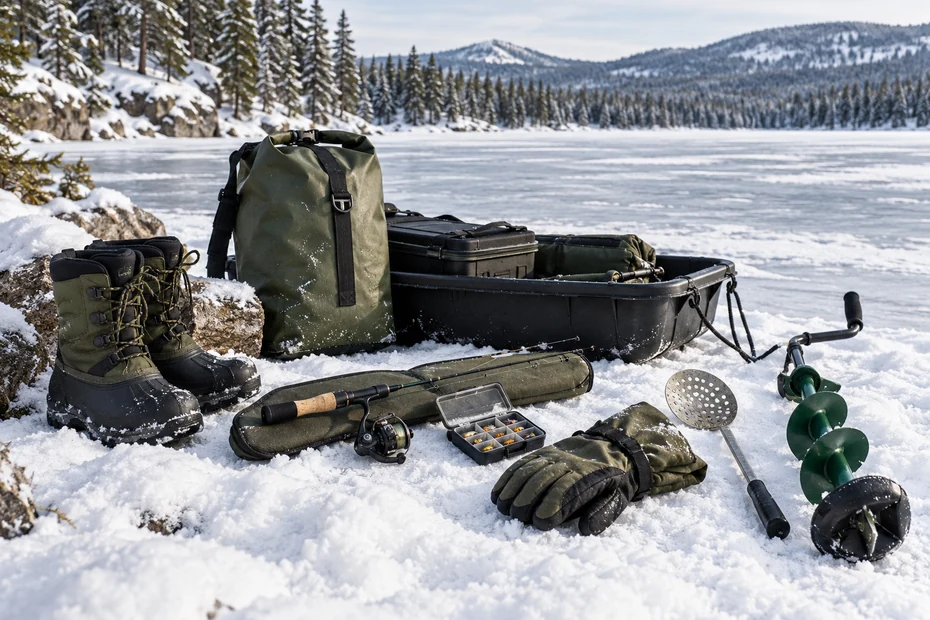
Ice fishing gear essentials include a suitable rod and reel, line and legal tackle, a way to make and clear a fishing hole, clothing for the conditions and a practical carrying system. Choose that kit around one planned outing. Equipment does not establish that the ice is safe.
A short guided day with supplied equipment and a self-organised trip to unfamiliar water are different undertakings. For a first outing, find out what the operator provides before buying an auger, shelter or electronics. For your own kit, prioritise the actual fishing task and the return journey as carefully as the time beside the hole.
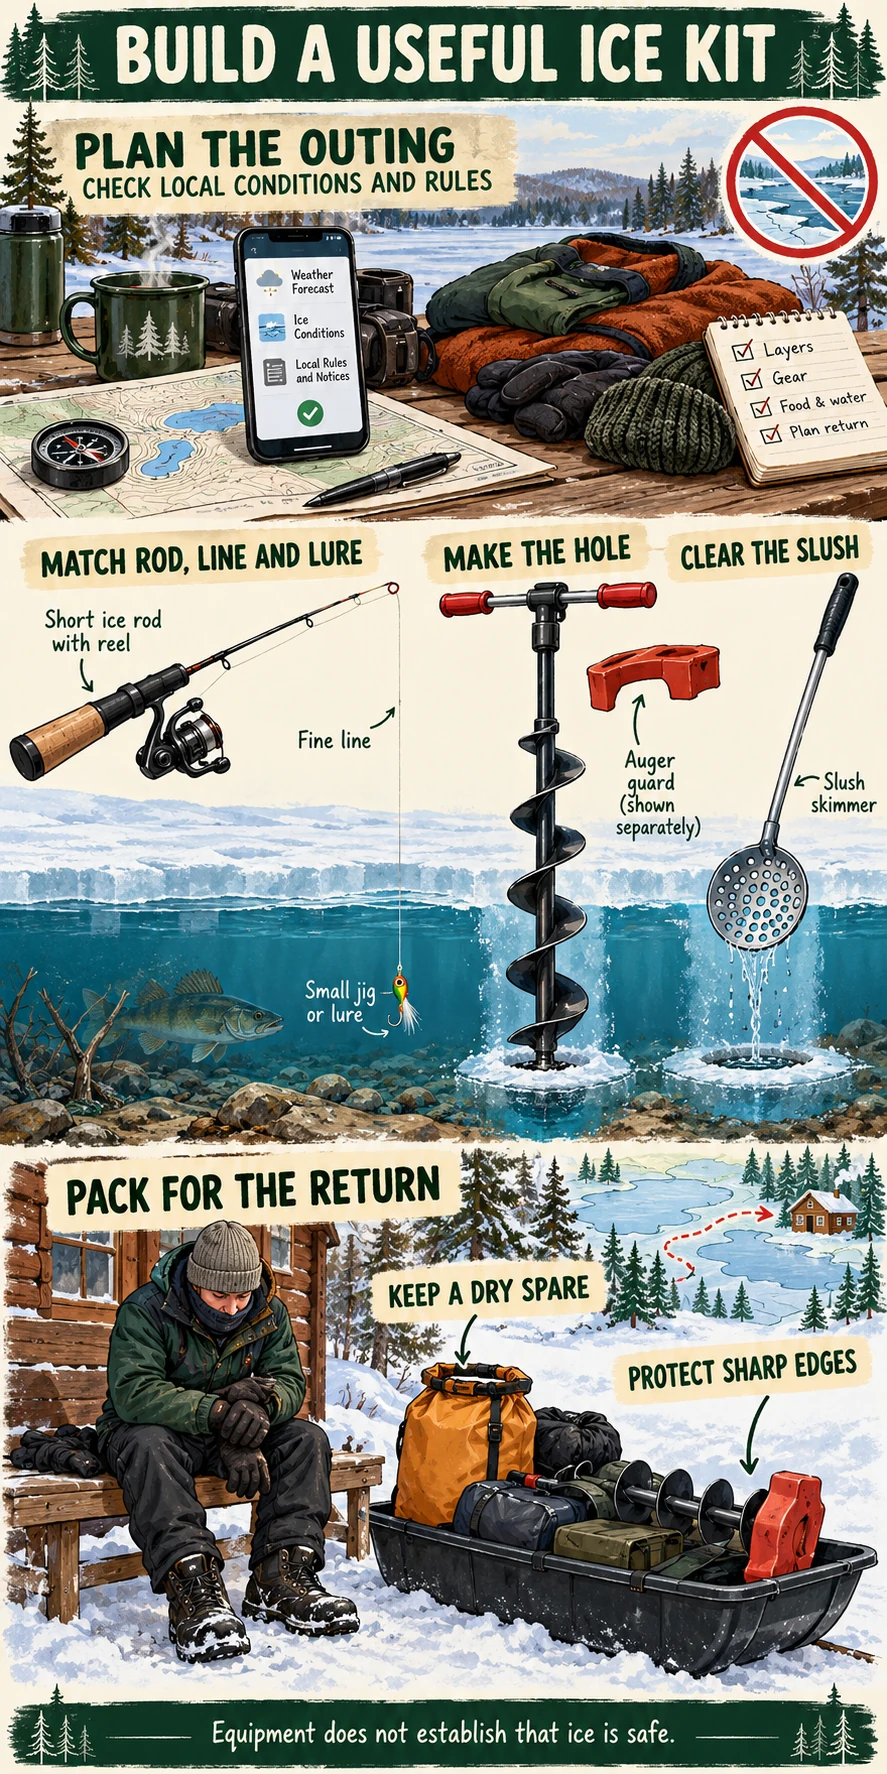
Choose a kit for the fishing and the return
Begin with the target species, the method and the equipment already supplied at the destination. An operator may provide a drilled hole and rods, while a self-organised outing requires you to arrange those tasks. Ask explicitly about clothing, transport and safety equipment; an equipment rental is not proof that every part of the outing is covered.
| Job | Equipment to arrange | Decision before buying |
|---|---|---|
| Plan access and return | Current local information, route, communications and appropriate safety equipment | Whether the outing should proceed at all |
| Make and maintain the hole | Suitable auger, blade guard and slush skimmer | Diameter, reach, effort and what an operator already supplies |
| Present the bait or lure | Rod, reel, line and permitted tackle | Target fish, lure weight and fishing space |
| Manage cold and wet gear | Appropriate layers, boots, gloves and protected spares | Approach versus time sitting still, wind and duration |
| Carry and protect the kit | Suitable bag, rod protection or sled | Vehicle fit, actual load and accessible essentials |
Start with one workable presentation and a few spares. Adding more rods or tip-ups also adds line-management and legal responsibilities. Read the ice fishing in Canada hub for the broader planning and species routes, then use this guide to choose the pieces you need.
Choose rod power and line for the presentation
A short rod helps you work vertically within a limited space. Its length alone does not tell you how a tiny panfish jig will load the tip or how it will handle a heavier spoon. Compare the intended lure with the actual rod’s ratings and sensitivity, not simply a label saying ice.
Check the reel’s usable drag and controls with the gloves you will wear. Fill and rig it before the trip. Watch for line rubbing at the hole edge, ice build-up and damaged leaders during fishing. A product called ice line still needs the correct diameter, knot and abrasion checks.
- For small panfish jigs, consider an appropriately light outfit rather than automatically choosing medium power.
- For a larger jig or spoon, check the complete rig weight and rod’s working range.
- For pike and other toothy fish, arrange a suitable leader and handling equipment deliberately.
- Try the rod’s reach while seated in the actual fishing space before committing to its length.
The fishing line comparison explains mainline and leader roles. For larger species, general light-tackle examples do not replace a purpose-fit outfit and landing plan.
The guide’s log: packing for a first daylight session
This is a hypothetical editorial planning example, not a product test or a report of our own outing.
If I were arranging a first ice-fishing session, I would begin by speaking to a reputable local operator about the destination, current conditions and what is included. I would not buy an auger if the planned session already supplied drilled holes.
For a self-organised kit, I would lay out one suitable rod and reel, a small tackle box, a skimmer and the equipment needed for the chosen access. I would try the rod while seated and check whether its length fitted the available space. I would also make sure I could reach the line cutters without emptying a bag.
I would pack dry spare gloves and clothing separately from wet tackle. The auger would travel with its blade guard secured, and the rod would have protection from other equipment shifting against it. I would check that the loaded carrying system fitted the vehicle before the morning of departure.
I would agree on a return time that left daylight for packing and travel. If the current local information or weather made the plan unsuitable, the equipment would stay packed. After a permitted session, I would dry the gear, inspect the blade guard and note which items I actually used. I would use those notes to decide whether a powered auger or sonar would help on the next trip.
Three examples for fishing, drilling and hauling
These are specification-based examples, not a tested ranking or a complete safety kit. The medium-power combo is one fishing option; choose a lighter or heavier outfit when the presentation calls for it. No item here establishes an ice load limit or suitability for a particular route.
As an Amazon Associate, CanadaFever earns from qualifying purchases. Links open Amazon.com. Confirm the exact model, selected size, seller, Canadian delivery, currency and total shipping/import cost before ordering.

Rod and reel example
Ugly Stik GX2 USGXSPICE32MCBO
This 32 in medium ice combo includes a size 20 spinning reel. The current manufacturer model table lists 4-8 lb line and a 5.2:1 gear ratio. Compare it for the presentation and fishing space you plan.
- The linked selection is the 32 in medium combo, not the 36 in medium-heavy variant.
- Rod and reel are included; line, lures and a complete ice kit are separate.
- A medium rod is not automatically the best match for tiny panfish jigs or heavy predator presentations.
The manufacturer does not provide a lure-weight range in this model row. Confirm lure suitability with the manufacturer or retailer before ordering.
Check this exact model on Amazon
Manual drilling example
StrikeMaster Mora MD-6
The selected powder-blue Mora is the 6 in MD-6 hand auger. StrikeMaster lists a 6 lb weight, two-piece breakdown and an adjustable handle from 48 to 57 in. It includes blades, a wing bolt and blade cover.
- The selected 6 in model differs from the 5, 7 and 8 in Mora sizes.
- Manual operation avoids a powerhead or battery but still requires suitable effort and reach.
- Use the supplied blade cover and follow the assembly and operating instructions.
Do not treat the diameter as a guarantee that it suits every fish or transducer. Confirm MD-6 and 6 in in the selected options before ordering; other Mora sizes differ.
Check this exact model on Amazon
Hauling example
Shappell Jet Sled 1 JS1
The black JS1 is a thermoformed polyethylene gear sled. The current Eagle Claw page lists outside dimensions of 54 in long, 25 in wide and 10 in high. Compare those dimensions with both the vehicle and the actual load.
- The linked model is black JS1, not the Jr., XL or a shelter package.
- Moulded runners are part of the sled construction; pack contents and fishing gear are separate.
- Treat it as a gear carrier; its dimensions do not establish a passenger rating or motor-towing approval.
Published outside dimensions are not the inside floor size. Measure your boxes and protected auger; confirm any cover, hitch, wear bars or tie-down accessories separately.
Check this exact model on AmazonCurrent manufacturer references: Ugly Stik GX2 ice combo model table, StrikeMaster Mora models and Eagle Claw Jet Sled 1 dimensions and construction. Match the exact model row rather than a family name or a generic marketplace field.
Choose an auger for the work you will actually do
Compare the intended hole diameter, usable drilling reach, number of holes and effort involved. A hand auger avoids carrying a motor or battery, but drilling remains physical work. Thick ice, dull or damaged blades and repeated moves change that workload. Do not buy on a promise that every beginner can drill effortlessly.
A powered system can reduce manual cranking, while adding weight, battery or fuel management and operating requirements. A drill-driven bit is another category: it needs a compatible drill and the manufacturer’s specified retention and control arrangements. Do not attach a hand auger to a drill unless the maker explicitly supports that combination.
Check how the auger fits in the vehicle and carrying system with the blade covered. Follow its instructions for assembly, operation, storage and blade maintenance. Keep hands away from cutting edges and use the correct guard; a soft bag alone is not a blade cover.
The small tool that clears the fishing hole
A skimmer removes loose ice and slush after drilling and during the session. Choose a handle you can use with gloves and a scoop that suits the hole. Keep it accessible rather than underneath a seat or packed beneath the auger.
Choose the hole size for the fishing and equipment. Sonar transducers also need space and a suitable position. Check the actual arrangement before buying separate items that crowd the same opening.
Dress for the approach and the time spent still
Walking with a load and sitting beside a hole produce different clothing needs. Use suitable moisture-managing layers, insulation and weather protection that you can adjust. Check room in boots and gloves with the socks and liners you intend to wear; simply adding bulk can make the fit worse.
Keep dry spare clothing protected from slush and wet equipment. Arrange hand protection so you can operate the reel and tools without leaving needed warmth out of reach. Use our fishing clothing guide, ice-fishing boot comparison and cold-weather gloves guide for those separate fit decisions.
A shelter can reduce exposure to wind and provide a defined working space. It also adds a packed load and anchoring requirements. Compare it with the people, seats, rod length and gear that must fit inside, using the fishing tents and shelters guide. It does not establish the safety of the surface beneath it.
Do not build a clothing plan around a heater always working. Choose duration and conditions you are prepared for, and shorten or cancel the session when the plan no longer fits.
Check conditions and fishing rules separately
Open fishing seasons do not confirm ice conditions. Snow, currents, changing water levels, pressure cracks and old holes can affect a route. Tracks, other anglers and nearby shelters are not a condition assessment for the place you intend to travel.
Ontario’s official ice-fishing guidance describes uneven freezing and weaker areas near flowing water, springs and cracks. Check current local advice and posted restrictions before departure. This guide gives no numerical thickness that certifies a route, group or shelter as safe.
The Canadian Red Cross ice-fishing safety sheet advises fishing with a buddy, avoiding ice travel outside daylight and being aware of currents. It is a general safety resource, not a live condition report. Arrange appropriate flotation, cold protection, communications and rescue equipment with suitable instruction.
- Tell someone the destination, route and expected return time.
- Keep communications protected and accessible, with a plan for the actual coverage available.
- Arrange appropriate safety equipment and learn its use before the trip.
- Leave daylight and energy for packing and returning, and turn back when the plan is unsuitable.
Extra rods and flags still count as fishing equipment
Before setting a second line, check the current provincial or territorial rules and waterbody exceptions, including hook arrangements, attendance and bait. A tip-up signals movement; its presence does not create permission to fish another line or leave it unattended.
For example, Ontario allows two ice-fishing lines in most waters, subject to its view and distance requirements. Manitoba’s 2026 Angler’s Guide also permits two ice lines, but sets its own rules, including remaining within 50 m and using barbless hooks. Read each jurisdiction’s full current rules rather than treating either example as national permission.
Check the destination and date before buying bait. Manitoba’s 2026 guide announces a prohibition on live baitfish and leeches effective 1 April 2027. That future change should not be confused with the rules for an earlier trip. Other provinces and particular waters have their own bait requirements.
Add electronics when they solve a specific problem
A compatible sonar system can help you read depth, observe returns and compare the lure’s position. It is not required to make every first outing worthwhile, and it does not guarantee fish or assess the load-bearing condition of the ice.
Check the transducer, display mode, mounting arrangement and battery supplied with an exact bundle. An open-water unit without the needed ice transducer or power arrangement may require extra purchases. Compare complete configurations in the fishing electronics guide.
Cold-weather performance and charging limits depend on the actual battery and device. Read their operating and charging instructions, plan the expected load and carry suitable reserve power when needed. Do not assume a summer runtime or an indoor battery indicator gives the same result on the trip.
| What is limiting the outing? | Check before upgrading | Possible next purchase |
|---|---|---|
| Too much effort drilling planned holes | Blade condition, diameter, reach and the planned workload | A more suitable auger system |
| Trouble seeing small lure movement | Rod power, tip response, line and rig weight | A better-matched outfit |
| No depth information for the chosen method | Whether the operator supplies it or existing sonar is compatible | A complete suitable ice sonar setup |
| Gear is awkward to carry and reach | Total load, bag layout and vehicle space | A suitable sled or more compact load |
| Cold or wet clothing ends the session | Fit, moisture, exposure and duration | A missing clothing function or a shorter outing |
Pack for the return
Confirm the actual outing
Check current conditions, access, rules and weather. Confirm supplied equipment and agree on a daylight return. Reconsider the trip when those checks do not support the plan.
Try the loaded kit at home
Rig the rod, test controls with gloves and check the auger guard. Fit the packed equipment into the vehicle and carrying system without forcing a rod against heavy gear.
Separate wet gear from dry essentials
Keep spare clothing, communications and needed safety equipment accessible. After the session, dry the kit and inspect blades, guards, line and battery connections before storing it.
Check the small items before adding more equipment
- Pack the skimmer, line cutters and suitable hook-handling tools where you can reach them.
- Protect rod tips and auger blades from shifting loads.
- Keep spare gloves and clothing away from wet tackle and bait containers.
- Bring the necessary rubbish storage and pack out line, broken tackle and packaging.
A sled’s published outside dimensions do not guarantee every box fits inside. Measure the base and opening around your actual load, and check tie-down arrangements. For smaller items, compare tackle storage and cutting and hook-handling tools. Keep future purchases tied to a practical gap in the complete fishing kit.
Ice fishing gear questions
Do I need to buy every item for a first outing?
No. Ask an operator what is supplied and what you must bring. Borrow or rent suitable equipment when that fits the trip, while making separate arrangements for conditions, clothing, safety and return travel.
What ice thickness makes this gear safe to use?
A gear list cannot establish safe ice. Conditions vary across a waterbody and change over time. Follow current local advice and restrictions, obtain suitable instruction and do not treat a numerical reading as a guarantee for the route.
Is a medium-power ice combo suitable for every fish?
No. Match the rod, line and complete lure to the target and method. Tiny panfish jigs may call for a lighter outfit, while larger fish and heavy presentations can require different tackle and handling equipment.
Do I need sonar and a powered auger?
They are separate choices. Sonar can provide useful information and power can reduce manual cranking, but both add equipment and operating requirements. Compare them with the actual workload and what is already provided.
Can I add a second tip-up anywhere in Canada?
No. Check line limits, waterbody exceptions, hook arrangements, attendance and bait rules for the jurisdiction and date. A flag is not permission for an additional line.